
|
xTuple ERP Reference Guide |
|
|
xTuple ERP Reference Guide |
If you are importing Customer or Vendor or any other Account information—either through the xTuple web Portal or some other feature—it's possible you will encounter duplicate Account records. It's also possible to create overlapping or duplicate Account records manually by mistake. The Merge Accounts utility is a wizard designed to help you resolve this scenario. Using the Merge Accounts utility, you can easily locate duplicate records and merge them into one single Account record.
For practical information about how the Merge Accounts utility can be used during an upgrade process, please see the following article posted on our community website here: http://www.xtuple.org/node/4479.
To begin using the Merge Accounts utility, select the "Merge Accounts" option. The following screen will appear:
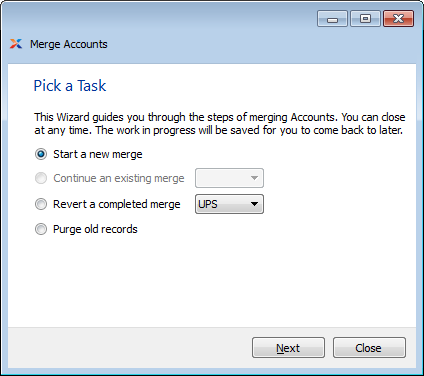
Upon first opening the Merge Accounts utility, you are presented with the following options:
Select to begin a new merge process.
Select to continue working on a merge that you have already started by not yet completed. Because you may have multiple merges in process at the same time, be sure to select the correct merge from the drop-down list.
Select to reverse a merge that has already been completed. Again, be sure to select the correct merge from the drop-down list.
Select to purge old records which have been marked for purging during merge processes you have performed.
After specifying a task to perform, select the NEXT button to reach the next step. The following screenshot shows the second step for creating a new merge:
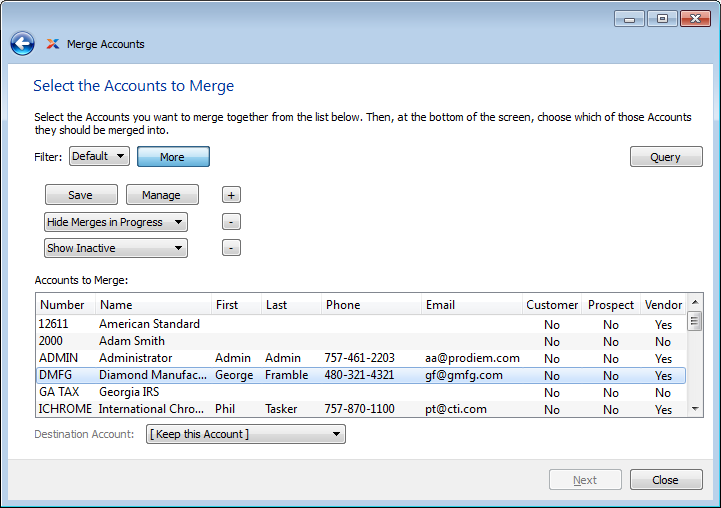
When starting a new merge, you need to identify the Accounts you want to merge. You are presented with the following options:
Select a filter from the list of available filters, then select the QUERY button to generate search results. Only saved filters will appear in this list.
Select this button to show the parameters underlying the saved filter. To hide the parameters, click the MORE button a second time.
When building a custom query, you have the following options:
Select to add a new parameter to the query.
Select to remove a parameter from the query. This option is disabled for default parameters.
Select to save your filter for future use. Saved filters will appear in the list of available filters.
Select to manage your saved filters. To learn more about managing filters, please see Section 2.1.2, “Search Filters”.
Select to refresh the Account data after filters have been changed.
Displays the list of Accounts found in your system. By using your mouse, you can click on Accounts to specify which ones you want to merge. The Accounts you select will appear in the "Destination Account" drop-down list.
After the Accounts have been selected, specify which of the Accounts is the target or destination Account. Information from the other selected Account(s) will be merged into the destination Account.
Once you've selected Accounts to merge, select the NEXT button to reach the next step. The following screenshot shows the next step once you've identified Accounts to merge:
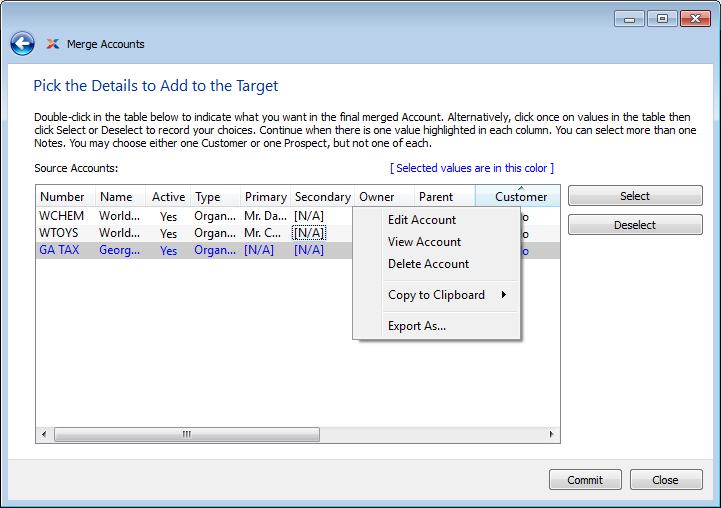
The next step is to pick which details you want to add to the target Account from the source Account(s). When merging specific data elements, you are presented with the following options:
Displays the Accounts you want to merge. Any information displayed in blue will be added to the target Account. You can select information (i.e., make it blue) by double-clicking on the information with your mouse. You can also click on the information once and then choose either the SELECT or DESELECT button to add or remove the information from the merge. Since the final result can only contain one piece of information per column, only one item in each column can be selected and blue.
After a cell of information has been clicked on, use this button to select it and add it to the merge.
After a cell of information has been clicked on, use this button to select it and remove it from the merge.
Select to save the details you want to merge. At this stage, the merge is still in process. You may revisit the merge details and make changes later.
Once you select the COMMIT button, you will be shown a preview of your merge results, as shown below:
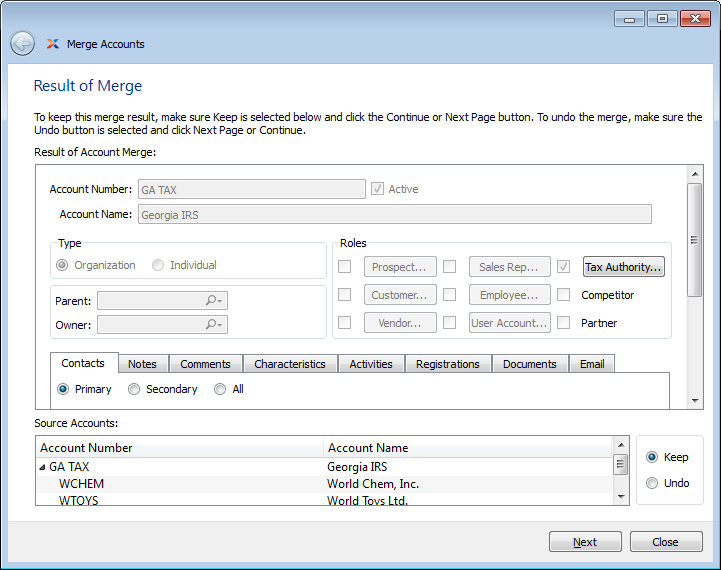
To keep the merge result, make sure the "Keep" option is chosen and then select the NEXT button. To undo the merge, make sure the "Undo" option is chosen and then select the NEXT button.
Assuming you decide to keep the merge, you will be presented with the following purge screen:
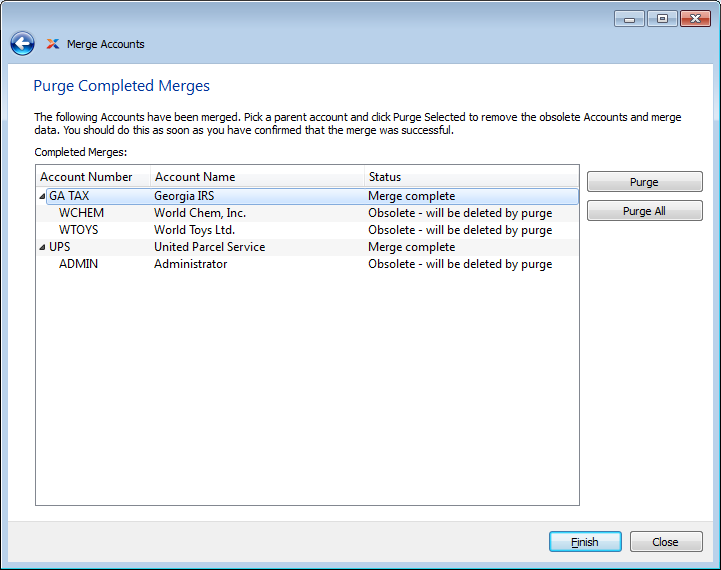
When reviewing the purge screen, pay particular attention to the information shown in the "Status" column. The status information explains what will happen to the specified records when they are purged.
If you decide to delete a merge you are working on, look for a status of "In Process." When you purge an in-process merge, you are effectively deleting the merge.
Highlight a target Account and then select this button to complete the merge and purge the records you are not keeping.
Select to purge all merges shown in the list.
Select this button when you are done using this screen.