|
xTuple ERP Reference Guide |
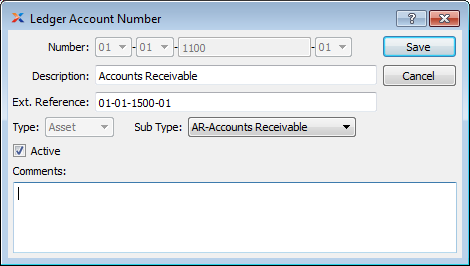
To add a new Ledger Account Number, select the NEW button. The following screen will appear:

When creating a new Ledger Account Number, you are presented with the following options:
Enter an Account Number for the Account. Depending on how your system is configured, you may add the following segments to an Account Number in the following order: Company segment (optional), Profit Center segment (optional), main segment (required), and Subaccount Number (optional). Once a main segment number has been entered and saved, it may not be edited.
Enter a brief description of the Account.
Enter an optional external reference to associate with the Account Number. Typically this field is left blank. However, this field is useful during a data conversion when the Account Number is reformatted.
Specify the Account Type you want to assign the Account Number to. The following selections are available: Asset, Liability, Expense, Revenue, and Equity. Once an Account Number has been used in a G/L transaction, you may no longer change the Account Type.
Specify the Subaccount Type you want to assign the Account Number to. This is an optional selection.
Select to mark the Account as active. Not selecting means the Account is inactive. You can only make an Account inactive if it has a zero balance. Before deactivating an Account, be sure to transfer any balance out of the Account.
If your site is configured to control Trial Balance updates on a manual basis, then this option will be visible—allowing you to set forward-updating capability on an Account-by-Account basis. Conversely, if your site is configured to automatically forward-update Accounts in the Accounting Configuration, then this option will be hidden from view. For more information see Section 11.1.1, “Configure Accounting”.
This is a scrolling text field with word-wrapping for entering Comments related to the Account Number.