|
xTuple ERP Reference Guide |
The "G/L Transactions" screen is a great tool for locating information about the complete range of General Ledger transaction activity. From this screen you can locate every transaction posted to the G/L. And using the custom search tools, you can narrow down your search to locate the specific records you are looking for.
Here are some tips for using this screen:
Use the right-click menu to drill down into the details of individual transactions.
If your transaction records are displaying a "No" value in the "Posted" column, this means the transactions were not posted into an Accounting Period because one doesn't exist or the Accounting Period was frozen at the time of posting. Once you create an Accounting Period for the time Period in question or you thaw the frozen Period with the necessary privilege, your transaction records will display "Yes" in the posted column.
Among its many features, the G/L Transactions query builder includes an option to display "deleted" transactions.
The total quantity of G/L transactions will be greatly reduced if your site is configured to post transactions to an intermediate Journal before they are posted to the G/L. To learn more about this configuration option, please see Section 11.1.1, “Configure Accounting”.
When Project Accounting enabled, there is a search parameter designed to show Accounts with a Project Number as the last segment. If the "Show Project Detail" option is not used, balances will roll up into the parent Account total.
The option "Exclude Child Accounts" is available when viewing G/L transactions for a single Account. This option is used to show or hide the child transactions which may be associated with a G/L Account when Project Accounting is enabled.
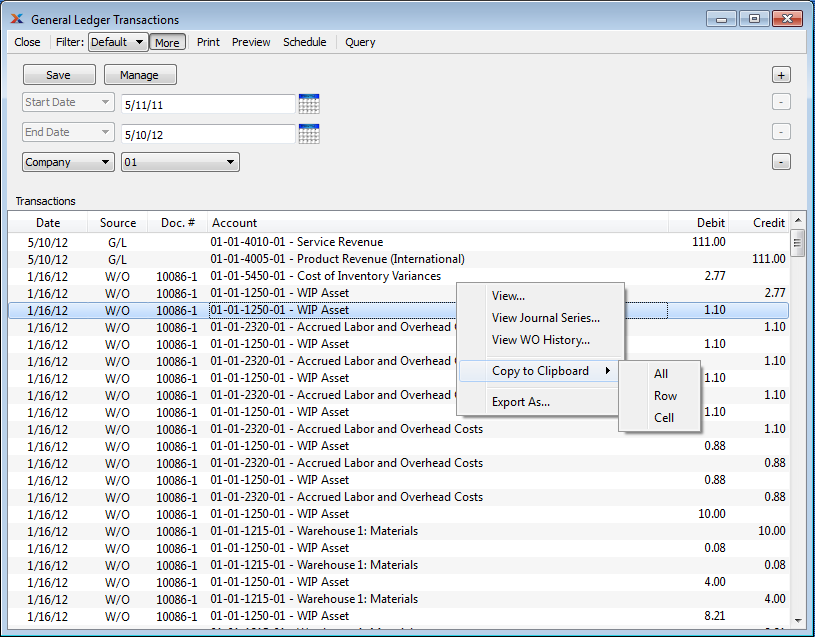
The following screenshot shows the "G/L Transactions" screen:

The default filter on the "G/L Transactions" screen shows all transactions for the current day. You can build your own search criteria using the following options:
Select a filter from the list of available filters, then select the QUERY button to generate search results. Only saved filters will appear in this list.
Select this button to show the parameters underlying the saved filter. To hide the parameters, click the MORE button a second time.
When building a custom query, you have the following options:
Select to add a new parameter to the query.
Select to remove a parameter from the query. This option is disabled for default parameters.
Select to save your filter for future use. Saved filters will appear in the list of available filters.
Select to manage your saved filters. To learn more about managing filters, please see Section 2.1.2, “Search Filters”.