
|
xTuple ERP Reference Guide |
|
|
xTuple ERP Reference Guide |
Incidents can be used for multiple purposes, including customer service, trouble-ticketing, web-based communication with Customers and Vendors using the xTuple Web Portal—and more. For sites where xTuple Connect is installed and running, various email notification options are also available. To enter a new Incident, select the "New Incident" option. The following screen will appear:
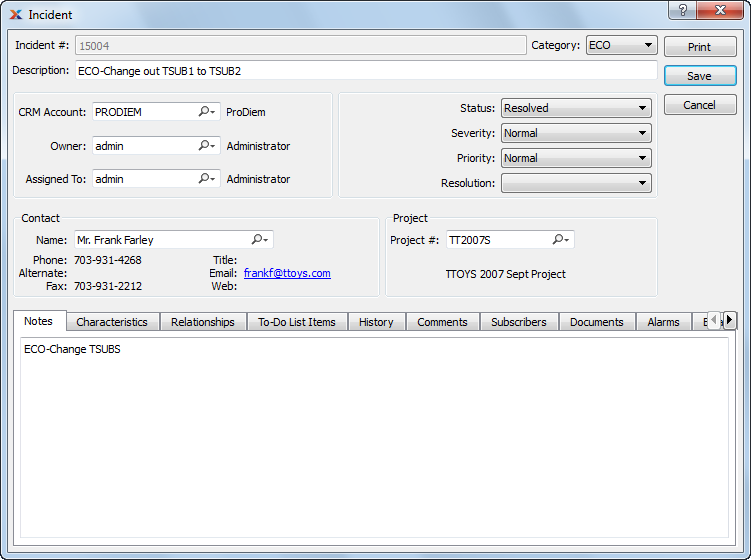
When entering a new Incident, you are presented with the following options:
Displays the Incident Number. You may set a beginning Incident Number at the system level.
Enter a few words to briefly describe the Incident
Specify a user-defined Category to assign the Incident.
If your CRM module is configured to allow for public/private Incidents, this option will be shown. When shown, select to indicate you want the Incident to be viewable publicly. This option applies primarily to sites where the xTuple Web Portal has been implemented. With the Web Portal, xTuple Incidents may be viewed by Customers, Vendors, and others on your website. Depending on your website rules, private incidents may be hidden from most website users. To learn more about the CRM configuration which enables this option, please see Section 10.1.1, “Configure CRM”.
Specify the Account the Incident is associated with.
Specify the user you want to assign the Incident to.
Specify a system-defined Incident status to assign to the Incident from the available options:
This is the default Incident status when a new Incident is entered.
This status can be used for Incidents which require more information before they can be confirmed.
A confirmed Incident is ready to be acted on.
When Incidents are assigned to a user, they become that user's responsibility.
A resolved Incident is ready to be closed. Typically, users work to resolve the Incidents assigned to them.
This is the final status and indicates an Incident requires no further action. It is completed.
Specify a user-defined Severity to assign the Incident.
Specify a user-defined Priority to assign the Incident.
Specify a user-defined Resolution to assign the Incident.
Manually enter Contact information in the fields below—or use the lookup feature to select pre-existing Contact information. If the Contact you select is linked to a CRM Account, the Account will be filled in automatically.
If your system is configured to use Projects, select a Project Number to associate with the Incident.
This is a scrolling text field with word-wrapping for entering general Notes related to the Incident. When a Note is entered, the content of the Note will also automatically be inserted as a Comment on the Incident. The Comment created this way may not be edited; however, if you edit the Note, the associated Comment will include your edits.
If CRM is configured with a default Incident EDI Profile or if the Category of this Incident has an EDI Profile, you may encounter an EDI processing interface when saving the Incident.
To enter Characteristics associated with an Incident, select the "Characteristics" tab. The following screen will appear:
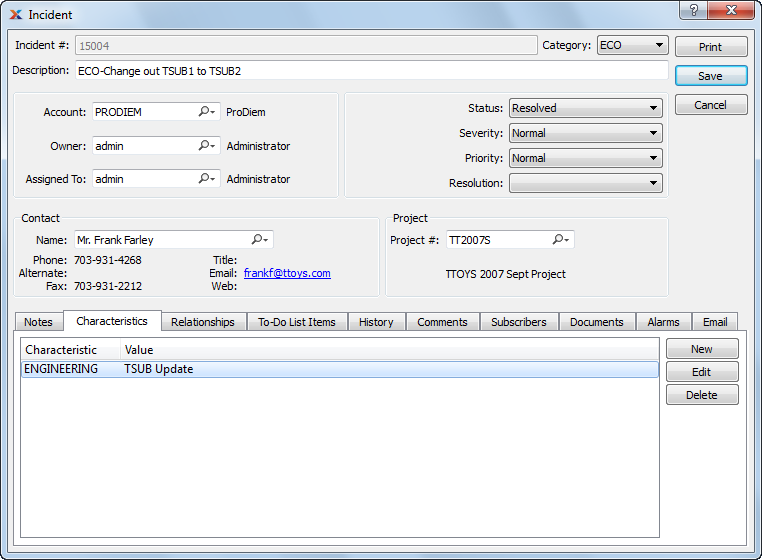
Display lists the Characteristic name and Value of Incident Characteristics related to the Item.
To create a new Item Characteristic, select the NEW button. The following screen will appear:
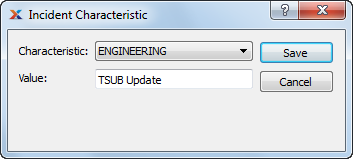
Select a Characteristic from the list of Characteristics designated as being available for use as Item Characteristics.
Enter a value to associate with the Incident Characteristic.
Select if the Value entered is the default Value for the specified Characteristic. The default Value will be presented initially wherever Incident Characteristics are used.
To define Item and Accounting relationships for an Incident, select the "Relationships" tab. The following screen will appear:
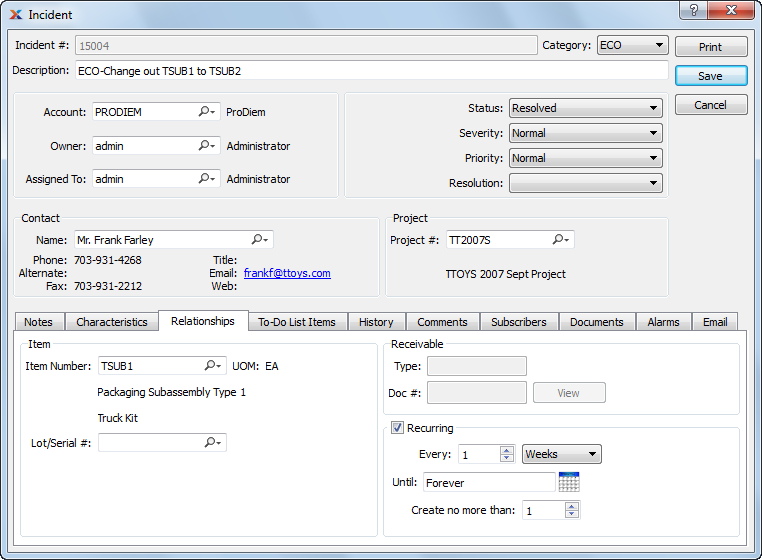
When defining Item and Accounting relationships for an Incident, you are presented with the following options:
Use the following fields to link an Incident to a specific Item or Lot/Serial Number:
Enter the Item Number of the Item (if any) you want to associate with the Incident.
Inventory Unit of Measure.
Manually enter a Lot/Serial Number (if any) to associate with the Item—or use the lookup feature to select pre-existing Lot/Serial Number information.
Incidents may be linked to a specific Receivable item from the right-click menu on the Open Receivables screen. When an Incident is linked to a specific Receivable item, you are presented with the following options:
Displays the type of document associated with the Incident. Document types would include Credit Memo, Debit Memo, Invoice, and Cash Deposit.
Displays the identifying number of the Document.
When creating a recurring event, you are presented with the following options:
Check this box if you want the event to repeat itself at regular intervals, using the frequency settings you specify below. Recurring events are generated when you run the recurring items utility, which is described in more detail here: Section 9.2, “Create Recurring Items”.
Enter a number and select a unit of time to describe how frequently you want the event to occur. You can choose any regular schedule, ranging from once every 1 minute to once every 99 years.
Enter a date and time at which to start the first event. The default value is the time the screen opened. The "From" option only appears on some screens.
Enter a date and time after which the event should no longer occur.
Enter the maximum number of future copies of this event you want the system to maintain. Whenever the Create Recurring Items screen is run, it will create up to the number you enter here.
If you delete all copies of a recurring event, the event will stop repeating even if the "Until" date has not yet been reached. xTuple recommends setting this to at least 2 to reduce the likelihood of deleting all copies of the event.
To view or associate To-Dos with an Incident, select the "To-Do List Items" tab. The following screen will appear:
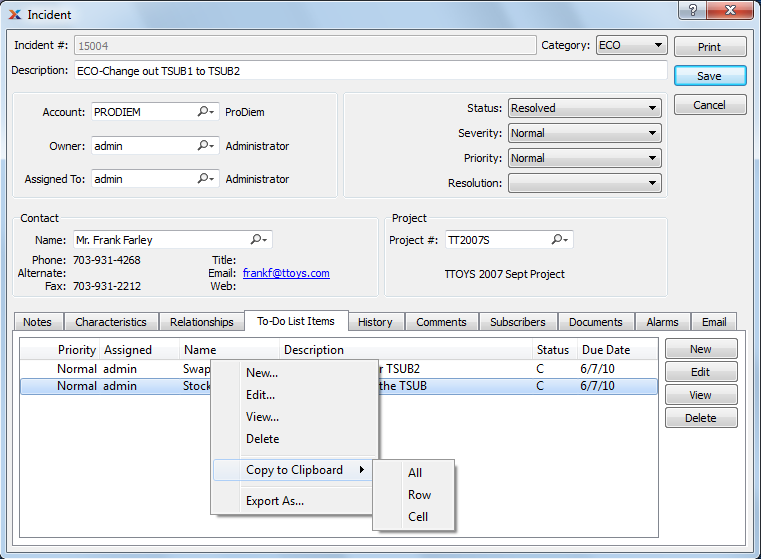
Display lists To-Do List Items associated with the Incident.
To view the history associated with an Incident, select the "History" tab. The following screen will appear:
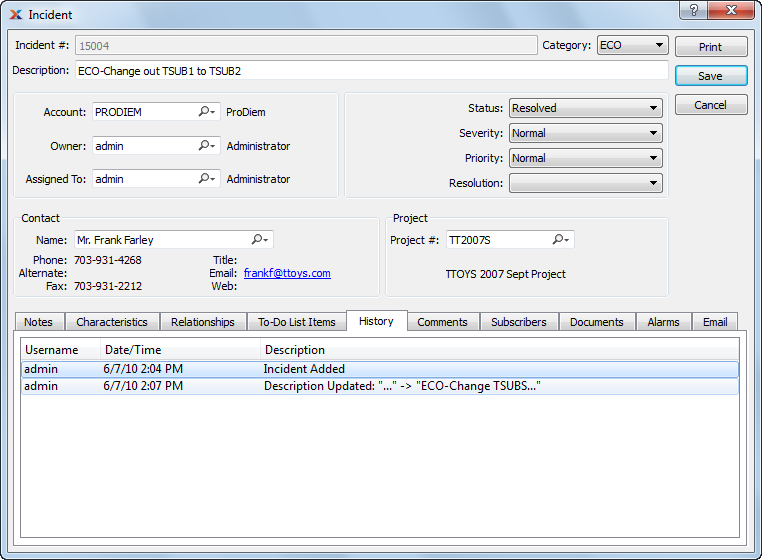
The "History" screen displays information related to the Incident, including username of Incident creator, created date, status, and description.
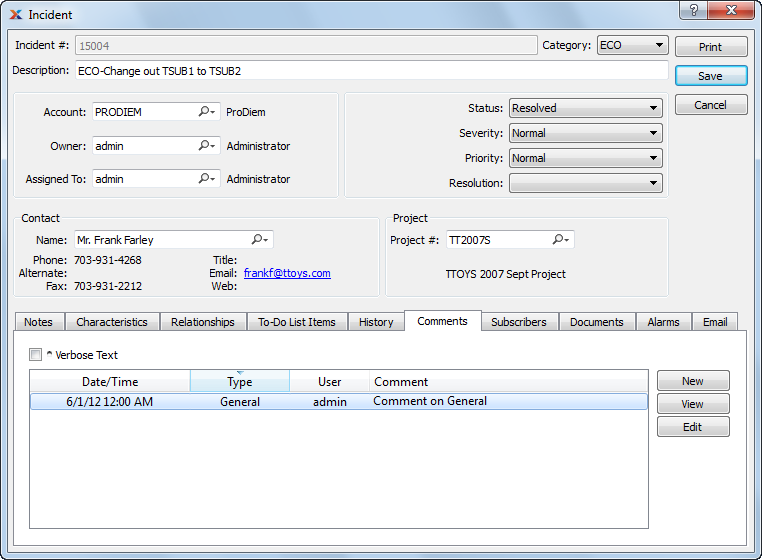
To view system-generated Comments associated with an Incident—or to add new Comments of your own—select the "Comments" tab. The following screen will appear:
When adding or reviewing Comments, you are presented with the following options:
Select to display all Comments in the list in an expanded view which includes the entire text of each Comment. To edit a Comment, simply select the "Edit" link next to the Comment. That link will not be shown for Changelog Comments, which can't be edited. If the "Verbose Text" option is not selected, the Comment list will display only header level information for each Comment.
Display lists Comments related to the record.
The following buttons are available:
Opens screen for creating a new Comment.
Highlight a Comment and then select this button to reach a read-only view of the "Edit" screen.
Enables you to edit highlighted Comments—as long as the Comments are not "ChangeLog" Comments. ChangeLog Comments are system-generated and may not be edited. The edit screen is the same as that for creating a new Comment—except that when editing, the fields will contain Comment information. Double-clicking on a Comment will also bring you to the editing screen.
To enter a new Comment, select the NEW button. The following screen will appear:
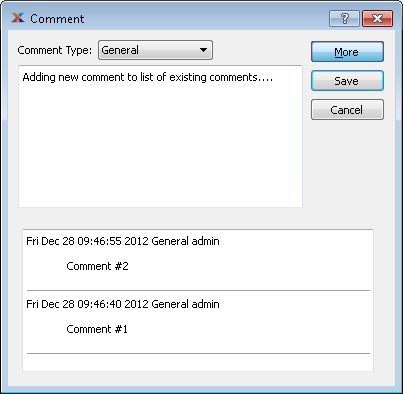
Select a Comment Type from the drop-down list to classify the Comment. This is a required step. Comment Types may be system-defined (i.e., "ChangeLog" and "General") or user-defined, as described in Section 13.2.2, “Comment Types”. Once you have specified a Comment Type, begin typing your Comment in the main text area. The text area features word-wrapping and scroll-bar support for longer Comments.
The following buttons are unique to this screen:
Select to show the complete list (i.e., "thread") of Comments associated with the record. To hide the list, simply select the SHOW MORE button again. The Comment thread will show the most recent Comment first.
To view the Subscribers to an Incident, select the "Subscribers" tab. The following screen will appear:
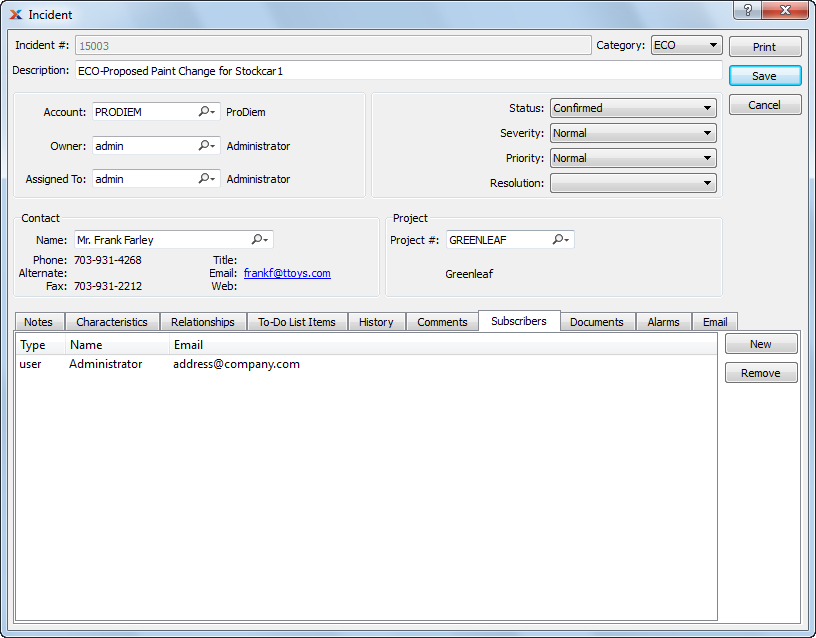
Incident Subscribers
Subscribers are automatically added to the list of recipients when xTuple Connect sends email for changes to Incidents. Subscribers can be either Users or Contacts, as long as they have an email address. To add a Subscriber, click the NEW button. The following screen will appear:
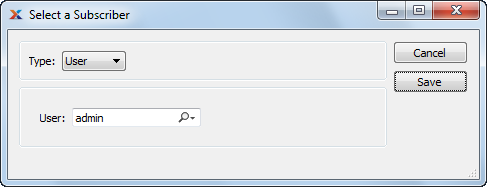
Adding a Subscriber
When adding a Subscriber, you are presented with the following options:
Select either User or Contact.
Type or select the Username of an xTuple ERP system User.
Type or select the first and last name of a Contact.
To view the documents associated with an Incident, select the "Documents" tab. The following screen will appear:
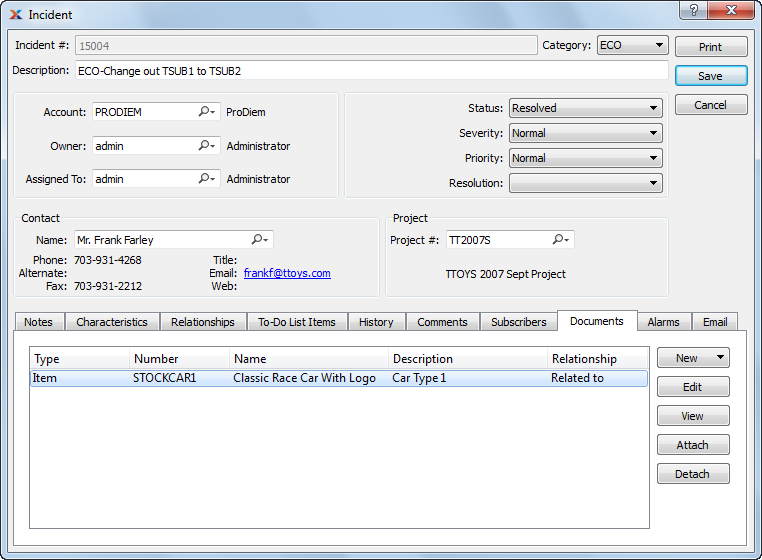
Incident Documents
When associating documents, you are presented with the following options:
Select to create a new document and associate it with the current record. You may create the following document types:
Select to create a new Image association.
Select to create a new Incident and associate it.
Select to create a new To-Do and associate it.
Select to create a new Opportunity and associate it.
Select to create a new Project and associate it.
Enables you to edit associated documents. The edit screen is the same as that for creating a new document—except that when editing, the fields will contain document information. Double-clicking on a document will also bring you to the editing screen.
Highlight a document and then select this button to reach a read-only view of the "Edit" screen
Select to associate already-existing documents. The following document types may be attached: Contact, Account, Customer, Employee, File, Image, Incident, Item, Opportunity, Project, Purchase Order, Sales Order, Vendor, Web Site, Work Order.
Highlight a document and then select this button to remove the association.
To associate already-existing documents, select the ATTACH button. The following screen will appear:
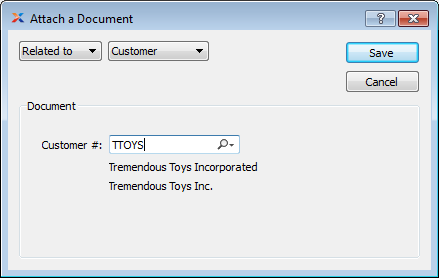
When associating already-existing documents, you are presented with the following options:
Indicate how the document is related to the current record. The following relationship options are available: Related to, Parent of, Child of, Duplicate of.
Specify the kind of document you want to associate. The following document types may be attached: Contact, Account, Customer, Employee, File, Image, Incident, Item, Opportunity, Project, Purchase Order, Sales Order, Vendor, Web Site, Work Order. When associating Files, you will also be given the option to save the File to the database.
There is no file size restriction when saving Files to the database. However, excessively large files could cause storage and performance issues.
Use the lookup field to identify the specific document you want to attach. The data entry options will vary depending on the document type you select.
To view the alarms associated with an Incident, select the "Alarms" tab. The following screen will appear:
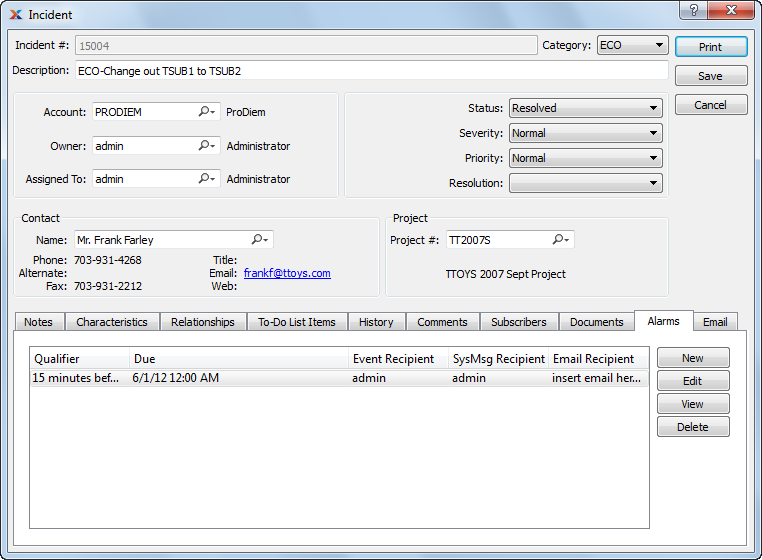
Upon selecting Alarms you are presented with the following options:
Displays a list of Alarms you can create to send reminders to various users associated with an event or system message.