|
xTuple ERP Reference Guide |
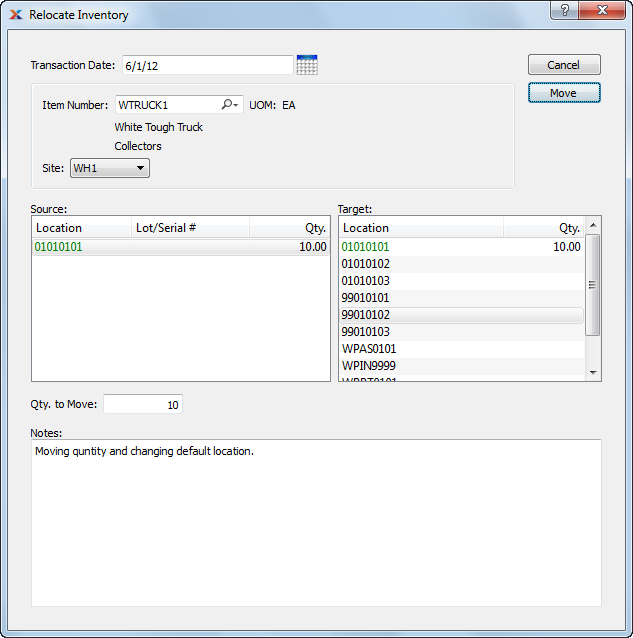
To relocate Inventory from one Location to another, select the "Relocate Inventory" option. The following screen will appear:

When relocating Inventory from one Location to another, you are presented with the following options:
Specify the date you want the transaction to be posted to the General Ledger. The current day's date will display by default.
Enter the Item Number of the Inventory you are relocating.
Inventory Unit of Measure.
Specify Site where Inventory is located.
Select to change the default Location for the Item Site to the target Location once the MOVE button is selected. Performing this action means the target Location will become the new default Location for the Item Site. This option will only be available if your site is configured to allow on-the-fly changes to the default Location. To learn more about this configuration option, see Section 12.1.1, “Configure Inventory”.
Display lists source Locations for the specified Item. Select the source Location Inventory is to be transferred from.
Display lists target Locations for the specified Item. Select the target Location Inventory is to be transferred to.
Enter the quantity of the specified Item you want to move from the source Location to the target Location.
This is a scrolling text field with word-wrapping for entering Comments related to the Inventory relocation.
The following buttons are unique to this screen:
Moves specified quantity of Inventory from source Location to target Location. Additional steps will be necessary if the specified Item is stored in multiple Locations.