
|
xTuple ERP Reference Guide |
Transfer orders are used to move inventory between sites. They are distinct from inter-site transfers in three primary ways: 1) you can add multiple items to a single transfer order and transfer all the items at once; 2) all transfer order transfers involve a transit site, for tracking inventory while it is in transit; and 3) there are reports (i.e., paperwork) associated with transfer orders. To enter a new transfer order, go to . The following screen will appear:
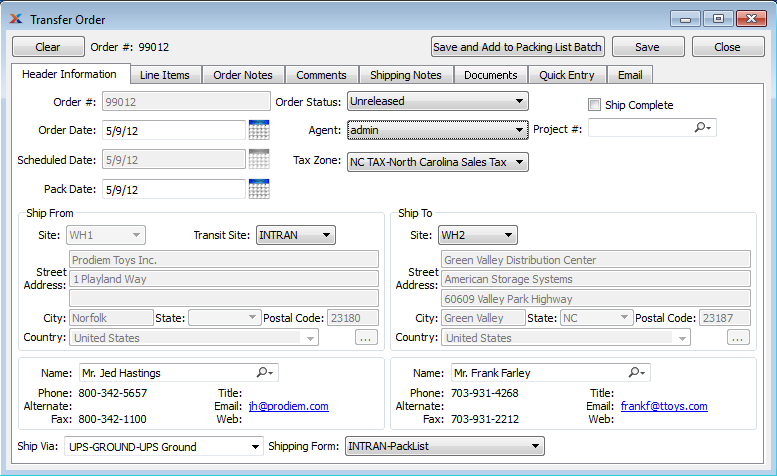
When creating a new transfer order, you are presented with the following options:
Next available transfer order number will automatically display, unless your system requires you to enter transfer order numbers manually. Default values and input parameters for transfer order numbers are configurable in .
Displays current day's date.
Displays the order's earliest scheduled date. The scheduled date corresponds to the earliest scheduled date for an included transfer order item. Because transfer orders may contain multiple transfer order items, the scheduled date indicates the most recent scheduled date. No scheduled date will display in the Scheduled Date field until a transfer order line item has been created and a scheduled date assigned to it.
The pack date is the same date as the ship date. Because the field can be edited, you have the ability to change the pack date and make it different from the ship date.
Select the current status of the transfer order. Transfer orders may be either unreleased = U, open = O or closed = C. The default status for a new transfer order is Unreleased. The ReleaseTransferOrders privilege is required to change the status to Open. The transfer order must be released before shipping and receiving transactions are allowed. Changing the order status will also make the appropriate status changes to the order line items.
Specify the agent associated with the transfer order. By default, the name of the logged-in user will be entered as purchasing agent-assuming that user is designated as a purchasing agent. If the user is not a purchasing agent, the first alphabetical name in the list of purchasing agents will be entered.
Specify the tax zone for this transfer order.
Select to require that all transfer order line item quantities be issued to shipping before the order is shipped. This feature is designed to prevent partial shipments. If selected, users will be prevented from shipping the order unless all line item quantities have been issued to shipping. If not selected, partial shipments for the order will be allowed.
Transfer orders may not be received before they have been shipped.
Select a project number to associate with the transfer order. Projects may be used to link transfer orders with work orders, sales orders, purchase orders, etc.
Specify the following details related to the site the order is being shipped from:
Select a source site from the available options.
Displays the default address for the specified ship-from site. You may manually override the displayed address information in the fields below—or use the lookup feature to select another address. If a new address is manually entered here, that address will be added automatically to the master list of addresses. For additional documentation related to creating addresses, see Section 8.1, “ New Address”.
Displays the default contact for the specified ship-from site. You may manually override the displayed contact information in the fields below—or use the lookup feature to select another contact. If a new contact is manually entered here, that contact will be added automatically to the master list of contacts. For additional documentation related to creating addresses, see Section 7.1, “New Contact”.
Specify the following details related to the site the order is being shipped to:
Select a destination site from the available options.
Displays the default address for the specified ship-to site. You may manually override the displayed address information in the fields below—or use the lookup feature to select another address. If a new address is manually entered here, that address will be added automatically to the master list of addresses. For additional documentation related to creating addresses, see Section 8.1, “ New Address”.
Displays the default contact for the specified ship-to site. You may manually override the displayed contact information in the fields below—or use the lookup feature to select another contact. If a new contact is manually entered here, that contact will be added automatically to the master list of contacts. For additional documentation related to creating addresses, see Section 7.1, “New Contact”.
Specify the ship via associated with the transfer order. You may enter a free-form ship via simply by typing the name of the ship via into the field.
Specify the shipping form associated with the transfer order. This field is optional.
The following buttons are unique to this screen:
Creates the transfer order, saves it, and adds it to the list of orders available for printing on the packing list batch.
To create or modify transfer order line items, select the tab at the top of the Transfer Order screen. The following screen will appear:
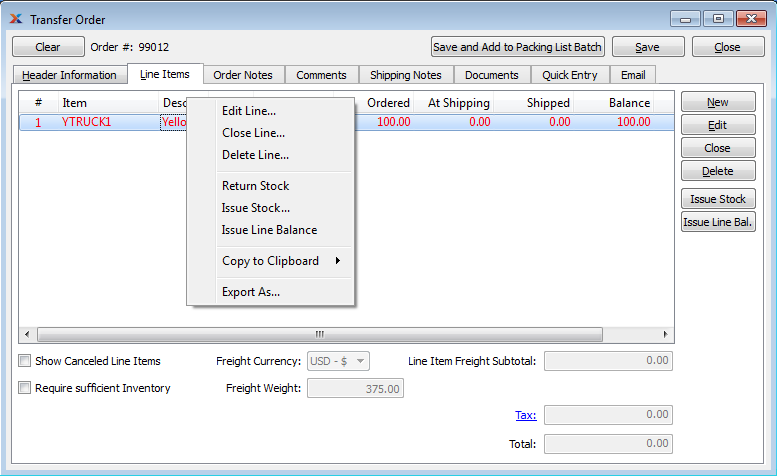
When creating or modifying transfer order line items, you are presented with the following options:
Display lists line items for this transfer order.
Transfer order line items may exist in any of the following statuses:
U = Unreleased
O = Open
C = Closed
X = Cancelled
Select to include in the line items display transfer order line items which have been specifically canceled. Displaying canceled line items can provide useful order history information.
Select to ensure you have enough quantity on hand (QOH) of a line item prior to issuing stock to shipping. If selected, this option will prevent you from issuing line item quantity to shipping if doing so would force QOH for the item site to fall below zero. Not selecting this option means issuing stock to shipping may drive item site QOH negative.
Displays the combined weight of all transfer order line items. Freight weight represents the sum of an item's product weight and packaging weight, both of which are defined on the Item master. The per unit freight weight multiplied by the quantity per gives you the line item freight weight. The sum of all line item freight weights is the combined weight for the order.
Displays the subtotal for all line item freight. Freight charges may be added when entering or editing a transfer order line item.
Displays the total amount of tax to be charged on the transfer order. Sales tax is calculated at the transfer order line item level. The tax amount displayed here represents the total for all line item tax amounts. To get a detailed view of the tax calculation, click on the link using your mouse.
Displays the total amount of the transfer order.
Any transfer order line item may be shipped—even if the item or item site in question becomes inactive after the sales order has been created.
The following buttons are unique to this screen:
Select to clear the contents of the current transfer order and open a fresh, new transfer order for order entry. The order number of the order being cleared will display next to the button.
Selecting the button on the transfer order header does not delete any information which has been saved previously.
Highlight a transfer order line item and then select this to close the transfer order line item. If the highlighted line item is already closed, the label will revert to an button, which may be used to open the closed line item.
Highlight a transfer order line item and then select this button to issue quantity to shipping.
You may select multiple line items for issuing to shipping by highlighting them using your mouse—or a combination of your mouse and either the or key.
Highlight a transfer order line item and then select this button to issue the balance of the line item quantity to shipping.
Order notes added to a transfer order are used for internal purposes only. To add notes to a transfer order, select the tab at the top of the Transfer Order screen. The following screen will appear:
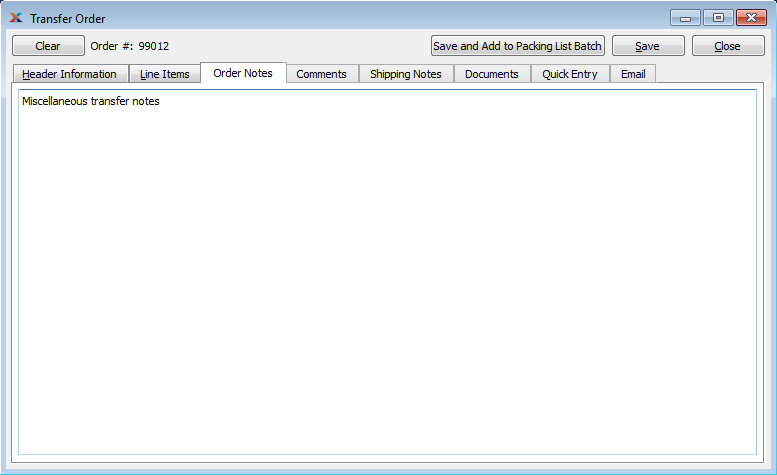
When adding notes to a transfer order, you are presented with the following options:
This is a scrolling text field with word-wrapping for entering general notes related to the transfer order. These notes are for internal use only.
To add comments related to a transfer order, select the tab. The following screen will appear:
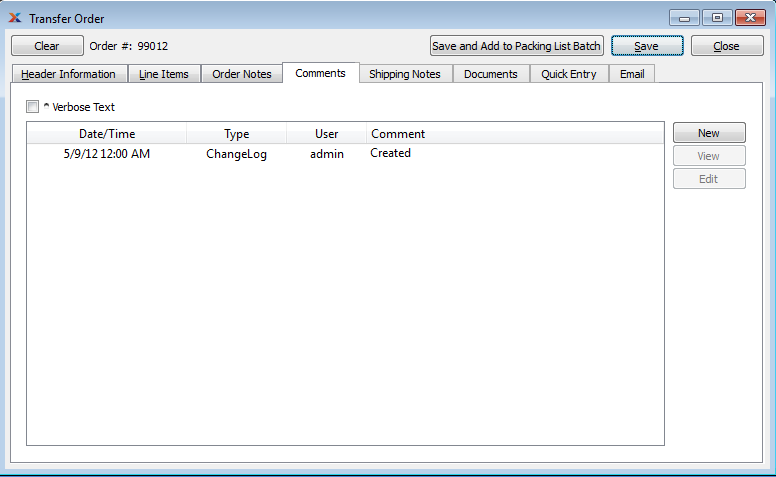
When adding or reviewing comments, you are presented with the following options:
Select to display all comments in the list in an expanded view which includes the entire text of each comment. To edit a comment, simply select the link next to the comment. That link will not be shown for changelog comments, which can't be edited. If the Verbose Text option is not selected, the comment list will display only header level information for each comment.
Display lists comments related to the record.
The following buttons are available:
Opens screen for creating a new comment.
Highlight a comment and then select this button to reach a read-only view of the Edit screen.
Enables you to edit highlighted comments—as long as the comments are not changelog comments. ChangeLog comments are system-generated and may not be edited. The Edit screen is the same as that for creating a new comment—except that when editing, the fields will contain comment information. Double-clicking on a comment will also bring you to the editing screen.
To enter a new comment, select the button. The following screen will appear:

Select a comment type from the drop-down list to classify the comment. This is a required step. Comment types may be system-defined (i.e., changelog and general) or user-defined, as described in Section 13.2.3, “Comment Types”. Once you have specified a comment type, begin typing your comment in the main text area. The text area features word-wrapping and scroll-bar support for longer comments.
The following buttons are unique to this screen:
Select to show the complete list (i.e., thread) of comments associated with the record. To hide the list, simply select the button again. The comment thread will show the most recent comment first.
Shipping notes are drawn from the shipping comments (if any) associated with transit sites. The notes may vary depending on the transit site being used. These notes provide a mechanism for transferring information about transit sites to the transfer order. To view transfer order shipping notes, select the tab at the top of the Transfer Order screen. The following screen will appear:
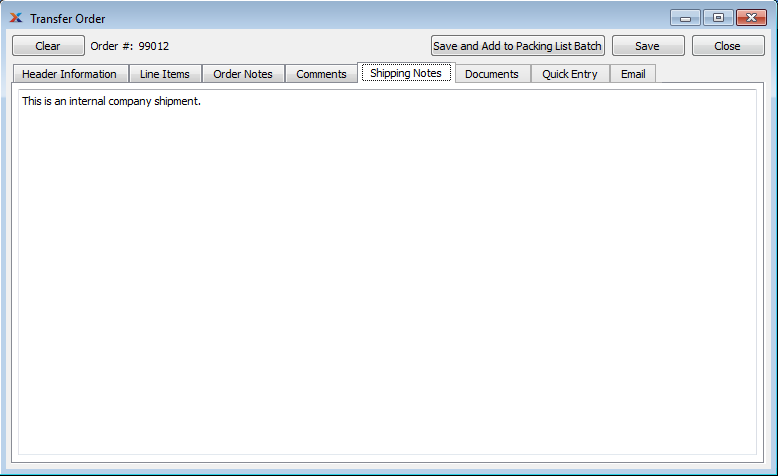
When viewing or editing shipping notes for a transfer order, you are presented with the following options:
While the content for shipping notes may originate from the Transit Site master, you can edit the notes to fit the requirements of an order. This is a scrolling text field with word-wrapping.
To associate documents with a transfer order, select the tab. The following screen will appear:
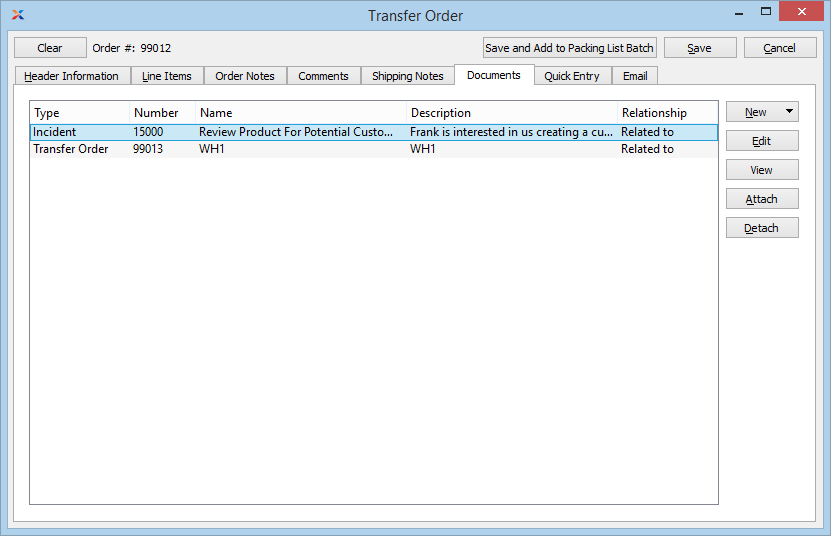
When associating documents, you are presented with the following options:
Select to create a new document and associate it with the current record. You may create the following document types:
Select to create a new image association.
Select to create a new fixed asset association.
Select to create a new maintenance order association.
Select to create a new incident and associate it.
Select to create a new project and associate it.
Select to create a new opportunity and associate it.
Select to create a new to-do and associate it.
Enables you to edit associated documents. The Edit screen is the same as that for creating a new document—except that when editing, the fields will contain document information. Double-clicking on a document will also bring you to the editing screen.
Highlight a document and then select this button to reach a read-only view of the Edit screen.
Select to associate already-existing documents. The following document types may be attached: contact, account, customer, employee, file, image, incident, item, opportunity, project, purchase order, sales order, vendor, web site, work order.
Highlight a document and then select this button to remove the association.
To associate already-existing documents, select the button. The following screen will appear:
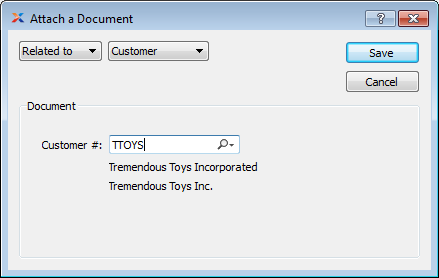
When associating already-existing documents, you are presented with the following options:
Indicate how the document is related to the current record. The following relationship options are available: related to, parent of, child of, duplicate of.
Specify the kind of document you want to associate. The following document types may be attached: contact, account, customer, employee, file, image, incident, item, opportunity, project, purchase order, sales order, vendor, web site, work order. When associating files, you will also be given the option to save the file to the database.
There is no file size restriction when saving files to the database. However, excessively large files could cause storage and performance issues.
Use the lookup tool to identify the specific document you want to attach. The data entry options will vary depending on the document type you select.
If you want to speed up your data entry of transfer order line items, you can use the quick entry interface. This screen allows you to enter multiple line items in one session. It also simplifies the process by presenting only the minimum required fields. To enter line items using the quick entry interface, select the tab at the top of the Transfer Order screen. The following screen will appear:
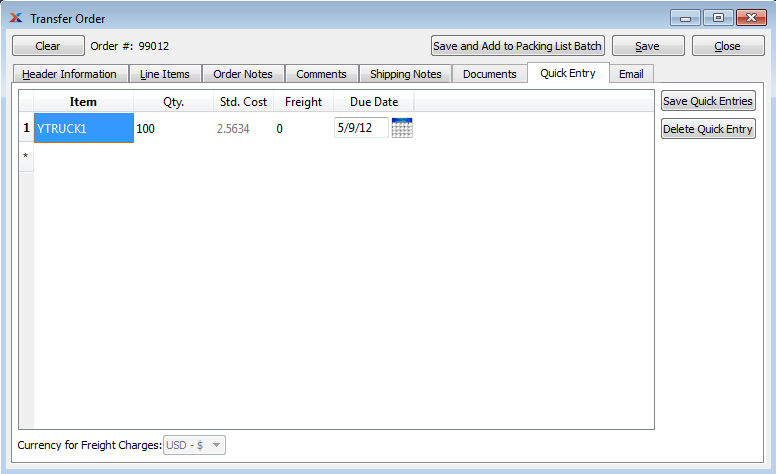
To get started entering line items, place your cursor in the Item field. You can then move from field-to-field using the button on your keyboard.
When entering transfer order line items using the quick entry interface, you are presented with the following options:
Enter an inventory item number. This field is used for entering items stored in inventory.
Enter the quantity you want to transfer.
Displays the standard cost per unit.
Enter the freight amount, if any.
Enter the due date.
The following buttons are unique to this screen:
Select to save all the line items entered using the quick entry interface.
Highlight a line item and then select this button to remove the item from the list.
To view email associated with a transfer order, select the tab. The following screen will appear:
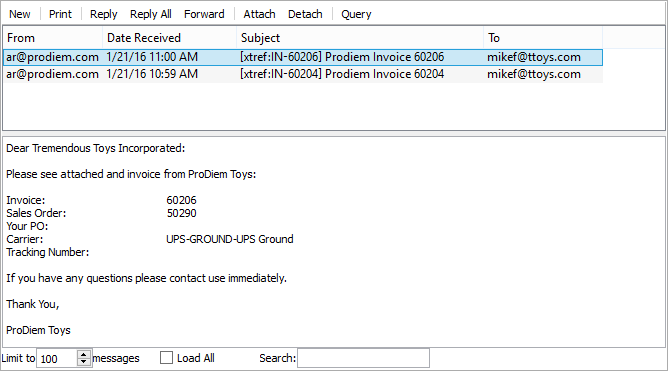
When viewing associated emails, you are presented with the following options:
Display lists associated emails.
The content of a highlighted email will be displayed here.
Specify the maximum number of associated emails you want to be displayed in the email list. If the list is extremely long, you may experience some slowness when opening the screen.
Select to load all associated emails into the list.
Enter a string of letters or complete words to search for matches in the list of associated emails. The search will scan through subject lines, To addresses, and From addresses.
The following buttons are unique to this screen:
Select to send a new email, using the default email program on your computer.
Highlight an email and then select this button to print a copy of the email.
Highlight an email and then select this button to reply to the email's sender, using the default email program on your computer.
Highlight an email and then select this button to reply to everyone associated with the email, using the default email program on your computer.
Highlight an email and then select this button to forward the email to another person(s), using the default email program on your computer.
Highlight an email and then select this button to attach an email associated with a contact in your contact list.
Highlight an email and then select this button to remove the associated email from the list.