
|
xTuple ERP Reference Guide |
|
|
xTuple ERP Reference Guide |
| 1.1. New quote | ||
|---|---|---|
 | 1. Quote |  |
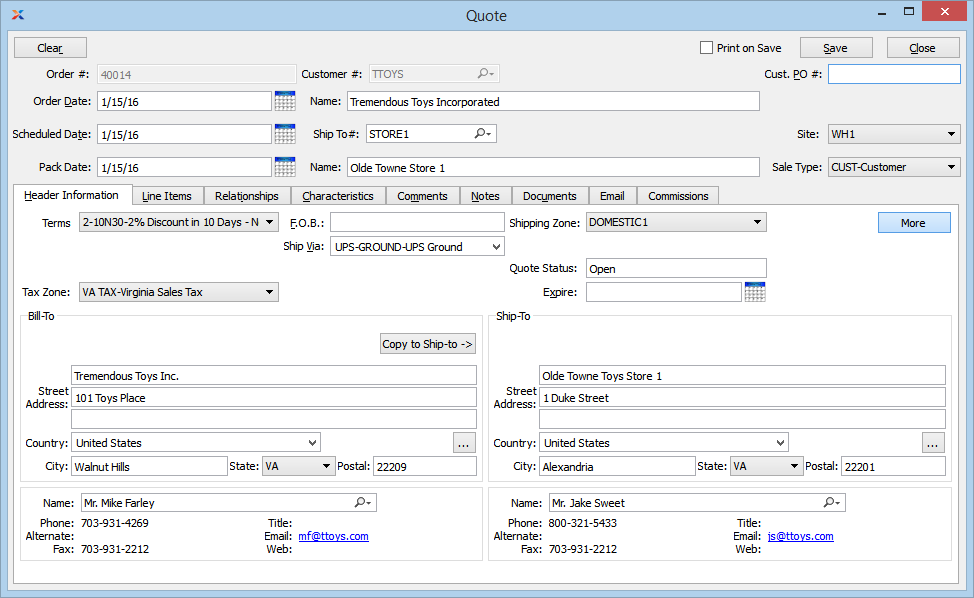
A quote is a statement issued to a customer or prospect indicating pricing and sales terms for specified quantities of sold items. Quotes are often precursors to sales orders. To create a quote, go to . The following screen will appear:
Be sure to close all sales order windows before exiting the system. This will prevent the creation of orphaned sales order records.
When creating a new quote, you are presented with the following options:
Next available quote number will automatically display, unless your system requires you to enter quote numbers manually. Default values and input parameters for quote numbers are configurable in the module.
Displays current day's date.
Displays the order's earliest scheduled date. The scheduled date corresponds to the earliest scheduled date for an included quote item. If there are no existing line items, the date entered here will become the default schedule date for the first one. If line items do exist and the date is changed, you will be asked whether you want all editable lines to change. If the change affects pricing, you will be asked whether you want prices to be updated as well. If hidden, this field can be viewed by selecting the button.
The pack date is the same date as the ship date. Because the field can be edited, you have the ability to change the pack date and make it different from the ship date. This field can be viewed by selecting the button.
Select to automatically print the quote when it is saved.
Enter the customer number of the customer (or prospect) to be billed for the sale. The lookup feature located to the right of the field leads to a searchable customers list. The lookup feature will be disabled if the quote is entered for a prospect. You may also access the customer list using the keyboard shortcut . Once a customer number is entered, the customer name and billing address will display. Select the or symbol to view customer information for the specified customer. If a customer's credit is good, the button will feature a black question mark () icon. If the customer is on credit warning, the icon will turn into an orange dollar sign (). A red dollar sign () indicates the customer is on credit hold. You may also create a new customer record by selecting the button.
A valid customer number must be entered in the Customer # field before line items can be added to a quote. If no valid customer number is entered, you will not be able to add line items to the quote. Additionally, quotes may only be entered for active customers.
Quotes may not be entered for customers who are on credit warning or credit hold. Only users with special privileges may override these credit settings.
The customer name is displayed in an editable text field.
Enter the number of the preferred ship-to address. Customers may maintain multiple ship-to addresses. If the Customer master for the specified customer indicates that free-form ship-tos are allowed, then any address may be entered. If free-form ship-tos are not allowed, then the ship-to address must be entered using the browse button located to the right of the field.
The ship-to name is displayed.
Enter a customer purchase order number, as needed.
You will be required to enter a customer purchase order number for customers who require them. If required, duplicate numbers will only be allowed if the customer uses blanket purchase orders. All customer requirements are specified on the Customer master.
Specify the shipping site associated with the quote. The site selected here acts as the default free-on-board (FOB) location. A site may be designated as a shipping site on the Site master. This field can be viewed upon selecting the button.
Specify the sale type. Sales account assignments by sales type are available.
If the sales order setup setting Display Sales Order Line Items Tab by Default is checked, the tab will be displayed on the opening window for quote entry.
Specify the billing terms associated with the order. By default, the customer's standard billing terms will appear in the field.
Specify the sales representative—or outside rep, in the Distribution edition—associated with the quote. Sales representatives are linked to a customer on the Customer master—either by a default setting or through the assignment of ship-to addresses. Each ship-to address may have a different sales representative associated with it. Consequently, the name of the sales representative appearing on the quote header will be the same as specified for the ship-to address being used. If you are using the enhanced commissions package, the sales rep information is moved to a separate tab.
When creating a new quote, only active sales reps will be available for selection. For future changes to an existing quote, all sales reps (active and inactive) will be listed to ensure that the original sales rep will still appear.
By default, the commission percentage recorded on the Customer master will be automatically entered in this field. If for some reason you select a non-default sales representative at order entry, the commission rate will not change. To adjust the commission rate, you must make the change manually. This field can be viewed by selecting the button.
Specify the tax zone associated with the quote. The tax zone for the specified ship-to address will be entered here by default. Otherwise, the primary tax zone for the customer will be entered. This field can be viewed upon selecting the button.
Enter free-on-board terms for the order. By default, FOB. Terms entered on the Shipping Site master will appear in this field. The default terms may be changed during order entry—and also at later stages during the billing cycle.
The preferred ship via method for the customer will appear in the field. You may change the default ship via using the list. You may also enter a free-form ship via simply by typing the name of the ship via into the field.
The system supports up-to-date shipment tracking with links to the websites of many leading shipping companies (i.e., ship vias).
Specify the shipping zone. Sales account assignments by shipping zone are available.
Displays the current status of the quote. There are two possible values: open and converted. Quotes get the converted status after they have been converted to sales orders. If your module is configured to show quotes after they have been converted, you may view historical quotes from the Customer workbench. Converted quotes will not be visible on the list of open quotes.
Enter the date when the quote expires, if any.
Specify the customer billing information below:
Displays the customer's bill-to address. You may manually override the displayed address information in the fields below—or use the lookup feature to select another address. If a new address is manually entered here, that address will be added automatically to the master list of addresses. For additional documentation related to creating addresses, see Section 8.1, “ New Address”.
Displays the customer's billing contact. You may manually override the displayed contact information in the fields below—or use the lookup feature to select another contact. If a new contact is manually entered here, that contact will be added automatically to the master list of contacts. For additional documentation related to creating addresses, see Section 7.1, “New Contact”.
Select to copy contents of billing address into Ship-To Address field. This option is enabled if the Customer master for the specified customer indicates that free-form ship-tos are allowed.
Specify shipping details below:
Displays the specified ship-to address. You may manually override the displayed address information in the fields below—or use the lookup feature to select another address. If a new address is manually entered here, that address will be added automatically to the master list of addresses. For additional documentation related to creating addresses, see Section 7.1, “New Contact”.
Displays the shipping contact for the ship-to address. You may manually override the displayed contact information in the fields below—or use the lookup feature to select another contact. If a new contact is manually entered here, that contact will be added automatically to the master list of contacts. For additional documentation related to creating addresses, see Section 7.1, “New Contact”.
The following buttons are unique to this screen:
Select to refresh the Quote screen so that you can enter a new quote. Using the button does not erase or in any way change the information on the quote you are clearing.
Select to display extra information related to the sales order. To hide the extra information, simply select the button again.
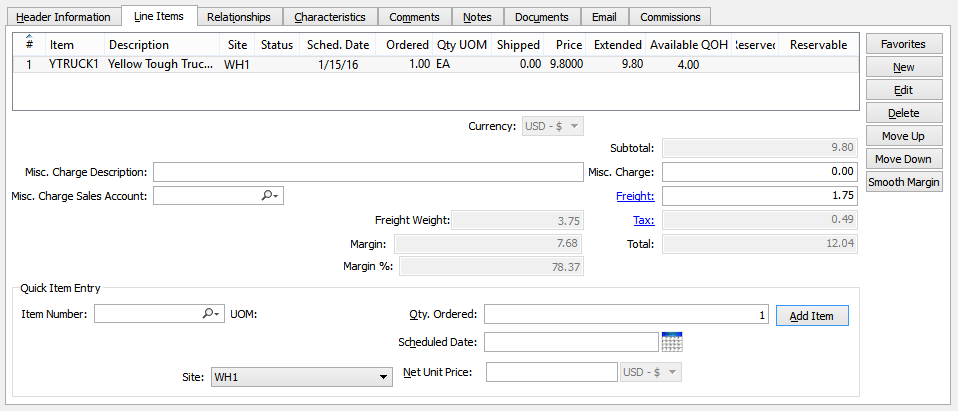
To create or modify quote line items, select the tab at the top of the new Quote screen. The following screen will appear:
The system will allow you to enter quotes for items which do not have item sites. However, item sites must be defined before a quote can be converted to a sales order.
When creating or modifying quote line items, you are presented with the following options:
Display lists line items for this quote. A valid customer number must be entered in the Customer # field before line items can be added to the order.
Enter a description to identify the miscellaneous charge.
Enter a sales account to assign the miscellaneous charge to.
Displays the combined weight of all quote line items. Freight weight represents the sum of an item's product weight and packaging weight, both of which are defined on the Item master. The per unit freight weight multiplied by the quantity per gives you the line item freight weight. The sum of all line item freight weights is the combined weight for the quote.
Displays the total profit margin for the quote. The profit margin is based on the following formula:
Quote Subtotal - Total Standard Costs for all Line Items
Displays the profit margin percentage for the order.
Displays the subtotal for the quote line items.
Enter the amount of any miscellaneous charge. Examples of miscellaneous charges include palletization costs, co-op refund, etc. Before entering a miscellaneous charge amount, you must first assign the charge to a sales account and also enter a description of the charge.
If you do not use miscellaneous charges at your site, you can hide these fields so they are not visible when entering sales orders. To do so, simply select the Hide Misc. Charges option in the -level configuration.
Enter the amount of freight charge to be added to the specified order. Freight charges may be entered during the creation or modification of a quote—or at the time of shipment.
Displays the amount of tax that will be added to the sales order, as defined by the specified tax code. To get a detailed view of the tax calculation, click on the link using your mouse.
Displays the total amount of the quote.
Any quote line item may be shipped—even if the item or item site in question becomes inactive after the quote has been created.
Distribution edition users will have the option to enter line items quickly on this screen, without having to first open the Sales Order Item screen:
Enter the item number of the item you want to sell. The item list will contain sold items available for sale to the specified customer. The list of available items may vary from customer to customer, depending on how pricing schedules are implemented at your site. Once an item number is entered, the inventory unit of measure and item description will automatically appear.
Specify the site the sales order item is sold from. Items may be supplied to sales orders from multiple item sites. After an item number is entered above, the system checks for available item sites for the item. Any item sites having the Sold From flag set on them will be selectable from this site list. By default, the item site having the highest ranking will be selected as the first available site. If more than one item site share a ranking of 1, the sites will be sorted in alphabetical order. Item site rankings are set on the Item Site master.
Enter the quantity of the specified item being ordered. The quantity will be set to 1 by default.
The scheduled date is the date when the line item quantity should be shipped. The user who enters the line item is responsible for determining the scheduled date. After entering the scheduled date, hit the key on your keyboard to display values in the remaining display only fields.
Displays the unit price for the sales order item. By default, the system will choose the lower of the following two prices: A) The most-specific pricing schedule assignment or B) any sale in effect at the time of order entry. The specificity of pricing schedule assignments is determined in the following descending order: By customer ship-to address (most specific), by customer, by customer type, by customer type pattern, by all customers. The lookup feature located to the right of the field leads to a Price List screen.
Select to add another line item to the order.
To define or maintain relationships for quotes, select the tab. The following screen will appear:
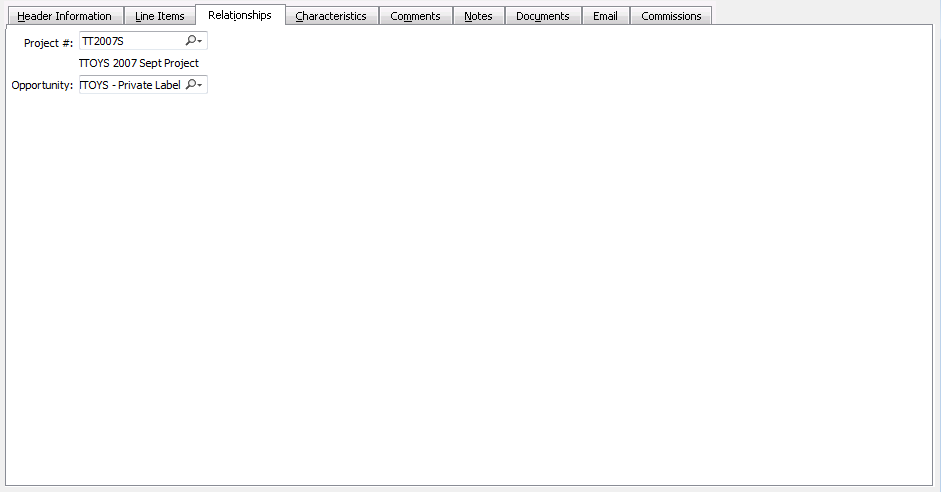
When defining relationships for quotes, you are presented with the following options:
If your site is configured to use projects, select a project number to associate with the quote. If a sales order is created from a converted quote—and the quote had a project number associated with it—then the project number from the originating quote will automatically be entered here. Once a project number is associated with a sales order, any work orders or purchase orders created by the sales order demand will automatically be linked to the same project number as the sales order. In this way, sales orders, work orders, and purchase orders may be linked to the same project.
If you have the xTuple Project Accounting package installed—and you link a project to the quote—transactions related to the sales order will include the project number as the final segment of affected G/L account numbers. Account numbers related to the following transactions will include the project number as the final segment: issue to shipping, return stock, ship shipment, recall shipment, and post invoice.
If your site is configured to create projects automatically whenever new sales orders or quotes are entered, the projects generated in this way will assume the number of the sales order or quote which caused their creation.
Select an opportunity to associate with the quote, using the lookup feature located to the right of the field.
Quote characteristics are user-defined definitions which may be used to provide additional layers of description about quotes. These descriptions are static and not processed by the system, but are useful for informational purposes. To enter characteristics associated with a quote, select the tab. The following screen will appear:
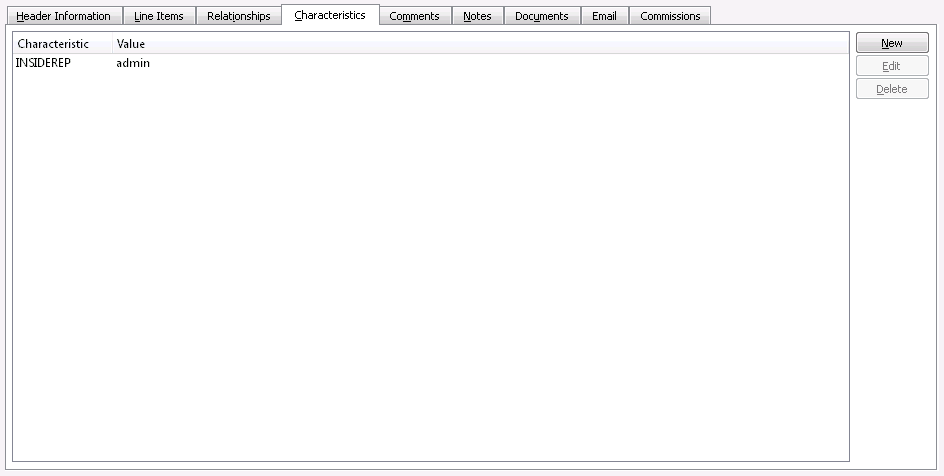
Characteristics tab
To create a new characteristic for your current context, select the button from the characteristics list. The following screen will appear:
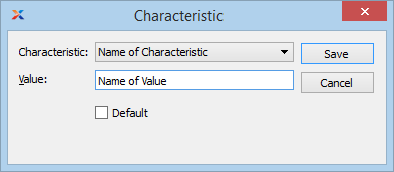
When creating a new characteristic, you are presented with the following options:
Select a characteristic from the list of characteristics available for your current context. To learn more about how characteristics are linked to specific contexts, please see Section 9.2.2.1, “Characteristic”.
Enter a value to associate with the characteristic.
In some contexts, the Default option will appear. Select if the value entered is the default value for the specified characteristic. Default values will always be listed first where characteristics are used.
To add comments related to a quote, select the tab. The following screen will appear:
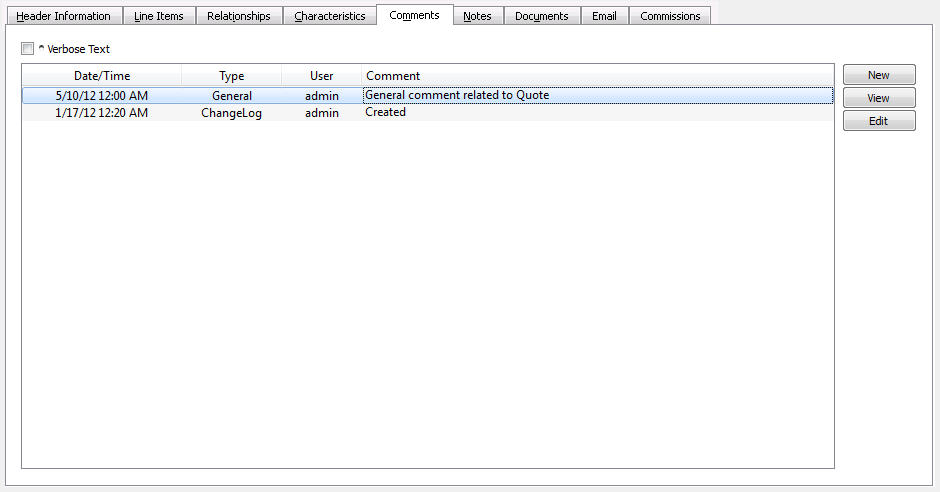
When adding or reviewing comments, you are presented with the following options:
Select to display all comments in the list in an expanded view which includes the entire text of each comment. To edit a comment, simply select the link next to the comment. That link will not be shown for changelog comments, which can't be edited. If the Verbose Text option is not selected, the comment list will display only header level information for each comment.
Display lists comments related to the record.
The following buttons are available:
Opens screen for creating a new comment.
Highlight a comment and then select this button to reach a read-only view of the Edit screen.
Enables you to edit highlighted comments—as long as the comments are not changelog comments. ChangeLog comments are system-generated and may not be edited. The Edit screen is the same as that for creating a new comment—except that when editing, the fields will contain comment information. Double-clicking on a comment will also bring you to the editing screen.
To enter a new comment, select the button. The following screen will appear:
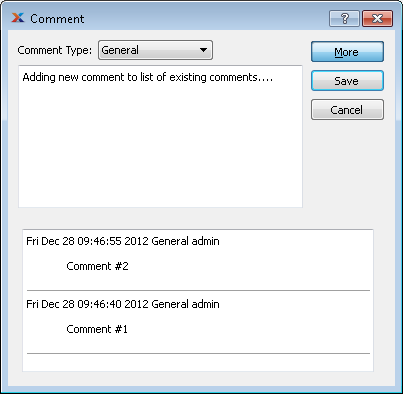
Select a comment type from the drop-down list to classify the comment. This is a required step. Comment types may be system-defined (i.e., changelog and general) or user-defined, as described in Section 13.2.3, “Comment Types”. Once you have specified a comment type, begin typing your comment in the main text area. The text area features word-wrapping and scroll-bar support for longer comments.
The following buttons are unique to this screen:
Select to show the complete list (i.e., thread) of comments associated with the record. To hide the list, simply select the button again. The comment thread will show the most recent comment first.
Order notes added to a quote are used for internal purposes only. To add order notes to a quote, select the tab at the top of the new Quote screen. The following screen will appear:
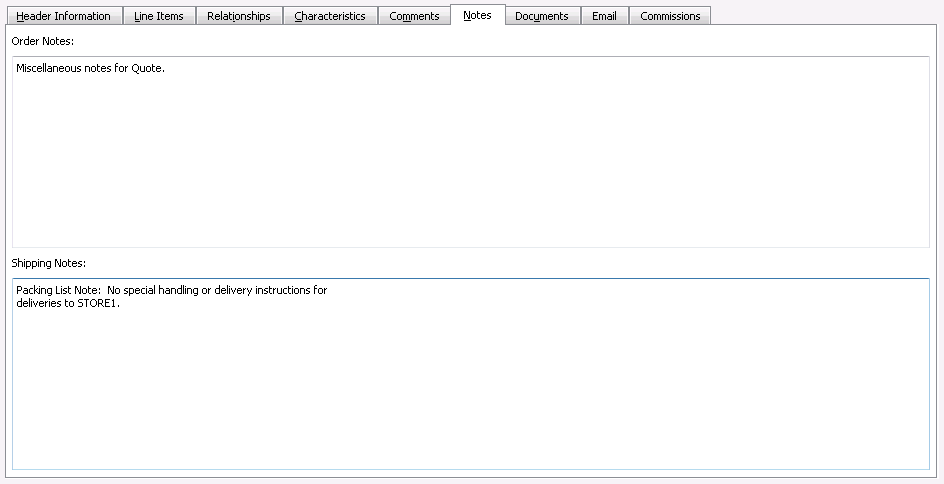
When adding order notes to a quote, you are presented with the following options:
This is a scrolling text field with word-wrapping for entering general notes related to the quote. These notes are for internal use only.
This is a scrolling text field with word-wrapping for entering shipping notes related to the quote. These notes are for internal use only. Shipping notes are drawn from the Customer master—specifically from the tab on the Ship-To Address master. The notes may vary depending on the ship-to address specified for the quote. These notes provide a mechanism for transferring shipping information from the Customer master to the quote.
To associate documents with a quote, select the tab. The following screen will appear
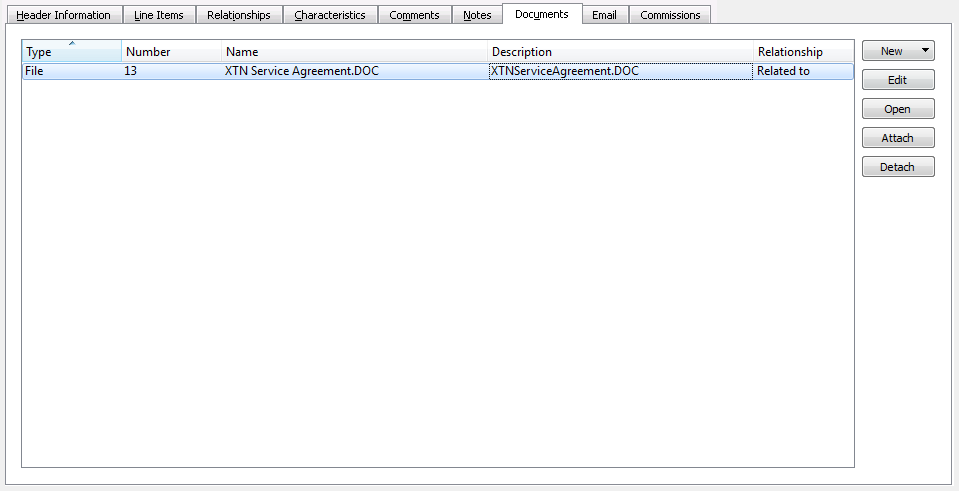
When associating documents, you are presented with the following options:
Select to create a new document and associate it with the current record. You may create the following document types:
Select to create a new image association.
Select to create a new fixed asset association.
Select to create a new maintenance order association.
Select to create a new incident and associate it.
Select to create a new project and associate it.
Select to create a new opportunity and associate it.
Select to create a new to-do and associate it.
Enables you to edit associated documents. The Edit screen is the same as that for creating a new document—except that when editing, the fields will contain document information. Double-clicking on a document will also bring you to the editing screen.
Highlight a document and then select this button to reach a read-only view of the Edit screen.
Select to associate already-existing documents. The following document types may be attached: contact, account, customer, employee, file, image, incident, item, opportunity, project, purchase order, sales order, vendor, web site, work order.
Highlight a document and then select this button to remove the association.
To associate already-existing documents, select the button. The following screen will appear:
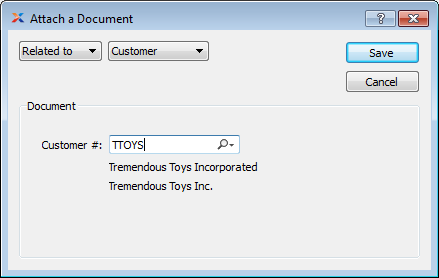
When associating already-existing documents, you are presented with the following options:
Indicate how the document is related to the current record. The following relationship options are available: related to, parent of, child of, duplicate of.
Specify the kind of document you want to associate. The following document types may be attached: contact, account, customer, employee, file, image, incident, item, opportunity, project, purchase order, sales order, vendor, web site, work order. When associating files, you will also be given the option to save the file to the database.
There is no file size restriction when saving files to the database. However, excessively large files could cause storage and performance issues.
Use the lookup tool to identify the specific document you want to attach. The data entry options will vary depending on the document type you select.
To view email associated with a quote, select the tab. The following screen will appear:
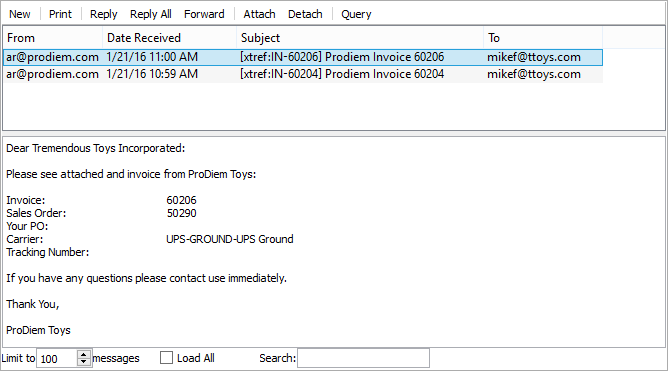
When viewing associated emails, you are presented with the following options:
Display lists associated emails.
The content of a highlighted email will be displayed here.
Specify the maximum number of associated emails you want to be displayed in the email list. If the list is extremely long, you may experience some slowness when opening the screen.
Select to load all associated emails into the list.
Enter a string of letters or complete words to search for matches in the list of associated emails. The search will scan through subject lines, To addresses, and From addresses.
The following buttons are unique to this screen:
Select to send a new email, using the default email program on your computer.
Highlight an email and then select this button to print a copy of the email.
Highlight an email and then select this button to reply to the email's sender, using the default email program on your computer.
Highlight an email and then select this button to reply to everyone associated with the email, using the default email program on your computer.
Highlight an email and then select this button to forward the email to another person(s), using the default email program on your computer.
Highlight an email and then select this button to attach an email associated with a contact in your contact list.
Highlight an email and then select this button to remove the associated email from the list.
| |  | |
| 1. Quote |  | 1.1.1. Quote Item |