
|
xTuple ERP Reference Guide |
|
|
xTuple ERP Reference Guide |
| 2.4. Receivables Workbench | ||
|---|---|---|
 | 2. Accounts Receivable |  |
The Receivable workbench is designed to consolidate on one screen the functions performed by accounts receivable personnel. To view the Receivables workbench, go to . The following screen will appear:
When viewing the Receivables workbench, you are presented with the following options:
Select all or specific customers whose receivables information you want to display.
To generate results in the display you first have to select the button. If you are not seeing any results, this is probably the reason why.
Select to include only invoices and debit memos in the display.
Select to include only credit memos in the display.
Select to include both debits and credits in the display.
Select to include unposted invoices in the display.
Enter the number of the document you want to locate. The record you are looking for will be highlighted in the display.
Specify one of the following document due date options:
Select to include all due dates in the display.
Select to include only documents having due dates on or before the date you specify.
Select to include documents having due dates falling between the dates you specify.
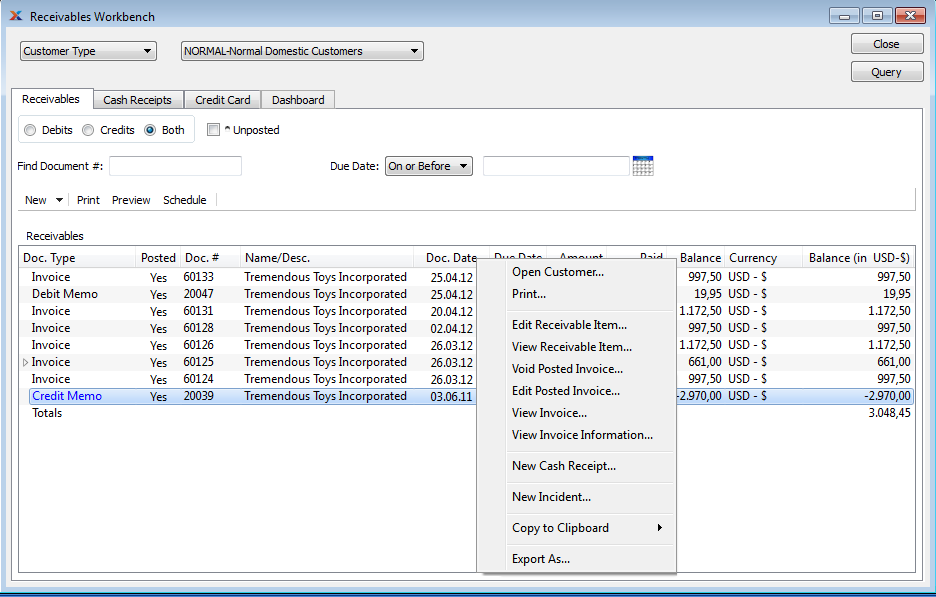
Displays the current list of receivable open items for the specified customer, based on the parameters you specify. Documents in the display may include invoices, debit memos, and credit memos. You can also void posted invoices and sales credits from the right-click menu—as long as they are unapplied. To un-apply documents, use the option on the Receivables Application screen. You can change the color for the following document types using the locale settings: customer deposit (alternate) and credit memo (emphasis).
You can refund credit card charges using the right-click menu. This option only works for credit memos specifically created from credit card transactions.
If you are using the Authorize.Net payment gateway, refunds must be processed at least one day after the original charge. Authorize.Net does not allow you to refund a transaction that was charged on the same day.
To manage cash receipts on the Receivables workbench, select the tab. The following screen will appear:
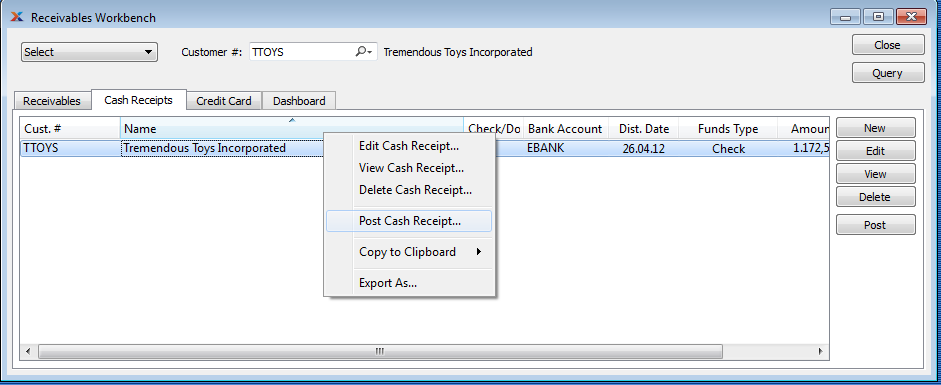
When managing cash receipts on the Receivables workbench, you are presented with the following options:
Displays the current list of unposted cash receipts for the specified customer.
Once a cash receipt is posted, it will no longer appear in the cash receipts list.
To process pre-authorized credit card payments on the Receivables workbench, select the tab. The following screen will appear:
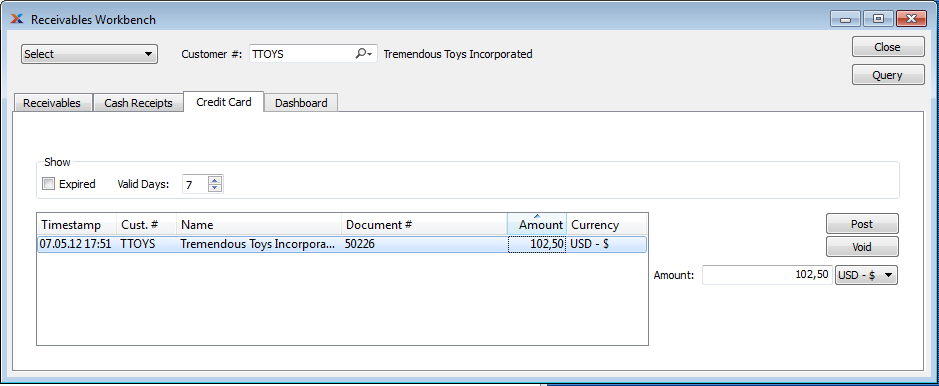
Select from the following options to include in the display:
Lists all credit cards, including expired cards.
Displays credit cards which expire on after the number of days selected.
Displays the current list of pre-authorized credit card charges for the specified customer. Pre-authorizations are generated from the tab of the sales order header.
The following buttons are unique to this screen:
Highlight a pre-authorized credit card charge amount and then select this button to authorize the charge. When a pre-authorization is authorized, a cash receipt in the authorized amount will be created, posted, and automatically applied to a credit memo or customer deposit (if customer deposits are enabled at your site).
You only get one chance to post a credit card pre-authorization. Once a pre-authorization is post-authorized, it will no longer appear in the Pre-authorized Credit Card Charges list.
Highlight a pre-authorized credit card charge amount and then select this button to void the pre-authorization.
Specify the amount of the post-authorization. By default, the pre-authorized amount will display here. However, you may override the default amount. After posting, a cash receipt for the customer will be generated in the amount entered here (i.e., the post-authorization amount).
To view the dashboard associated with your receivables, select the tab. The following screen will appear:
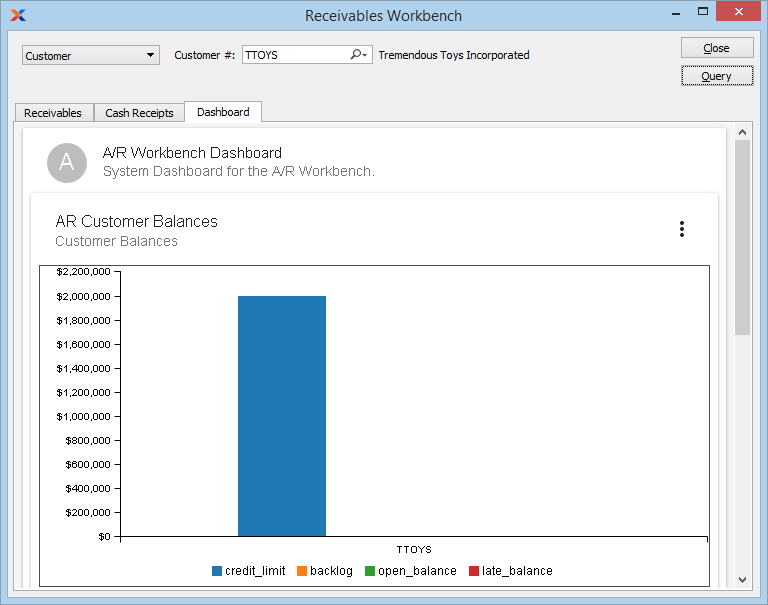
The Receivables dashboard includes the following pre-loaded dashboard panes, which you can either remove or supplement with additional panes at any time:
Displays the customer's receivable balances.
Displays customer sales by month.
Dashboard panes are used to contain charts, which are populated using datasources. To create a new dashboard pane, select the button located toward the bottom of the Dashboard window. The following screen will appear:
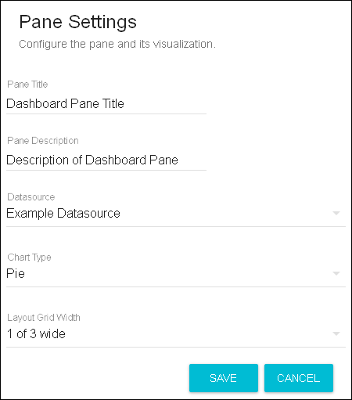
When creating a new dashboard pane, you are presented with the following options:
Enter a title to identify the pane.
Enter a brief description to describe the pane.
Specify which datasource you want to use as the source for the dashboard pane's chart. The dashboards package includes several stock datasources. You may also create custom datasources on your own. For more information, please see Section 13.1.9, “Datasources”.
Specify which chart type you want the dashboard pane to display. The chart type options will be limited to the types specified on the selected datasource definition.
Specify how many panes you want displayed in a row on the Dashboard screen, from as few as one to as many as three across. The layout grid width options will be limited to the layout options specified on the selected datasource definition.
| |  | |
| 2.3.3. Post Cash Receipts |  | 2.5. Forms |