
|
xTuple ERP Reference Guide |
|
|
xTuple ERP Reference Guide |
| 3.1.1. Simple Entry | ||
|---|---|---|
 | 3.1. Journal Entry |  |
To manually create a simple G/L journal entry, go to . The following screen will appear:
When creating a simple G/L journal entry, you are presented with the following options:
Specify the monetary value of the transaction.
Specify the date when you want the simple journal entry to be posted to the general ledger.
Displays the system-defined document type (i.e., JE) used to identify simple journal entries in the general ledger.
Specify a document number to be associated with the transaction.
Specify the debit account to be used for the transaction record.
Select a project to associate with the transaction. The project number will be added as the final segment of the G/L account number.
Specify the credit account to be used for the transaction record.
Select a project to associate with the transaction. The project number will be added as the final segment of the G/L account number.
Select to print a copy of the simple journal entry.
This is a scrolling text field with word-wrapping for entering notes related to the transaction. This may be a required field, depending on your system configuration.
Your system may be configured to require notes whenever manual journal entries are posted.
To add documents to the simple G/L journal entry select the Documents tab.
When associating documents, you are presented with the following options:
Select to create a new document and associate it with the current record. You may create the following document types:
Select to create a new image association.
Select to create a new fixed asset association.
Select to create a new maintenance order association.
Select to create a new incident and associate it.
Select to create a new project and associate it.
Select to create a new opportunity and associate it.
Select to create a new to-do and associate it.
Enables you to edit associated documents. The Edit screen is the same as that for creating a new document—except that when editing, the fields will contain document information. Double-clicking on a document will also bring you to the editing screen.
Highlight a document and then select this button to reach a read-only view of the Edit screen.
Select to associate already-existing documents. The following document types may be attached: contact, account, customer, employee, file, image, incident, item, opportunity, project, purchase order, sales order, vendor, web site, work order.
Highlight a document and then select this button to remove the association.
To associate already-existing documents, select the button. The following screen will appear:
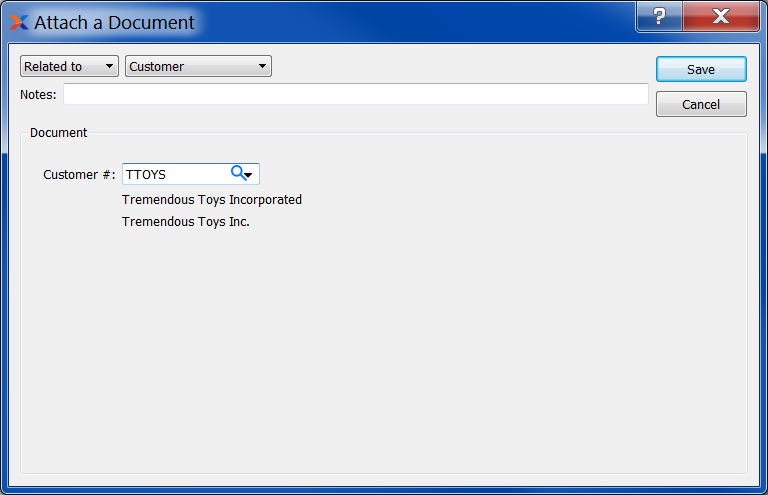
When associating already-existing documents, you are presented with the following options:
Indicate how the document is related to the current record. The following relationship options are available: related to, parent of, child of, duplicate of.
Specify the kind of document you want to associate. The following document types may be attached: contact, account, customer, employee, file, image, incident, item, opportunity, project, purchase order, sales order, vendor, web site, work order. When associating files, you will also be given the option to save the file to the database.
There is no file size restriction when saving files to the database. However, excessively large files could cause storage and performance issues.
Leave any notes on the document file as needed.
Use the lookup tool to identify the specific document you want to attach. The data entry options will vary depending on the document type you select.
| |  | |
| 3.1. Journal Entry |  | 3.1.2. Series G/L Journal Entry |