
|
xTuple ERP Reference Guide |
|
|
xTuple ERP Reference Guide |
| 2.6.3. Receivables Aging | ||
|---|---|---|
 | 2.6. Receivables Reports |  |
The receivables aging report gives you the ability to view open receivables in a bucketed, time-phased perspective. An open item is recognized by the receivables aging report as-of the item's document or distribution date, depending on your preference. In the case of invoices, the document date is the invoice date. The distribution date is the date the invoice shows up in the general ledger (G/L). For example, if you post an invoice on January 1, but the invoice date is February 15, then the as-of document date will be February 15. This means, if you run the receivables aging report with an as-of document date in January, the open item with an invoice date of February 15 will not appear in the report. In fact, it will not appear in the report until an as-of document date of February 15 or later is specified. Conversely, using the distribution date option, the invoice would appear as-of January 1.
You can view the document date for an open item by right-clicking on a line in the Receivables Aging display. You can also find open item details on other screens—for example, Receivables workbench, customer history, open items by customer, etc.
The grouping of open items into time-phased buckets is driven by a document's due date. In other words, if a due date falls within 0-30 days of the as-of date specified when the report is run, then the open item will appear in the first bucket. If the due date falls 31-60 days past the specified as-of date, then the open item will appear in the second bucket. And so on. But again, keep in mind that the document date for an open receivable (e.g., invoice date) must be on or before the specified as-of date for the item to be recognized by the report. To view open receivables from an aging perspective, go to . The following screen will appear:
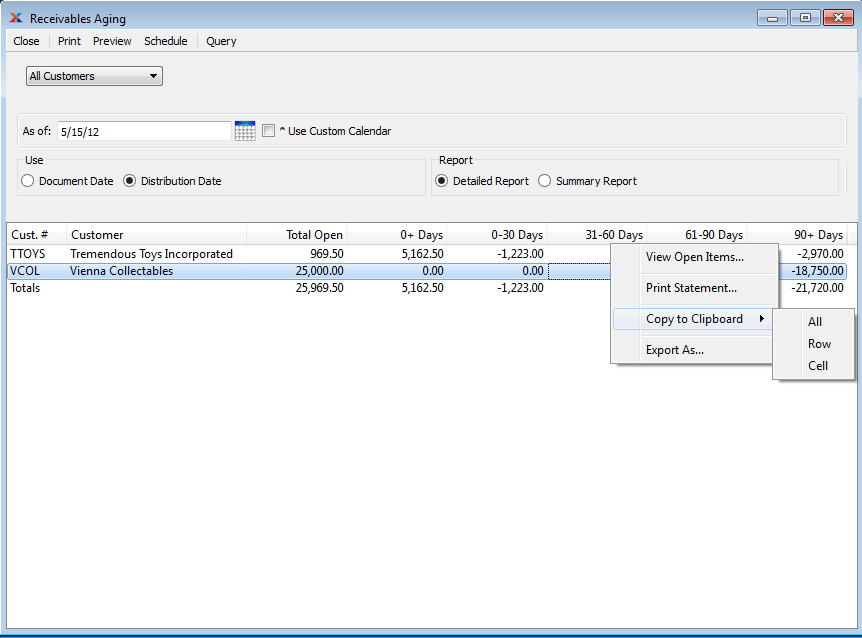
When displaying aging open receivables, you are presented with the following options:
Select all or specific customers whose receivables information you want to display.
Specify the date you want the open receivables to be relative to. The report will include any receivable items which were open—that is, not yet paid—as of the specified date. This feature provides point in time open balance functionality. But again, keep in mind that the document date for an open receivable (e.g., invoice date) must be on or before the specified as-of date for the item to be recognized by the report.
Select if you want to display open receivables using a custom calendar of your choosing.
If selected, the screen will present a series of different options, including the option to select a calendar and associated periods.
Specify the date preference you want to use:
Select to include open items as of their document date.
Select to include open items as of their document date.
Specify your preference for the printed report. This option impacts the printed report only and will not change the information displayed on the screen.
Select if you want to print a detailed aging report. This option will not change the screen display.
Select if you want to print a summarized aging report. This option will not change the screen display.
Display lists aging open receivables, using the specified parameters.
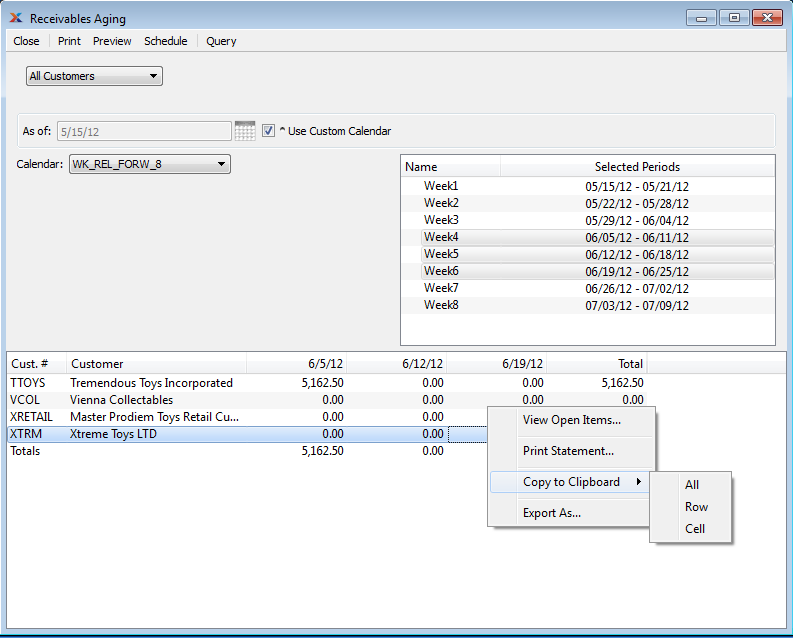
To view open receivables using a custom calendar, select the option above. The following screen will appear:
If a customer's open receivables balance exceeds their credit limit, the customer will automatically be placed on credit warning. In addition, any new or open sales orders for the customer will also be placed on credit hold.
When displaying open receivables using a custom calendar, you are presented with the following options:
Select the calendar you want to use for the report.
Associated calendar periods will be displayed.
Select as many periods as you want to display. Selected periods correspond to calendar specified in the Calendar field. Select individual periods or groups of periods together. To select an individual period, highlight the period using your mouse button. The period is now selected. To select a sequence of periods, highlight the first in the sequence using your mouse button. Then, holding down the key on your keyboard, highlight the last period in the sequence. The entire sequence is now selected. To select periods that are out of sequence (e.g., January, April, July, October), highlight the first period in the group. Then, holding down the key on your keyboard, highlight the next period you want to select. Continue highlighting periods with the key depressed until all desired periods are selected. The entire group is now selected.
Display lists time-phased open receivables, using the specified parameters.
| |  | |
| 2.6.2. Open Receivables |  | 2.6.4. Invoice Register |