
|
xTuple ERP Reference Guide |
|
|
xTuple ERP Reference Guide |
| 9.1. Enter New Prospect | ||
|---|---|---|
 | 9. Prospect |  |
Prospects are potential customer accounts. The system allows you to maintain information on prospects—and then, when the time is right, it enables you to convert prospect accounts to customer accounts.
To convert a prospect to a customer, simply select the button on the prospect's CRM account. This will prompt you to convert the prospect information—and also give you the chance to convert any existing prospect quotes to customer quotes.
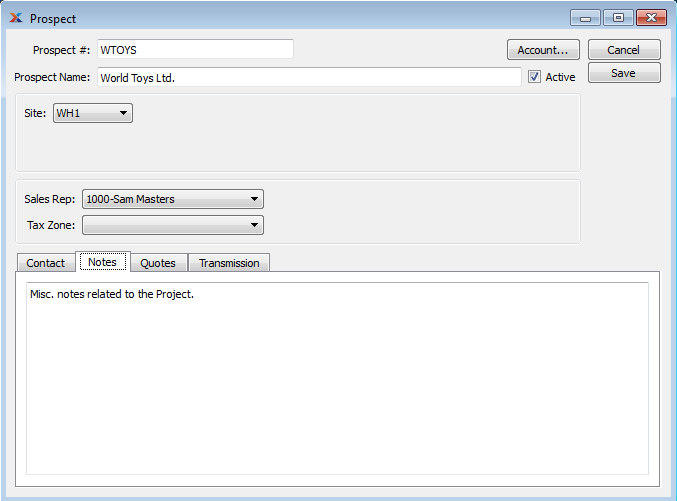
To create a new prospect, go to . The following screen will appear:

Create new Prospect
Prospects can also be created from the CRM Account screen. Simply enter a new CRM account, selecting the Prospect relationship option.
When creating a new prospect, you are presented with the following options:
Enter a code to identify the prospect.
Enter a name to describe the prospect.
Select to indicate the prospect is active. Not selecting this option means the prospect is inactive.
Specify the site the prospect is associated with.
Specify the sales representative associated with the prospect.
Specify the tax zone you want to associate with the prospect.
Manually enter contact information in the fields below—or use the lookup feature to select pre-existing contact information.
The following buttons are unique to this screen:
Select to open the prospect's account.
To add notes related to a prospect, select the tab. The following screen will appear:
The system allows you to enter quotes for prospects. To view the list of existing prospect quotes—or to enter a new quote for a prospect—select the tab at the bottom of the Prospect screen. The following screen will appear:
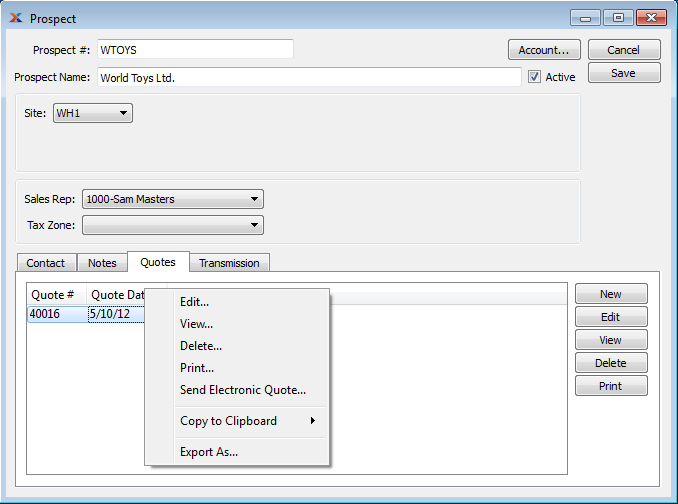
The Quotes screen displays information on all existing prospect quotes, including quote number and quote date.
If the prospect specified on the quote has an EDI profile attached or has an email address for the contact, you may encounter an EDI processing interface when printing the quote.
The electronic data interchange (EDI) system enables you to send quotes electronically to your prospects. To establish a prospect's EDI preferences, select the tab. The following screen will appear:
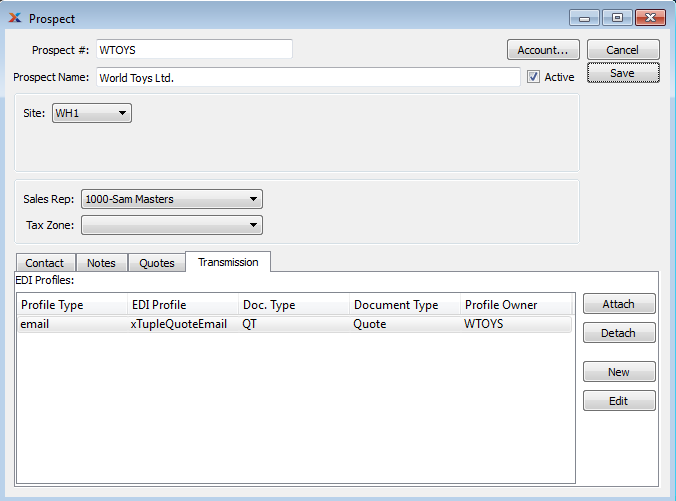
Transmission information for EDI
If you do not set EDI preferences for a prospect but do enter an email address for the contact, you may see an EDI processing interface when you print quotes for the prospect.
When associating EDI profiles with EDI recipients, such as customers, ship-to addresses, and vendors, you are presented with the following options:
Display lists EDI profiles associated with this recipient (e.g., current customer) for a particular document type. It also shows whether EDI will be sent via email or FTP.
The following buttons are unique to this screen:
Connect an existing EDI profile to this EDI recipient for a particular document type.
Detach the selected EDI profile from the recipient for the selected document type.
Selecting the button will open the EDI profile so you can change it. All EDI recipients who share this EDI profile will be affected by changes.
To attach an existing EDI profile to the current recipient, select the button. The following screen will appear:
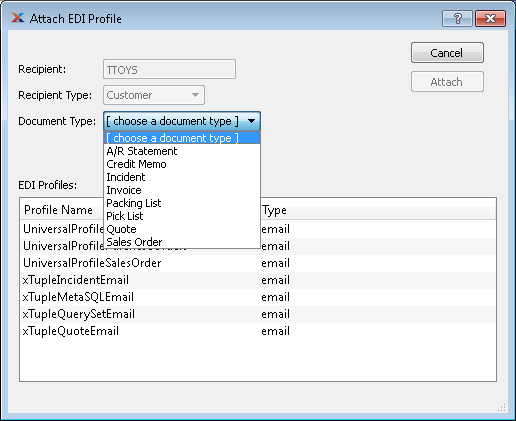
This screen lets you attach an existing EDI profile to the currently selected recipient for a particular document type. This tells xTuple Connect which documents should be sent by EDI and the EDI profile to use when sending documents of that type to a particular recipient. The recipient and recipient type are displayed for your information while attaching the EDI profile.
This shows the number of the customer, vendor, etc. which will receive EDI using the selected EDI profile.
This shows whether the recipient is a customer, vendor, etc. This reduces confusion in cases where a customer and vendor have the same number (i.e., the same CRM account is both a customer and vendor).
Choose from this list the type of document you want to use the EDI profile for. The list of available document types changes depending on the recipient type. For example, if the recipient type is vendor, the document type list will not contain "Sales Order."
The list of EDI profiles shows only those EDI profiles that have an EDI form for the currently selected document type by default. If this box is checked, all EDI profiles will be listed. You may attach an EDI profile without an appropriate EDI form but it will not be used until the right EDI form is added to the EDI profile.
Choose from this list the EDI profile you want to attach for the selected document type.
The following buttons are unique to this screen:
Attaches the EDI profile to the recipient and closes the screen, returning you to the previous screen.
If there is no existing EDI profile that suits your needs, you can create a new one by selecting the button. This does the same thing as clicking the button on the EDI Profiles window (see Section 13.2.8, “EDI Profiles”). After you have created the new EDI profile and saved it, the Attach EDI Profile window will appear with the new EDI profile selected. Now you can select the document type and click . If you click , the new EDI profile will still be saved but will not be attached to the recipient.
| |  | |
| 9. Prospect |  | 9.2. List Prospects |