
|
xTuple ERP Reference Guide |
|
|
xTuple ERP Reference Guide |
| 3.2.1. New Sales Credit | ||
|---|---|---|
 | 3.2. Sales Credit |  |
To create a sales credit, go to . The following screen will appear:
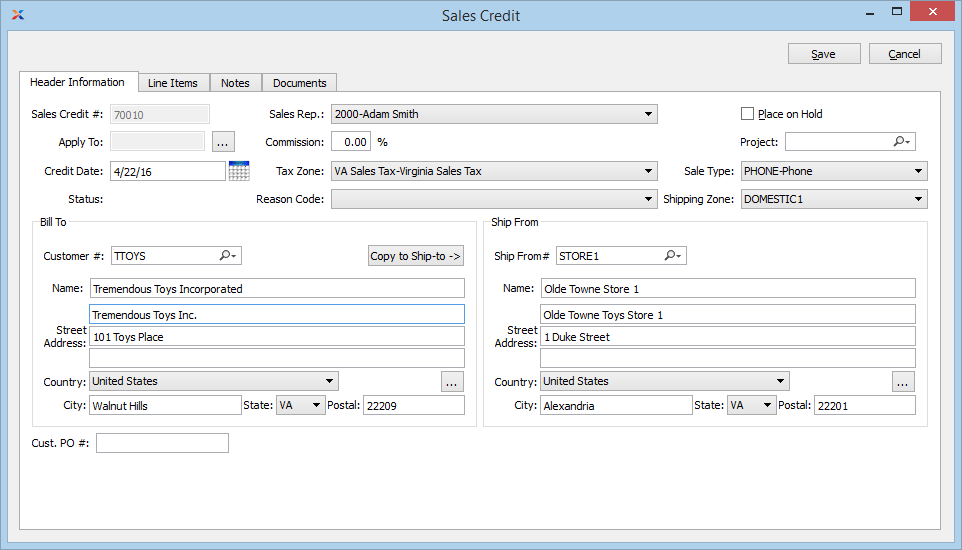
Next available sales credit number will automatically display, unless your system requires you to enter sales credit numbers manually.
Default values and input parameters for sales credit numbers are configurable at the system level.
Specify the invoice number of the invoice you want to apply the sales credit to, using the lookup feature located to the right of the field. The list will include invoices for the specified customer. If a sales credit is applied to a specific invoice, the sales credit may only credit items which appeared on the chosen invoice. If for some reason the sales credit is applied to a closed invoice, the sales credit will be listed as an unapplied sales credit.
Enter a date representing the date when you want the sales credit to be distributed. When a sales credit is posted, it is posted effective as of the credit date.
You are not required to apply a sales credit to a specific invoice. If a sales credit is applied to an invoice, any sales credit items will be sales credited to inventory when the sales credit is posted.
Indicates whether sales credit is posted or unposted.
The quickest way to fill in the Sales Credit screen may be to select the invoice you intend to credit using the Apply To feature. If you use this feature, most of the fields in the Sales Credit screen will automatically populate with the needed customer information.
Specify the sales representative associated with the order. By default, the customer's designated sales representative will appear in the field—except if you have selected an invoice to apply the sales credit to. In that case, the sales representative credited with the invoice will be selected.
By default, the commission percentage recorded on the Customer master will be automatically entered in this field. If for some reason you select a non-default sales representative at sales credit entry, the commission rate will not change. To adjust the commission rate, you must make the change manually.
Specify the tax zone associated with the sales credit. The tax zone for the specified ship-to address will be entered here by default. Otherwise, the primary tax zone for the customer will be entered.
Specify the reason why an adjustment is being made to a customer's account.
Select to place sales credit on hold. If a sales credit is placed on hold, it cannot be posted. You would place a sales credit on hold, for example, to allow time for producing and processing a return material authorization (RMA) document. To remove a hold and allow posting of a sales credit, de-select this option.
If your system is configured to use projects, select a project number to associate with the sales credit.
When you have the xTuple Project Accounting package installed—and you link a project to the sales credit—the project number will be added as the final segment of affected G/L account numbers when the sales credit is posted.
Specify the sale type.
Specify the shipping zone.
Enter the customer number of the customer you want to issue the sales credit to. The lookup feature located to the right of the field leads to a searchable customers list. You may also access this list using the keyboard shortcut . Once a customer number is entered, the customer name and billing address will display. Select the or symbol to view customer information for the specified customer. If a customer's credit is good, the button will feature a black question mark () icon. If the customer is on credit warning, the icon will turn into an orange dollar sign (). A red dollar sign () indicates the customer is on credit hold.
Sales credits may be entered for inactive customers. The same does not hold true for sales orders.
Displays the customer's bill-to name.
Displays the customer's bill-to address. You may manually override the displayed address information in the fields below—or use the lookup feature to select another address. If a new address is manually entered here, that address will be added automatically to the master list of addresses. For additional documentation related to creating addresses, see Section 8.1, “ New Address”.
A sales credit that is applied to an invoice will by default have the address that appeared on the invoice.
Select to copy contents of billing address into Ship-to Address field. This option is enabled if the Customer master for the specified customer indicates that free-form ship-tos are allowed.
Enter the number of the preferred ship-to address. Customers may maintain multiple ship-to addresses. If the Customer master for the specified customer indicates that free-form ship-tos are allowed, then any address may be entered. If free-form ship-tos are not allowed, then the ship-to address must be entered using the button located to the right of the field. The lookup feature leads to a searchable ship-to addresses list.
Make sure the ship-to address on the sales credit matches the ship-to address on the customer's pricing schedule. If they don't match, you won't be able to issue credit for exclusively sold items.
Displays the name for the specified ship-to.
Displays the specified ship-to address. You may manually override the displayed address information in the fields below—or use the lookup feature to select another address. If a new address is manually entered here, that address will be added automatically to the master list of addresses. For additional documentation related to creating addresses, see Section 8.1, “ New Address”.
By default, the customer purchase order number associated with the invoice being credited will display here. If no customer purchase order number was entered at the time of the original sales order—or if the sales credit is not being applied to a specific invoice—the field will remain blank. Enter or edit a customer purchase order number as necessary.
To create or modify sales credit line items, select the tab at the top of the Sales Credit screen. The following screen will appear:
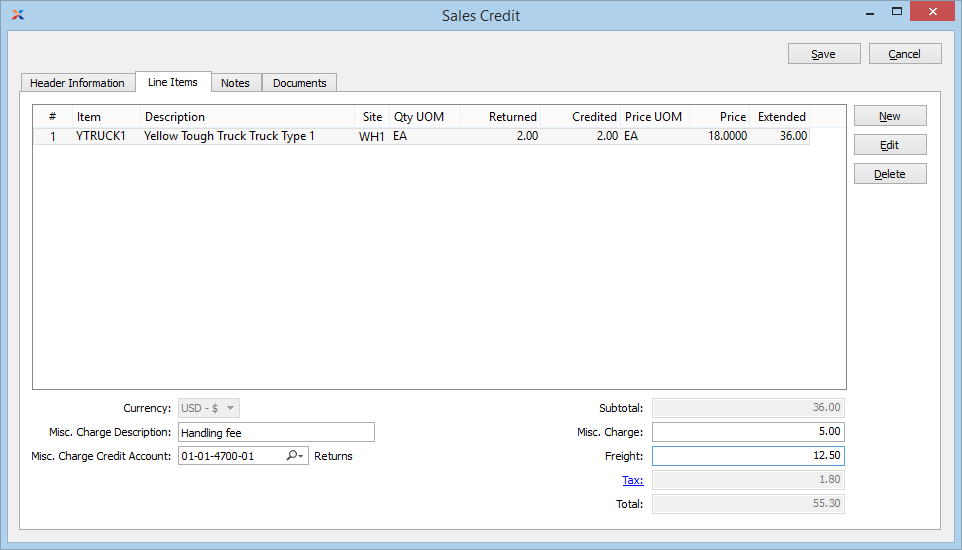
When creating or modifying sales credit line items, you are presented with the following options:
Display lists sales order line item quantities that have been returned and selected for credit. Line items are added to a sales credit using the button.
Before creating a new sales credit line item, be sure to specify an invoice to apply the sales credit to. The Apply To feature is found on the Sales Credit header screen.
Displays the subtotal for the sales credit line items.
Enter the amount of the miscellaneous charge. Before entering a miscellaneous charge amount, you must first assign the charge to a sales account and also enter a description of the charge.
Enter a description to identify the miscellaneous charge.
Enter a credit account to assign the miscellaneous charge to.
Enter the amount of freight charge to be added to the specified order. The freight charge may be entered during the creation or modification of a sales credit—or at the time of shipment.
Displays the total amount of tax to be charged on the sales credit. Sales tax is calculated at the sales credit line item level. The tax amount displayed here represents the total for all line item tax amounts. To get a detailed view of the tax calculation, click on the link using your mouse.
Displays the total amount of the sales credit.
To add notes to a sales credit, select the tab at the top of the Sales Credit screen. The following screen will appear:
When adding notes to a sales credit, you are presented with the following options:
This is a scrolling text field with word-wrapping for entering notes related to the sales credit. Notes entered on this screen will follow the sales credit through the billing process. For example, you may view notes associated with a posted sales credit within the Customer History report.
To associate documents with a sales credit, select the tab. The following screen will appear:
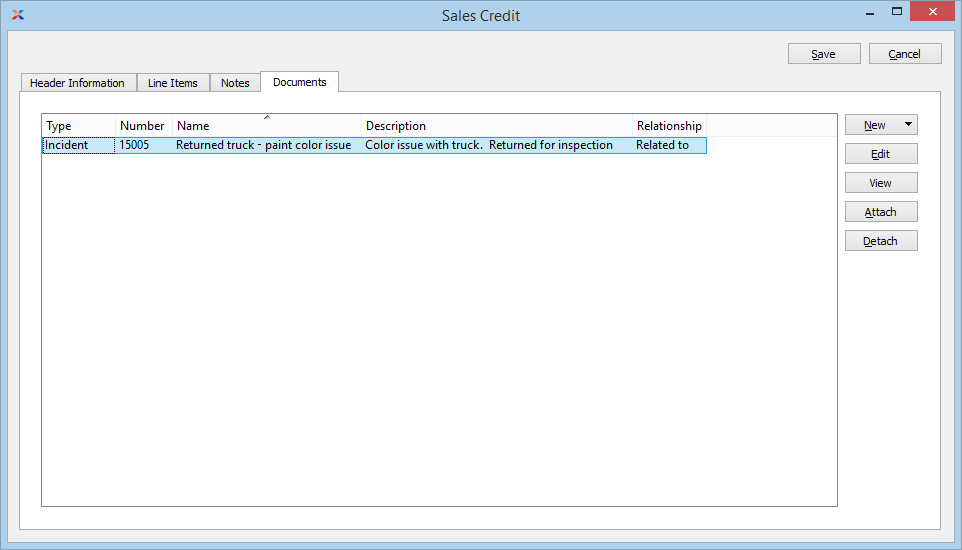
When associating documents, you are presented with the following options:
Select to create a new document and associate it with the current record. You may create the following document types:
Select to create a new image association.
Select to create a new fixed asset association.
Select to create a new maintenance order association.
Select to create a new incident and associate it.
Select to create a new project and associate it.
Select to create a new opportunity and associate it.
Select to create a new to-do and associate it.
Enables you to edit associated documents. The Edit screen is the same as that for creating a new document—except that when editing, the fields will contain document information. Double-clicking on a document will also bring you to the editing screen.
Highlight a document and then select this button to reach a read-only view of the Edit screen.
Select to associate already-existing documents. The following document types may be attached: contact, account, customer, employee, file, image, incident, item, opportunity, project, purchase order, sales order, vendor, web site, work order.
Highlight a document and then select this button to remove the association.
To associate already-existing documents, select the button. The following screen will appear:
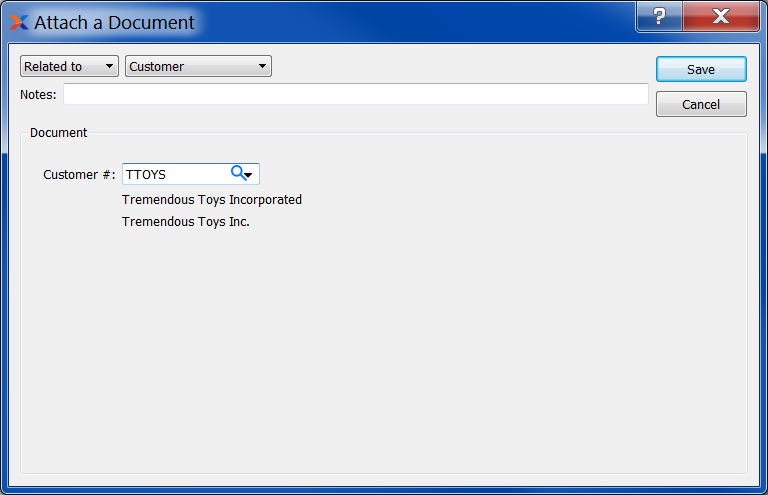
When associating already-existing documents, you are presented with the following options:
Indicate how the document is related to the current record. The following relationship options are available: related to, parent of, child of, duplicate of.
Specify the kind of document you want to associate. The following document types may be attached: contact, account, customer, employee, file, image, incident, item, opportunity, project, purchase order, sales order, vendor, web site, work order. When associating files, you will also be given the option to save the file to the database.
There is no file size restriction when saving files to the database. However, excessively large files could cause storage and performance issues.
Leave any notes on the document file as needed.
Use the lookup tool to identify the specific document you want to attach. The data entry options will vary depending on the document type you select.
To create a new sales credit line item, select the button. The following screen will appear:
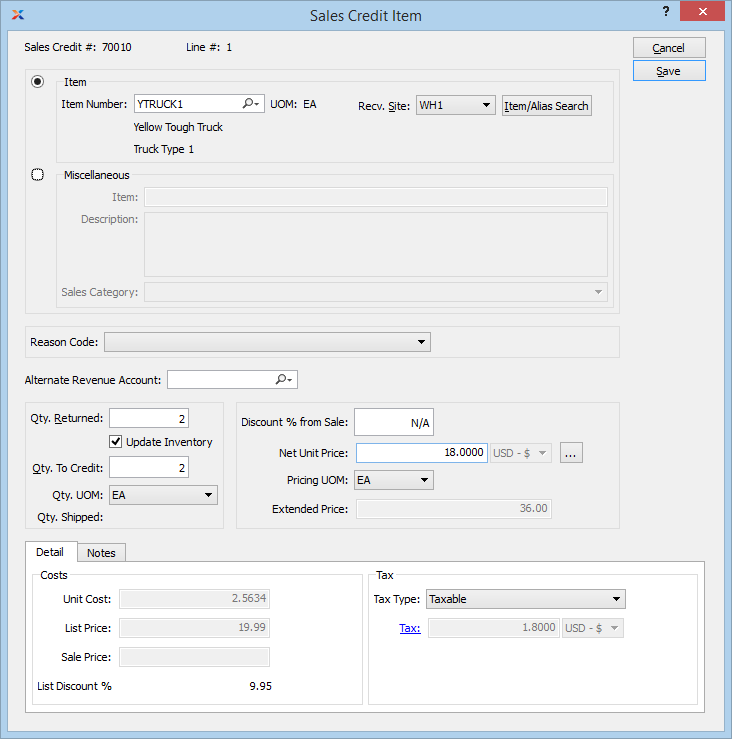
When creating a new sales credit line item, you are presented with the following options:
Displays the sales credit number for the current sales credit.
Displays the line number assigned to the sales credit item.
Indicate the item type for the sales credit line item, by selecting one of the following options:
The lookup feature located to the right of the field leads to a searchable list of inventory items. If the sales credit is being applied to a particular invoice—and your module is configured to restrict sales credits to items appearing on their apply-to document—then the item list will show only items on the original invoice. The button can also be used to help locate sales credit items. Once an item number is entered, the inventory unit of measure and item description will automatically appear. Additionally, you may also specify the item's receiving site. Commercial editions of xTuple allow items to be received into multiple sites.
Enter a name and description for the miscellaneous, non-inventory item you are billing the customer for. The Name and Description fields are free-form, meaning they accept unlimited alphanumeric characters. You must also select a sales category. Sales categories are used to identify the general ledger (G/L) accounts to be used when non-inventory sales transactions take place.
Specify the reason why an adjustment is being made to a customer's account.
By default, the reason code on the sales credit header will be used at the line item level. However, you may change the reason code for individual line items.
Specify an alternate account to be used as the revenue account. This account will be used instead of the typical accounts pre-defined in the receivables assignments. For example, you might use this alternate account in the scenario where you are doing business with customers who are part of the same buyer's group (i.e., customer Group).
Enter the quantity of the item returned for credit. If the sales credit was created from a return authorization, the quantity returned will be zero on the Sales Credit Item screen. Return authorization returns are handled separately, outside of the normal sales credit inventory handling process.
Select if you want the quantity returned to be added back into inventory when you post the sales credit. If not selected, your inventory will not be updated.
Enter the quantity of the item you plan to give the customer credit for. The quantity entered here may equal the quantity returned. However, you have the flexibility to credit the customer for a quantity different from the returned quantity. The quantity credited is multiplied by the net unit price to determine the amount of the credit.
The unit of measure being returned and credited in. You may also select a global conversion ratio here. Global conversions have the label Global appended to them.
Displays the quantity of the item shipped to date.
Specify a percentage to reduce the credited amount by. The discount will be deducted from the sale price, thereby reducing the amount of the credit by the specified percentage.
Specify the net unit price to assign the quantity being credited. If the sales credit is being applied to a specific invoice, then the system will automatically enter the item's net unit price as it appeared on the referring invoice. If no invoice is being applied-to, then the system will choose the lower of the following two prices: A) The most-specific pricing schedule assignment or B) any sale in effect at the time of order entry. The specificity of pricing schedule assignments is determined in the following descending order: by customer ship-to address (most specific), by customer, by customer type, by customer type pattern, by all customers. The lookup feature located to the right of the field leads to a Price List screen.
If your pricing schedule has multiple units of measure (UOM) on it (or if several pricing schedules share the same level of price specificity, but they have different UOMs) then the UOM which matches the selected UOM will be chosen—that is, as long as the quantity break does not exceed the quantity being priced. If no entry matches the UOM with a quantity break less than the quantity being priced, then the lowest value price for any UOM will be chosen. To make sure a specific UOM is always chosen at the desired level of price specificity, then your pricing schedules should include at least one UOM with a quantity break of 0.
The system can be configured to prevent users from editing the net unit price. If your system is configured that way, the Net Unit Price field will not be editable.
Displays the item's price UOM. You may also select a global conversion ratio here. Global conversions have the label Global appended to them.
Displays the extended price. The extended price for a sales credit item is based on the quantity credited multiplied by the price.
Displays the standard cost per unit.
Displays the item's list price per unit displays.
Displays the sold price for the item at the time of sale.
The default customer discount (if any) will display here. Default customer discount percentages are defined in the Customer master.
Specify the tax type for the sales credit item.
Displays the amount of tax to be charged for the sales credit line item quantity. To get a detailed view of the tax calculation, click on the link using your mouse.
Click on the tab to enter notes and you will be presented with the following screen:
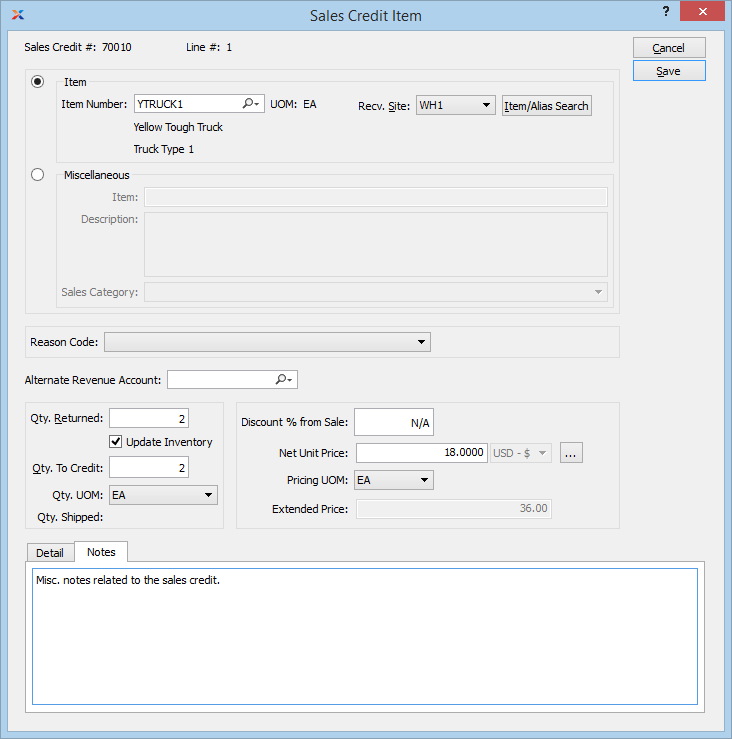
This is a scrolling text field with word-wrapping for entering notes related to the sales credit item.
| |  | |
| 3.2. Sales Credit |  | 3.2.2. List Unposted Sales Credits |