
|
xTuple ERP Reference Guide |
|
|
xTuple ERP Reference Guide |
| 10.1. Enter New Customer | ||
|---|---|---|
 | 10. Customer |  |
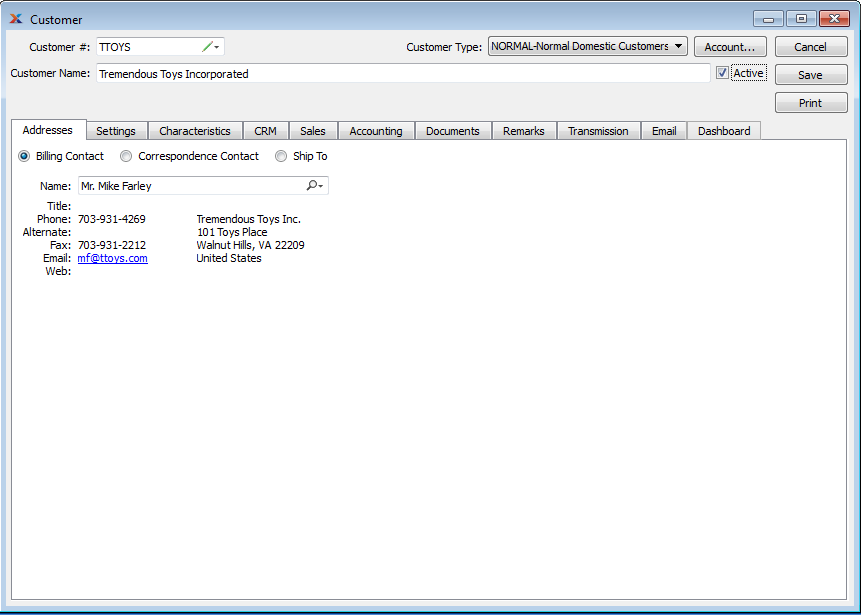
Maintaining detailed customer information is essential to ensuring a successful customer relationship. To enter a new customer into the system, go to . The following screen will appear:
Customers can also be created from the CRM Account screen. Simply enter a new CRM account, selecting the relationship option.
When creating a new customer, you are presented with the following options:
The customer number uniquely identifies the customer. To search for an existing customer, use the lookup feature located next to the Customer field. Use the button to add a new customer. And use the button if you want to edit the customer number. If the button is not selected, you will be prevented from editing the customer number.
Enter the name of the customer or company you are doing business with. This field should not to be confused with the contact name of an individual at the company.
Specify the customer type the customer belongs to.
Select if you are actively doing business with this customer. Not selecting makes the customer inactive.
The following buttons are unique to this screen:
Select to open the customer's account.
To enter contact information for the customer, select the tab and choose from the following options:
Select to manually enter billing contact information in the fields below—or use the lookup feature to select pre-existing contact information. If a new contact is manually entered here, that contact will be added automatically to the master list of contacts. For additional documentation related to creating contacts, see Section 7.1, “New Contact”.
Select to manually enter non-billing-related contact information in the fields below—or use the lookup feature to select pre-existing contact information. Examples of non-billing-related correspondence might include price updates, holiday cards, etc. You may also enter additional contact information. If a new contact is manually entered here, that contact will be added automatically to the master list of contacts. For additional documentation related to creating contacts, see Section 7.1, “New Contact”.
Select to display ship-to addresses for the specified customer. Every customer can have multiple ship-to addresses, one for each of the destinations you ship goods to. Ship-to addresses are specified at the point of sales order entry.
To create a new ship-to address for a customer, select the button. The following screen will appear:
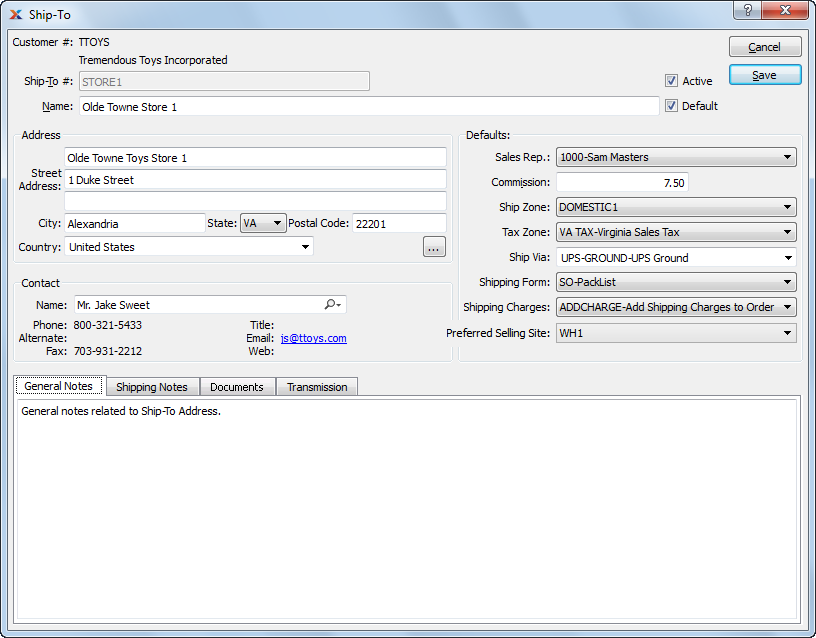
The Ship-To Address screen shares many common fields with the Customer master—for example, shipping defaults, sales representative, etc. By default, the Customer master values will be pre-filled on the Ship-To Address screen. However, you can easily change these customer defaults for each ship-to address. The specific ship-to address information will be used when the ship-to address is selected at the point of sales order entry.
When creating a new ship-to address, you are presented with the following options:
Displays the customer number and customer name.
Specify a number or code to identify the ship-to address.
Enter the name of the company that will receive shipments at this ship-to address. Customers may maintain multiple ship-to addresses with diverse destinations.
Select to activate the ship-to address. If this option is not selected, then the ship-to address will be inactive.
Select if this is the default ship-to address for the customer.
Manually enter delivery address information in the fields below—or use the lookup feature to select pre-existing address information. If a new address is manually entered here, that address will be added automatically to the master list of addresses. For additional documentation related to creating addresses, see Section 8.1, “ New Address”.
Manually enter delivery contact information in the fields below—or use the lookup feature to select pre-existing contact information. This field should not to be confused with the Name field that appears on the ship-to address label. If a new contact is manually entered here, that contact will be added automatically to the master list of contacts. For additional documentation related to creating contacts, see Section 7.1, “New Contact”.
Specify the following ship-to address defaults:
Specify the sales rep for the ship-to address. This is the sales rep that will be used whenever an order specifies this ship-to address.
When you first associate a sales rep with a customer—or with a ship-to address—the system will copy in the commission from the sales rep record as a convenience. This commission may be changed locally at the customer record level, but any changes will not be inherited by the sales rep record. Similarly, if you update the commission percentage on a sales rep record, that update will not recursively update all the commission records wherever that sales rep is used.
Specify the shipping zone for the ship-to address.
Specify tax zone to be used for ship-to address.
Specify the default ship via to be used for the ship-to address. You may enter a free-form ship via simply by typing the name of the ship via into the field.
The system supports up-to-date shipment tracking with links to the websites of many leading shipping companies (i.e., ship vias).
Specify the default shipping form to be used for the ship-to address. This field is optional.
Specify the default shipping charges to be used for the ship-to address.
Specify the preferred selling site for the ship-to address. Choose the most appropriate sold-from site to use when shipping to this ship-to address.
Select the tab to access this scrolling text field with word-wrapping for entering general notes related to the customer ship-to address. These notes are for internal use only.
Select the tab to access this scrolling text field with word-wrapping for entering shipping notes related to the customer ship-to address. Shipping notes are transferred to the tab on the sales order header whenever a sales order for the specified ship-to address is entered. Ultimately, shipping notes may be printed on shipping paperwork.
To associate documents with a ship-to address, select the tab.
When associating documents, you are presented with the following options:
Select to create a new document and associate it with the current record. You may create the following document types:
Select to create a new image association.
Select to create a new fixed asset association.
Select to create a new maintenance order association.
Select to create a new incident and associate it.
Select to create a new project and associate it.
Select to create a new opportunity and associate it.
Select to create a new to-do and associate it.
Enables you to edit associated documents. The Edit screen is the same as that for creating a new document—except that when editing, the fields will contain document information. Double-clicking on a document will also bring you to the editing screen.
Highlight a document and then select this button to reach a read-only view of the Edit screen.
Select to associate already-existing documents. The following document types may be attached: contact, account, customer, employee, file, image, incident, item, opportunity, project, purchase order, sales order, vendor, web site, work order.
Highlight a document and then select this button to remove the association.
To associate already-existing documents, select the button. The following screen will appear:
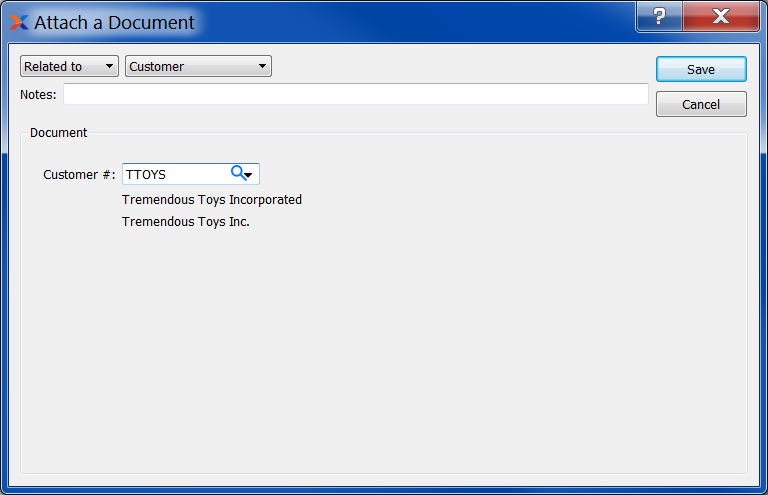
When associating already-existing documents, you are presented with the following options:
Indicate how the document is related to the current record. The following relationship options are available: related to, parent of, child of, duplicate of.
Specify the kind of document you want to associate. The following document types may be attached: contact, account, customer, employee, file, image, incident, item, opportunity, project, purchase order, sales order, vendor, web site, work order. When associating files, you will also be given the option to save the file to the database.
There is no file size restriction when saving files to the database. However, excessively large files could cause storage and performance issues.
Leave any notes on the document file as needed.
Use the lookup tool to identify the specific document you want to attach. The data entry options will vary depending on the document type you select.
Select the tab to associate EDI profiles with the ship-to address. EDI profiles are used for transmitting orders and invoices to customers electronically—via email or FTP. Associating an EDI profile with a ship-to address overrides the association of an EDI profile with the customer.
The buttons on the tab are disabled when creating a new ship-to address. If you want to set up EDI for a new ship-to address, save the ship-to address and edit it again.
When associating EDI profiles with EDI recipients, such as customers, ship-to addresses, and vendors, you are presented with the following options:
Display lists EDI profiles associated with this recipient (e.g., current customer) for a particular document type. It also shows whether EDI will be sent via email or FTP.
The following buttons are unique to this screen:
Connect an existing EDI profile to this EDI recipient for a particular document type.
Detach the selected EDI profile from the recipient for the selected document type.
Selecting the button will open the EDI profile so you can change it. All EDI recipients who share this EDI profile will be affected by changes.
To attach an existing EDI profile to the current recipient, select the button. The following screen will appear:
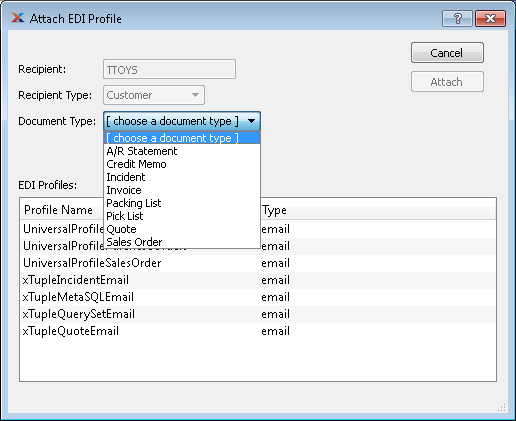
This screen lets you attach an existing EDI profile to the currently selected recipient for a particular document type. This tells xTuple Connect which documents should be sent by EDI and the EDI profile to use when sending documents of that type to a particular recipient. The recipient and recipient type are displayed for your information while attaching the EDI profile.
This shows the number of the customer, vendor, etc. which will receive EDI using the selected EDI profile.
This shows whether the recipient is a customer, vendor, etc. This reduces confusion in cases where a customer and vendor have the same number (i.e., the same CRM account is both a customer and vendor).
Choose from this list the type of document you want to use the EDI profile for. The list of available document types changes depending on the recipient type. For example, if the recipient type is vendor, the document type list will not contain "Sales Order."
The list of EDI profiles shows only those EDI profiles that have an EDI form for the currently selected document type by default. If this box is checked, all EDI profiles will be listed. You may attach an EDI profile without an appropriate EDI form but it will not be used until the right EDI form is added to the EDI profile.
Choose from this list the EDI profile you want to attach for the selected document type.
The following buttons are unique to this screen:
Attaches the EDI profile to the recipient and closes the screen, returning you to the previous screen.
If there is no existing EDI profile that suits your needs, you can create a new one by selecting the button. This does the same thing as clicking the button on the EDI Profiles window (see Section 13.2.8, “EDI Profiles”). After you have created the new EDI profile and saved it, the Attach EDI Profile window will appear with the new EDI profile selected. Now you can select the document type and click . If you click , the new EDI profile will still be saved but will not be attached to the recipient.
To define some of the basic customer settings, select the tab. The following screen will appear:
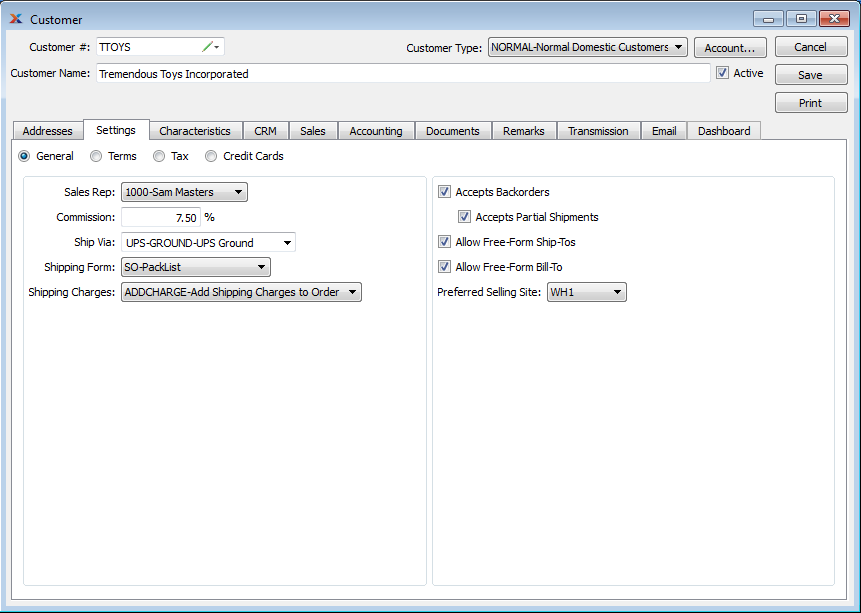
When defining basic customer settings, you are presented with the following options:
Select to specify the default preferences for the customer.
Select to specify credit-related information for the customer.
Select to specify the default tax information for the customer.
Select to enter credit card information for the customer. This option will only be enabled if your site is configured to use and process customer credit cards.
The following options are available when you select the General option:
Specify a default sales representative for the customer. This sales rep will be used for customer orders, unless a particular ship-to address for the customer specifies a different sales rep.
When you first associate a sales rep with a customer—or with a ship-to address—the system will copy in the commission from the sales rep record as a convenience. This commission may be changed locally at the customer record level, but any changes will not be inherited by the sales rep record. Similarly, if you update the commission percentage on a sales rep record, that update will not recursively update all the commission records wherever that sales rep is used.
Specify the default ship via to be used for the customer. You may enter a free-form ship via simply by typing the name of the ship via into the field.
Specify the default shipping form to be used for the customer. This field is optional.
Specify the default shipping charges to be used for the customer. Shipping defaults specified on the Customer master will transfer to the sales order header when a new sales order is entered for a customer.
The system supports up-to-date shipment tracking with links to the websites of many leading shipping companies (i.e., ship vias).
Select to indicate whether the customer accepts backorders. A backorder is defined as an unshipped line item on a shipped sales order. For example, if a customer orders three line items, but only one of the line items is shipped, the remaining two line items would be on backorder. Not selecting this option indicates the customer does not accept backorders or partial shipments.
Sales orders having unshipped line items on backorder will be closed at billing (i.e., when an invoice is created) if the customer in question is flagged to not accept backorders.
Accepts partial shipments: select to indicate whether the customer accepts partial shipments. A partial shipment is defined as a shipped order having a line item whose full quantity is not included in the shipment. For example, if customer ABC orders 20 units of item XYZ, but only 10 units are shipped, that partial line item quantity ("10") would constitute a partial shipment of the ordered item. Not selecting this option indicates the customer does not accept partial shipments.
Partially-shipped line items will be closed at billing (i.e., when an invoice is created) if the customer in question is flagged to not accept partial shipments.
Select to indicate that free-form ship-to addresses may be entered when sales orders are created for the customer. If not selected, you are indicating that free-form ship-tos may not be entered for the customer. Instead, ship-tos must be entered using predefined information.
Select to indicate that free-form bill-to addresses may be entered when sales orders are created for the customer. If not selected, you are indicating that free-form bill-tos may not be entered for the customer. Instead, the predefined bill-to found on the Customer master will be used.
Specify the preferred selling site, if any. This is an optional setting. If a preferred site is selected, then this site will be used when entering sales orders for the customer. At sales order entry, the preferred site will be the default shipping site for the sales order—as well as the default selling site for sales order items.
If there are no item sites matching the preferred site at the point of sales order line item entry, the highest-ranked selling site will be used instead.
To specify credit-related information for the customer, select the Terms option. The following screen will appear:
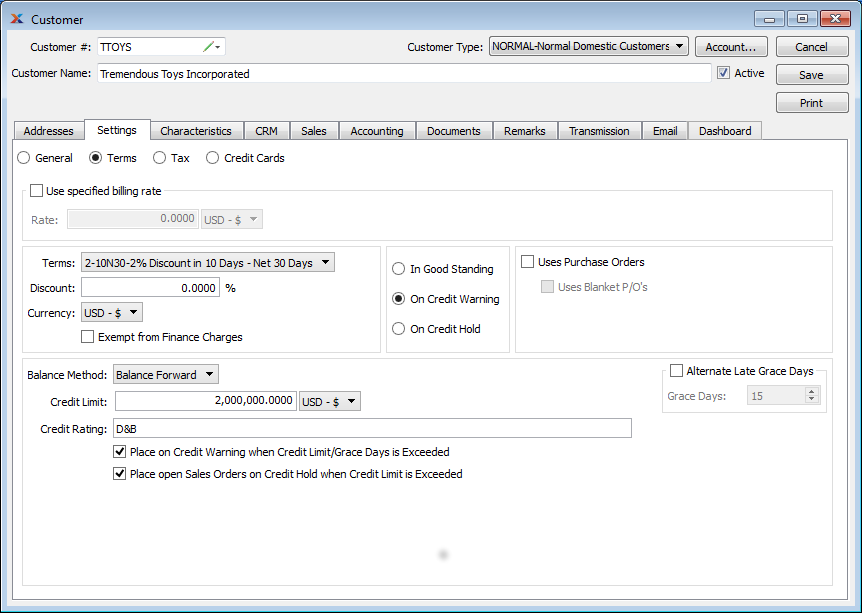
When specifying credit-related information for the customer, you are presented with the following options:
Specify the default billing rate for the customer.
Specify the default billing terms for the customer.
Enter the default discount—if any—which the customer should receive. Customer discounts are applied to the list price for a sold item, if the list price is being used. The discount does not get used if a pricing schedule price applies to the item.
Specify the currency to be used when transacting business with the customer. With the system's multi-currency support, you can do business with customer's in their currency, using exchange rates to normalize transactions in your base currency.
Select if you want the customer to be exempt from finance charges when their receivables are overdue.
Select to mark the customer as having credit in good standing. Customers with credit in good standing may have sales orders issued for them. A black-colored typeface will be associated with their account.
Sales orders may not be entered for customers who are on credit warning or credit hold. Credit holds may be overridden, but only by users having the appropriate privileges.
Select to alert sales staff to possible credit problems with the customer. Non-privileged users will be prevented from issuing stock to shipping for any customers on credit warning. An orange-colored typeface will be associated with their account.
Select to inform sales staff that the customer's credit has been suspended. Non-privileged users will be prevented from issuing stock to shipping for any customers on credit hold. A red-colored typeface will be associated with their account.
Place your cash-only customers on credit hold when you create their customer records. That way, their sales orders can only be shipped if the balance on the sales order = $0. In other words, sales orders for cash customers must be paid in advance before they can be shipped.
Select to indicate that the customer uses purchase orders. If selected, users will be required to enter a customer purchase order number when entering a sales order. In addition, selecting the option will prevent users from entering duplicate customer purchase order numbers—unless the customer is marked as using blanket POs.
If the option Uses Purchase Orders is not selected, the system will place no restrictions on customer purchase order numbers.
Specify one of the available methods for handling open balances for the customer:
Select to post payments against the oldest invoices. Used in accounts receivable only.
Select to post payments against specific invoices, regardless of their age. Used in accounts receivable only.
Specify the credit ceiling you are willing to extend to the customer.
You have the option of assigning a credit rating to the customer. Any value entered here is purely informational. The system does not use the credit rating in any calculations.
Select this option to automatically place the customer on credit warning if their open receivables balance exceeds their credit limit. This option must also be selected for a customer's open receivables to be evaluated when the update late customer credit status utility is run. If a customer is on credit warning, sales orders may not be entered for the customer—except by users with override privileges. Once the customer's receivables open balance falls below their credit limit, sales orders may once again be entered for the customer.
You must specify you want a customer to be placed on credit warning to enable the late credit status utility to consider a customer's open receivables.
Select this option to place all new and existing open sales orders on credit hold if the customer's credit limit is exceeded. The contents of sales orders placed on credit hold may not be issued to shipping—except by users with override privileges. Once the customer's credit limit is no longer exceeded, sales order contents may be issued to shipping.
Select to specify an alternate number of grace days for the customer, to override the global grace period defined at the system level in the configuration. To learn more about configuring grace days, see Section 12.1.1, “Configure Accounting”.
Specify the number of days beyond the receivables open due date which will serve as a grace period for the customer. The number of days entered here will override the global number of grace days.
To specify tax-related information for the customer, select the Tax option. The following screen will appear:
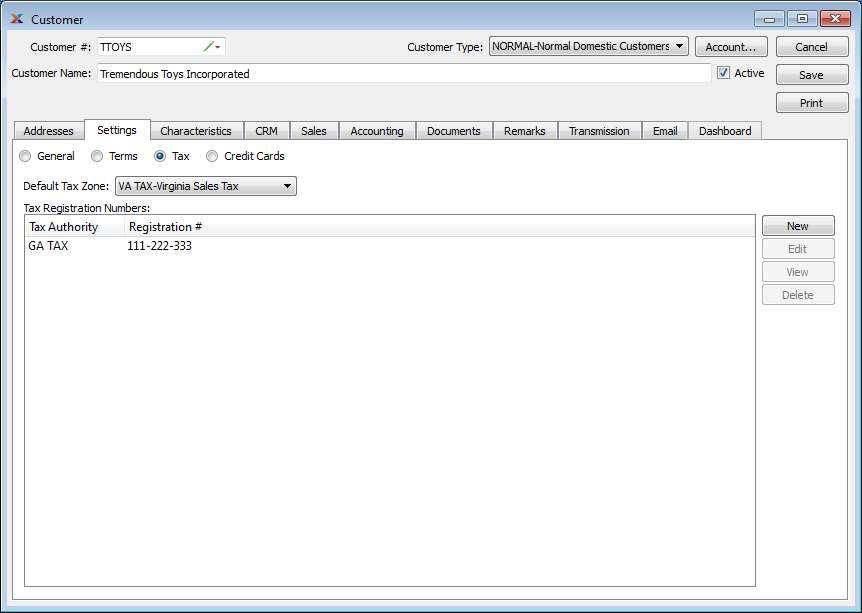
When adding customer tax information, you are presented with the following options:
Specify the default tax zone you want to associate with the customer. By default, the specified tax zone will be used on sales orders and quotes for the customer—unless a ship-to address in use specifies a different tax zone.
Display lists tax registration numbers for the specified customer.
To add a new customer tax registration number, select the button. The following screen will appear:
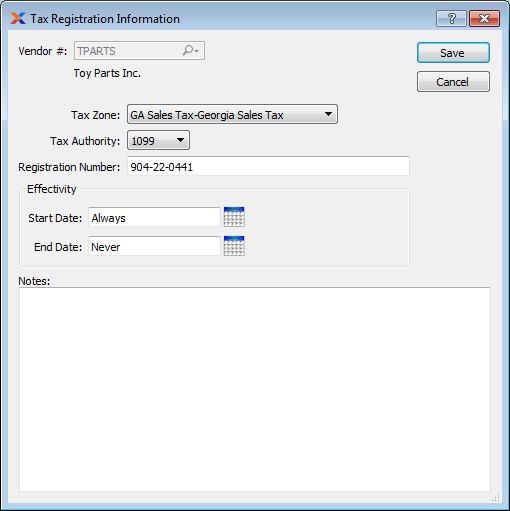
When adding a new customer tax registration number, you are presented with the following options:
Displays the customer number for the specified customer.
Specify the tax zone the tax registration number is valid for.
Specify the tax authority associated with the tax registration number.
Enter the customer's tax registration number for the specified tax authority. The registration number is used by tax authorities to identify businesses and/or individuals. An employer identification numbers (EIN) is an example of a tax registration number.
The customer's tax registration number is used for identifying the customer to relevant tax authorities. This information should not be confused with the tax registration numbers, which are used to identify your company to relevant tax authorities.
Specify the date range the tax registration number is valid for:
The tax registration number is valid on and after this date.
The tax registration number is valid on and before this date.
This is a scrolling text field with word-wrapping for entering notes related to the tax registration number.
To specify credit card information for the customer, select the Credit Cards option. The following screen will appear:
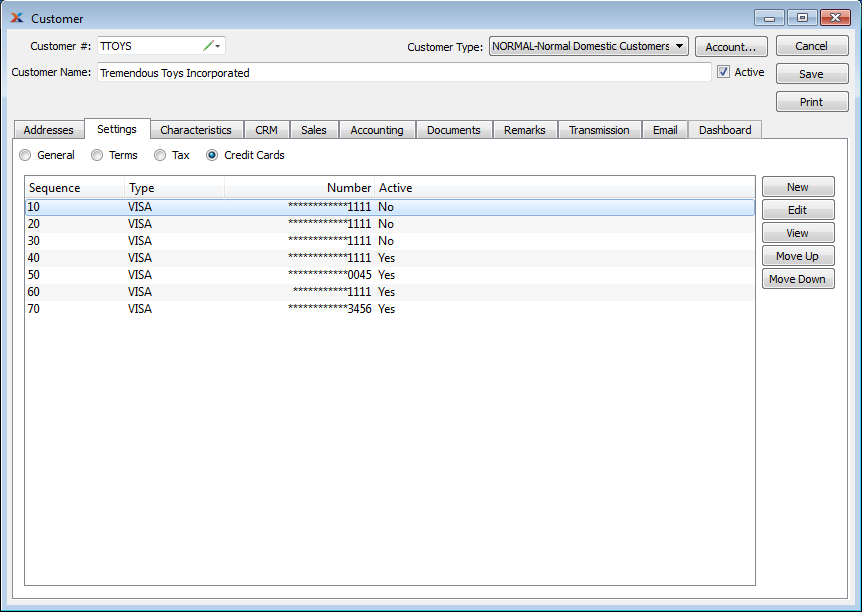
Customer credit cards may be used when entering sales orders or cash receipt transactions for the customer. When entering a sales order, you have the option to either pre-authorize or charge a credit card. Any pre-authorizations may later be post-authorized using the Receivables workbench.
When specifying credit card information for the customer, you are presented with the following options:
Display lists credit card records for the customer.
The following buttons are unique to this screen:
Highlight a credit card and then select this button to delete the credit card from the list. If the card has transaction history, it will not be deleted but will be expired and made inactive, instead.
Highlight a credit card and then select this button to move the credit card up in the sequence of credit cards. Sequence numbers are automatically adjusted to reflect the change in position.
Highlight a credit card and then select this button to move the credit card down the sequence of credit cards. Sequence numbers are automatically adjusted to reflect the change in position.
To create a new credit card record for a customer, select the button. The following screen will appear:
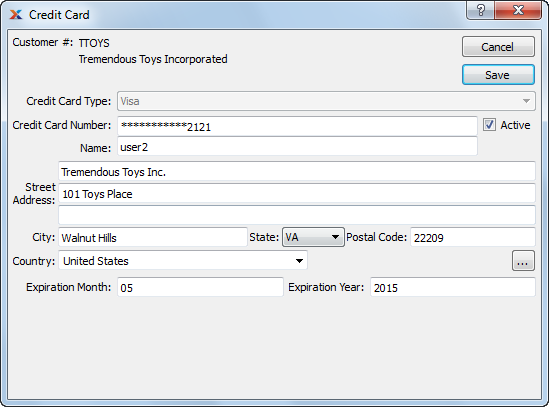
When creating a new credit card record for a customer, you are presented with the following options:
Displays the name of the customer associated with the credit card record. The name of the customer will also be displayed.
Specify the type of credit card. The following credit card types are currently supported: Master Card, Visa, American Express, and Discover.
Enter the credit card number. After the credit card record has been saved, all but the last four digits of the credit card number will be encrypted for security purposes.
Select if the credit card record is active. Do not select this option if the specified credit card is inactive or invalid for any reason.
Enter a name to describe the credit card record.
By default, the customer's billing address will be entered here. However, you may specify an alternate billing address for the credit card record using the address lookup feature located in the lower right-hand corner of the screen. For additional documentation related to creating addresses, see Section 8.1, “ New Address”.
Enter the month when the specified credit card expires. The month must be saved in the format "MM". For example, the month of January would be represented as "01".
Enter the year when the specified credit card expires. The year must be saved in the format "YYYY". For example, the year 2006 would be represented as "2006".
Customer characteristics are user-defined definitions which may be used to provide additional layers of description about customers. For example, customer characteristics might be used to specify Order Preferences or Buying Season. These constitute static descriptions which are not processed by the system, but are useful for informational purposes. To enter characteristics associated with a customer, select the tab. The following screen will appear:
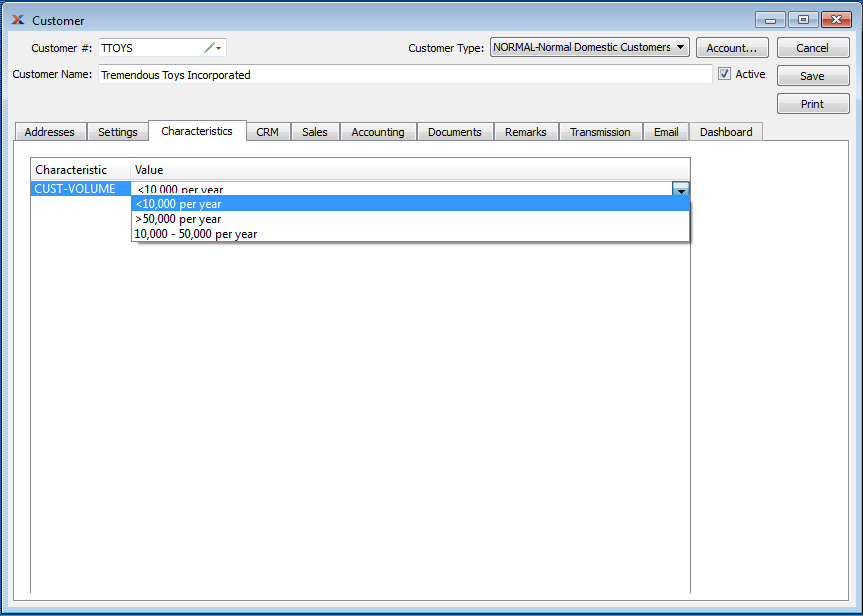
If the customer type a customer belongs to has a characteristic profile (i.e., template) defined, then every customer in that customer type will be presented with a range of pre-defined characteristics. You can select or add values for each characteristic by right-clicking on a characteristic in the list.
If you do not see buttons on the right side of the Customer Characteristics screen, this means characteristic profiles are being used for the customer type the customer belongs to. These buttons will only appear if customer type characteristic profiles are not being used.
To create a new characteristic for your current context, select the button from the characteristics list. The following screen will appear:
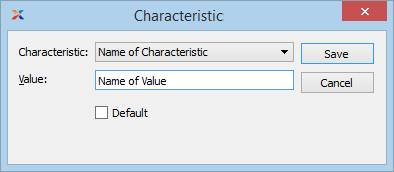
When creating a new characteristic, you are presented with the following options:
Select a characteristic from the list of characteristics available for your current context. To learn more about how characteristics are linked to specific contexts, please see Section 9.2.2.1, “Characteristic”.
Enter a value to associate with the characteristic.
In some contexts, the Default option will appear. Select if the value entered is the default value for the specified characteristic. Default values will always be listed first where characteristics are used.
Every customer record is linked to a CRM account. To view information related to the customer's CRM account, select the tab. The following screen will appear:
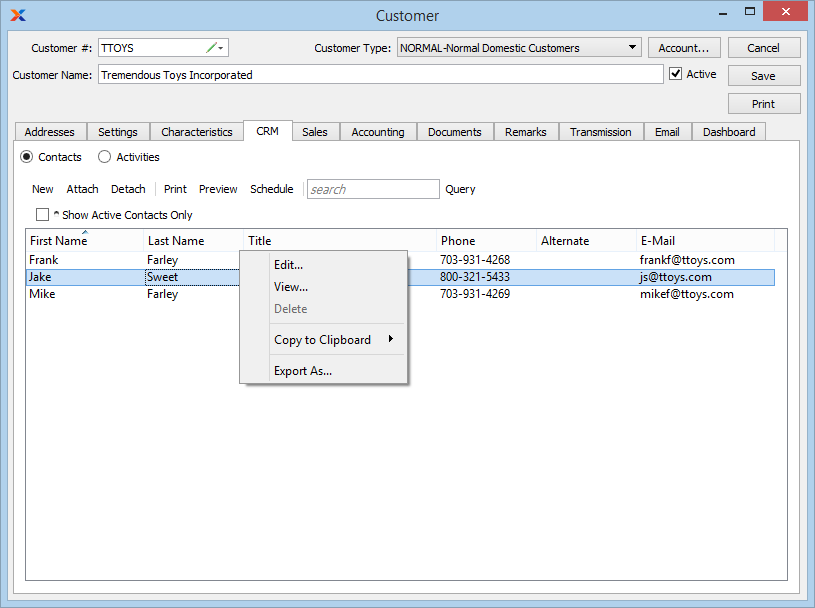
When viewing information related to the customer's CRM account, you are presented with the following options:
Select to view a list of all contacts associated with the account. On this screen you can manage an account's contacts—either by adding new contacts or attaching/detaching contacts from the account. Any changes made here also update the CRM account record. For additional documentation related to managing a contacts associated with a CRM account, see Section 6.1, “New Account”.
Select to view the to-do list associated with the account. On this screen you can manage all of the to-dos, opportunities, and incidents related to the account. Any changes made here also update the main to-do list. For additional documentation related to managing the to-do list, see Section 2.2, “ To-Do List”.
To manage or review a customer's sales activity, select the tab. The following screen will appear:
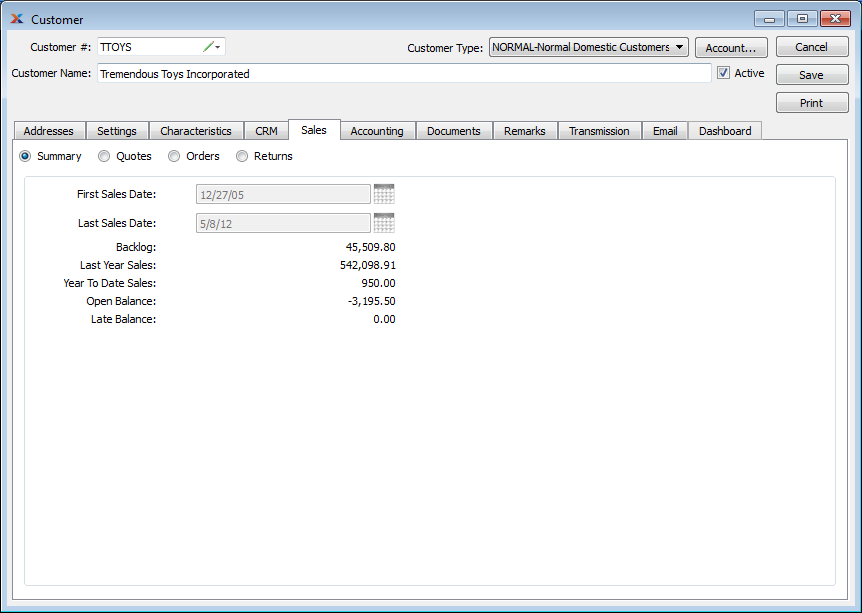
When reviewing a customer's sales activity, you are presented with the following options:
Select to view high-level sales history information for the customer, including year-to-date sales, last year sales, total backlog value, and more. For more detailed customer sales history, see the wide range of sales analysis options available in the module menu here: .
Select to view the list of quotes associated with the customer. On this screen you can create new quotes or edit existing ones. You may also view historical quotes converted to sales orders or invoices if your module is configured to allow this. For additional documentation related to entering quotes for customers, please see Section 1.1, “ New quote”.
Select to view the list of sales orders associated with the customer. On this screen you can create new sales orders or edit existing ones. For additional documentation related to entering sales orders for customers, please see Section 2.2, “New Sales Order”.
Select to manage returns associated with the customer. On this screen you can manage most aspects of the returns process—from creating new return authorizations to processing credit memos. For additional documentation related to managing return authorizations, please see Section 4.1, “Return Authorization”.
To manage or review accounting information for the customer, select the tab. The following screen will appear:
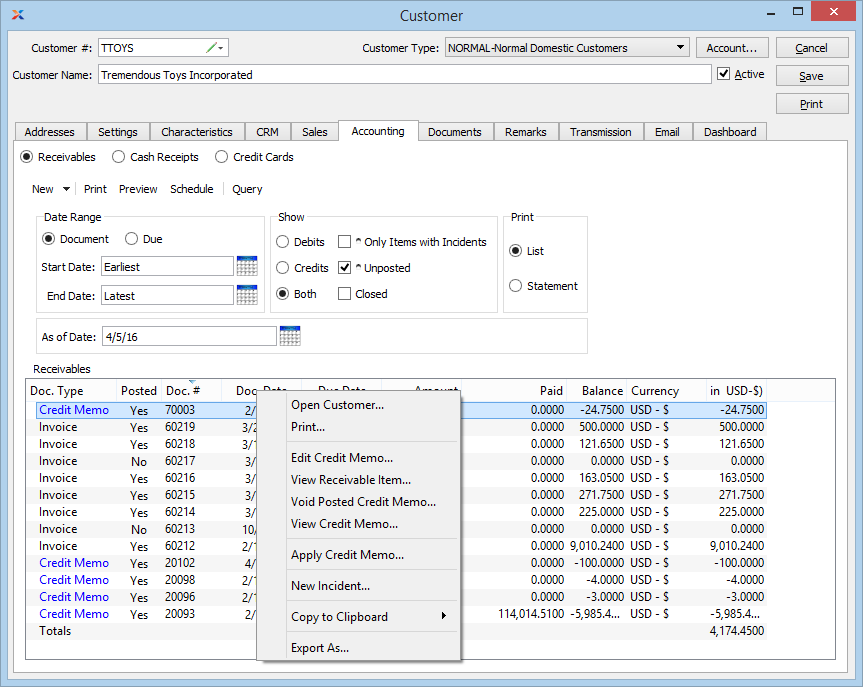
When reviewing a customer's accounting information, you are presented with the following options:
Select to view information related to the customer's open receivables. On this screen you can manage most aspects of the receivables process—from creating new receivable documents (e.g., invoices, credit memos, etc.) to printing out customer statements. For additional documentation related to managing customer receivables, see Section 2.6.2, “Open Receivables”.
You can void posted invoices and sales credits on the open receivables screen—as long as they are unapplied. To un-apply documents, use the option on the Receivables Application screen.
Select to view information related to cash receipts from the customer. On this screen you can view cash receipt and cash application history, as well as enter new cash receipts for the customer. For additional documentation related to cash receipt history, see Section 2.6.5, “Cash Receipts”. And for detailed information about entering cash receipts, see Section 2.3.1, “ New Cash Receipt”.
Select to view information related to transactions involving the customer's credit card(s). On this screen you can view credit card transaction history, authorize credit card pre-authorizations, and print credit card receipts. For additional documentation related to credit card history and the method for processing pre-authorizations, see Section 2.4, “ Receivables Workbench”.
To associate documents with a customer, select the tab. The following screen will appear:
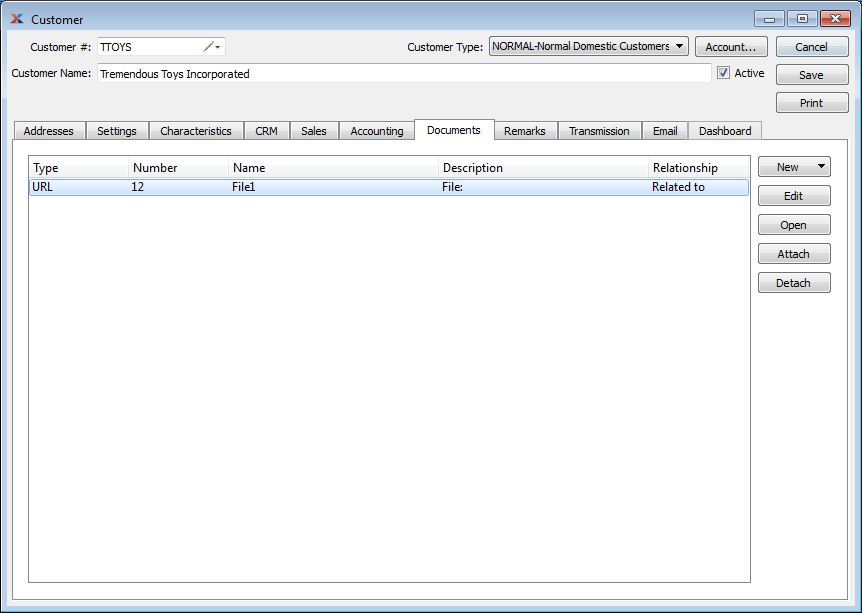
Customer Documents
When associating documents, you are presented with the following options:
Select to create a new document and associate it with the current record. You may create the following document types:
Select to create a new image association.
Select to create a new fixed asset association.
Select to create a new maintenance order association.
Select to create a new incident and associate it.
Select to create a new project and associate it.
Select to create a new opportunity and associate it.
Select to create a new to-do and associate it.
Enables you to edit associated documents. The Edit screen is the same as that for creating a new document—except that when editing, the fields will contain document information. Double-clicking on a document will also bring you to the editing screen.
Highlight a document and then select this button to reach a read-only view of the Edit screen.
Select to associate already-existing documents. The following document types may be attached: contact, account, customer, employee, file, image, incident, item, opportunity, project, purchase order, sales order, vendor, web site, work order.
Highlight a document and then select this button to remove the association.
To associate already-existing documents, select the button. The following screen will appear:
When associating already-existing documents, you are presented with the following options:
Indicate how the document is related to the current record. The following relationship options are available: related to, parent of, child of, duplicate of.
Specify the kind of document you want to associate. The following document types may be attached: contact, account, customer, employee, file, image, incident, item, opportunity, project, purchase order, sales order, vendor, web site, work order. When associating files, you will also be given the option to save the file to the database.
There is no file size restriction when saving files to the database. However, excessively large files could cause storage and performance issues.
Leave any notes on the document file as needed.
Use the lookup tool to identify the specific document you want to attach. The data entry options will vary depending on the document type you select.
To enter remarks (e.g., notes and comments) related to the customer, select the tab. The following screen will appear:
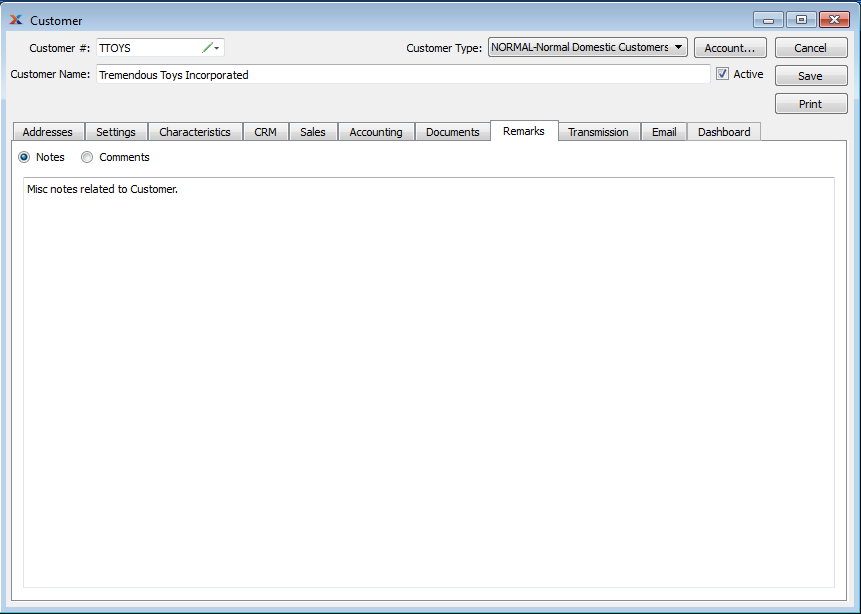
When entering remarks related to a customer, you are presented with the following options:
Select to enter notes related to the customer. This is a scrolling text field with word-wrapping for entering notes related to the customer. Any notes entered on this screen are for internal purposes only.
Select to review or add comments related to the customer. Any comments entered elsewhere in the module related to the customer's CRM account will also be shown here.
When adding or reviewing comments, you are presented with the following options:
Select to display all comments in the list in an expanded view which includes the entire text of each comment. To edit a comment, simply select the link next to the comment. That link will not be shown for changelog comments, which can't be edited. If the Verbose Text option is not selected, the comment list will display only header level information for each comment.
Display lists comments related to the record.
The following buttons are available:
Opens screen for creating a new comment.
Highlight a comment and then select this button to reach a read-only view of the Edit screen.
Enables you to edit highlighted comments—as long as the comments are not changelog comments. ChangeLog comments are system-generated and may not be edited. The Edit screen is the same as that for creating a new comment—except that when editing, the fields will contain comment information. Double-clicking on a comment will also bring you to the editing screen.
To enter a new comment, select the button. The following screen will appear:
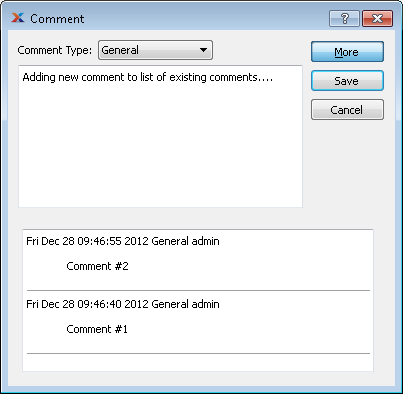
Select a comment type from the drop-down list to classify the comment. This is a required step. Comment types may be system-defined (i.e., changelog and general) or user-defined, as described in Section 13.2.3, “Comment Types”. Once you have specified a comment type, begin typing your comment in the main text area. The text area features word-wrapping and scroll-bar support for longer comments.
The following buttons are unique to this screen:
Select to show the complete list (i.e., thread) of comments associated with the record. To hide the list, simply select the button again. The comment thread will show the most recent comment first.
The electronic data interchange (EDI) system enables you to send quotes, sales orders, credit memos, receivables statements, and invoices electronically to your customers. To establish a customer's EDI preferences, select the tab. The following screen will appear:
The buttons on the tab are disabled when creating a new customer. If you want to set up EDI for a new customer, save the customer and edit it again.
When associating EDI profiles with EDI recipients, such as customers, ship-to addresses, and vendors, you are presented with the following options:
Display lists EDI profiles associated with this recipient (e.g., current customer) for a particular document type. It also shows whether EDI will be sent via email or FTP.
The following buttons are unique to this screen:
Connect an existing EDI profile to this EDI recipient for a particular document type.
Detach the selected EDI profile from the recipient for the selected document type.
Selecting the button will open the EDI profile so you can change it. All EDI recipients who share this EDI profile will be affected by changes.
To attach an existing EDI profile to the current recipient, select the button. The following screen will appear:
This screen lets you attach an existing EDI profile to the currently selected recipient for a particular document type. This tells xTuple Connect which documents should be sent by EDI and the EDI profile to use when sending documents of that type to a particular recipient. The recipient and recipient type are displayed for your information while attaching the EDI profile.
This shows the number of the customer, vendor, etc. which will receive EDI using the selected EDI profile.
This shows whether the recipient is a customer, vendor, etc. This reduces confusion in cases where a customer and vendor have the same number (i.e., the same CRM account is both a customer and vendor).
Choose from this list the type of document you want to use the EDI profile for. The list of available document types changes depending on the recipient type. For example, if the recipient type is vendor, the document type list will not contain "Sales Order."
The list of EDI profiles shows only those EDI profiles that have an EDI form for the currently selected document type by default. If this box is checked, all EDI profiles will be listed. You may attach an EDI profile without an appropriate EDI form but it will not be used until the right EDI form is added to the EDI profile.
Choose from this list the EDI profile you want to attach for the selected document type.
The following buttons are unique to this screen:
Attaches the EDI profile to the recipient and closes the screen, returning you to the previous screen.
If there is no existing EDI profile that suits your needs, you can create a new one by selecting the button. This does the same thing as clicking the button on the EDI Profiles window (see Section 13.2.8, “EDI Profiles”). After you have created the new EDI profile and saved it, the Attach EDI Profile window will appear with the new EDI profile selected. Now you can select the document type and click . If you click , the new EDI profile will still be saved but will not be attached to the recipient.
To view email associated with the customer, select the tab. The following screen will appear:
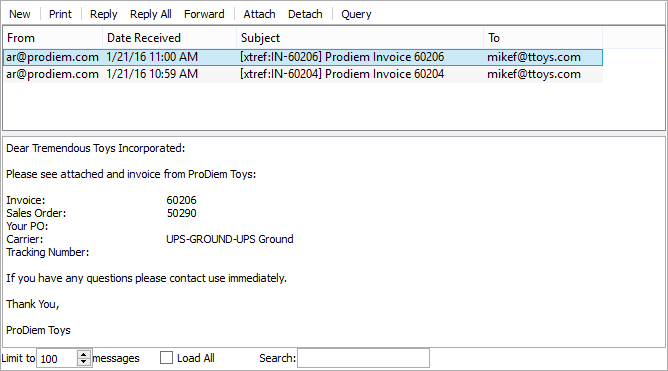
When viewing associated emails, you are presented with the following options:
Display lists associated emails.
The content of a highlighted email will be displayed here.
Specify the maximum number of associated emails you want to be displayed in the email list. If the list is extremely long, you may experience some slowness when opening the screen.
Select to load all associated emails into the list.
Enter a string of letters or complete words to search for matches in the list of associated emails. The search will scan through subject lines, To addresses, and From addresses.
The following buttons are unique to this screen:
Select to send a new email, using the default email program on your computer.
Highlight an email and then select this button to print a copy of the email.
Highlight an email and then select this button to reply to the email's sender, using the default email program on your computer.
Highlight an email and then select this button to reply to everyone associated with the email, using the default email program on your computer.
Highlight an email and then select this button to forward the email to another person(s), using the default email program on your computer.
Highlight an email and then select this button to attach an email associated with a contact in your contact list.
Highlight an email and then select this button to remove the associated email from the list.
To view the dashboard associated with the customer, select the tab. The following screen will appear:
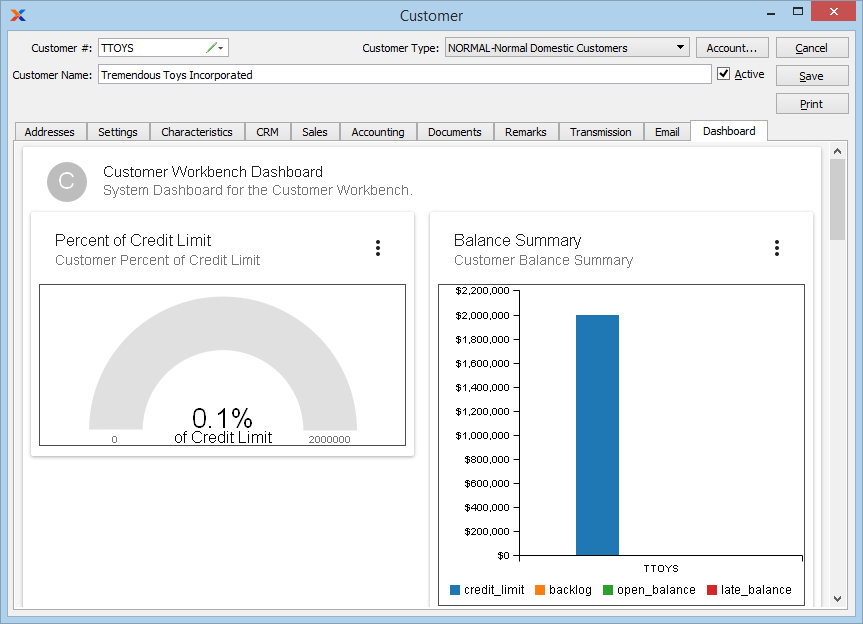
The customer dashboard includes the following pre-loaded dashboard panes, which you can either remove or supplement with additional panes at any time:
Displays how much of the customer's credit limit has been consumed.
Displays information indicating customer balances for several indicators.
Displays time-phased sales summary information for the customer.
Displays the customer's rolling sales information for the last 12 months from the current date, or the first of the current month.
Displays an historical view of the customer's summarized sales by month.
Displays rolling item sales information for the last 12 months from the current date, or the first of the current month.
Displays orders grouped into order-size buckets, making it possible for you to see where your customer order totals are concentrated (e.g., you sell mostly small orders under $100).
Dashboard panes are used to contain charts, which are populated using datasources. To create a new dashboard pane, select the button located toward the bottom of the Dashboard window. The following screen will appear:

When creating a new dashboard pane, you are presented with the following options:
Enter a title to identify the pane.
Enter a brief description to describe the pane.
Specify which datasource you want to use as the source for the dashboard pane's chart. The dashboards package includes several stock datasources. You may also create custom datasources on your own. For more information, please see Section 13.1.9, “Datasources”.
Specify which chart type you want the dashboard pane to display. The chart type options will be limited to the types specified on the selected datasource definition.
Specify how many panes you want displayed in a row on the Dashboard screen, from as few as one to as many as three across. The layout grid width options will be limited to the layout options specified on the selected datasource definition.
| |  | |
| 10. Customer |  | 10.2. Customers |