
|
xTuple Admin Guide |
|
|
xTuple Admin Guide |
| 2. Configuring the Server | ||
|---|---|---|
 | Chapter 2. Non-Web-Enabled Server Administration on All Platforms |  |
Once you have PostgreSQL installed, the first thing to do is initialize the server so xTuple databases will run successfully on it. Do the following things:
Connect pgAdmin to your PostgreSQL server
Create a group called "xtrole"
Create a user "admin"
Put the user admin in the group xtrole
This section assumes you installed PostgreSQL on your local drive (a.k.a. "localhost" or "127.0.0.1").
First, connect to your PostgreSQL database with the pgAdmin application. Right-click on the icon in the section and then select .
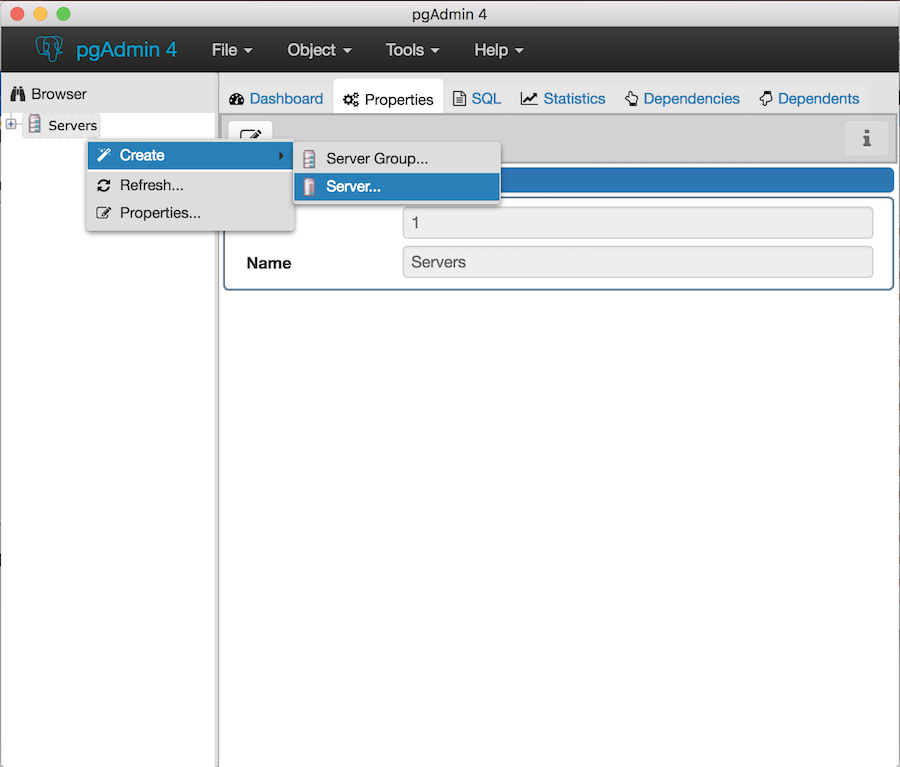
Add new server
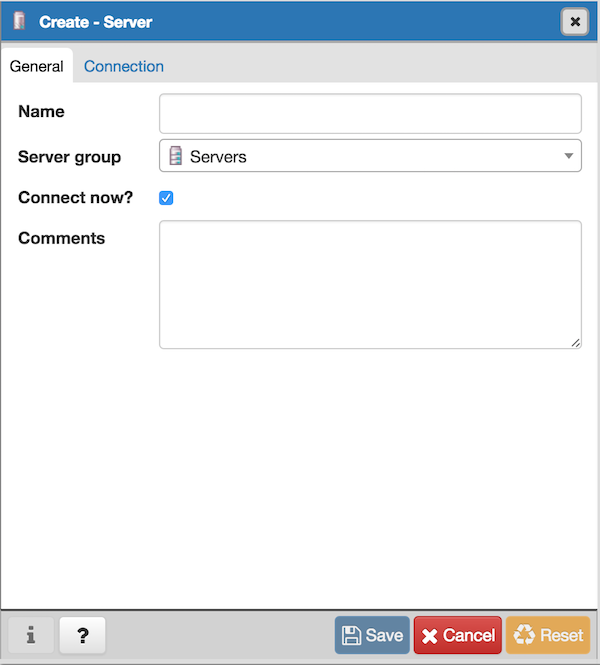
When you are presented with the new server screen, enter a name for the server, and then click on the tab.
Next, fill in the connection information. You have flexibility in some of the options you choose. However, the following must be used:
Host name/address: localhost or 127.0.0.1
Port: 5432
User name: postgres
Password: Password used for postgres user when you installed PostgreSQL
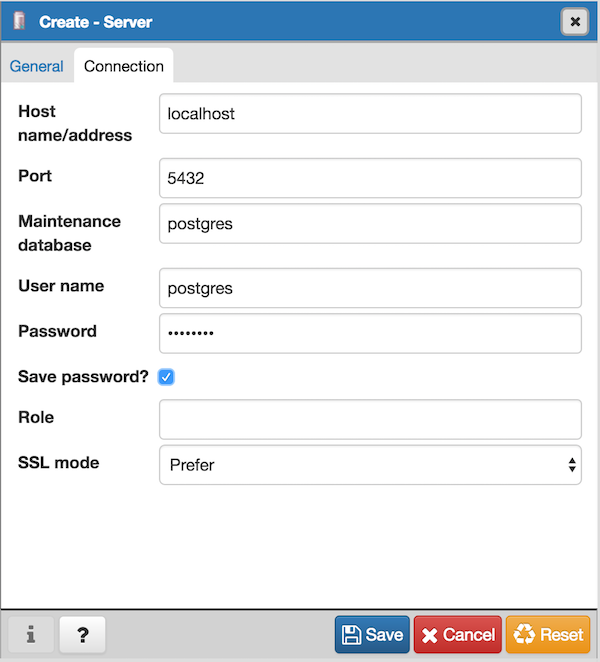
Server definition
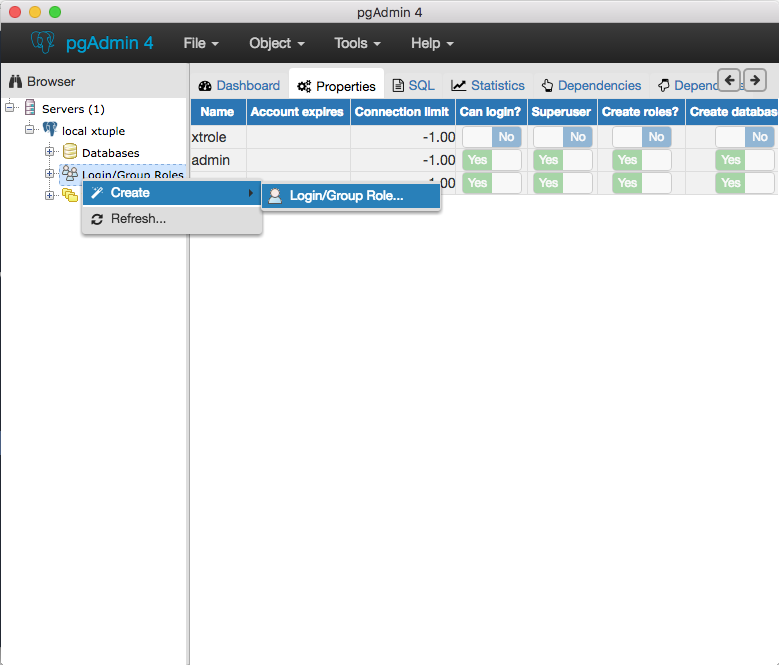
Once you have the connection between pgAdmin and PostgreSQL completed, the next step is to configure PostgreSQL so xTuple databases will run successfully on it. The first thing to do then is to create the xtrole group role. Right-click on the section, then select .
Group roles
When creating the new group role for xtrole, you only need to enter a minimal amount of information. On the tab, enter the same information as it's shown in the next screenshot. The role Name should be lower case.
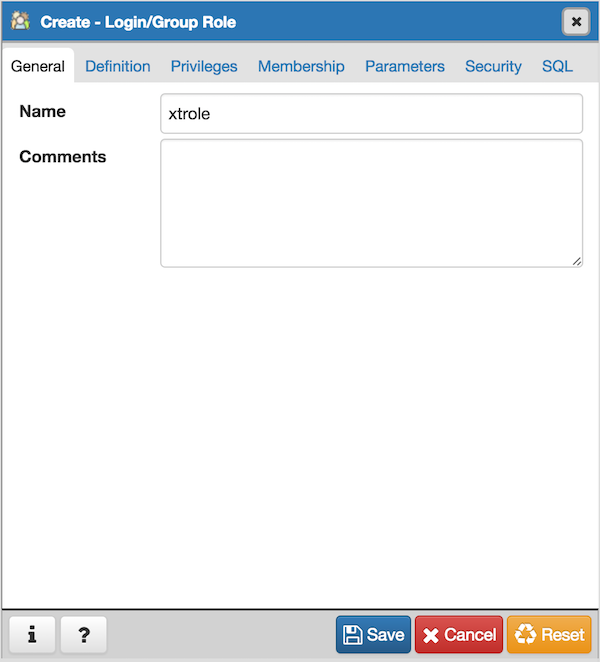
Group role for xtrole
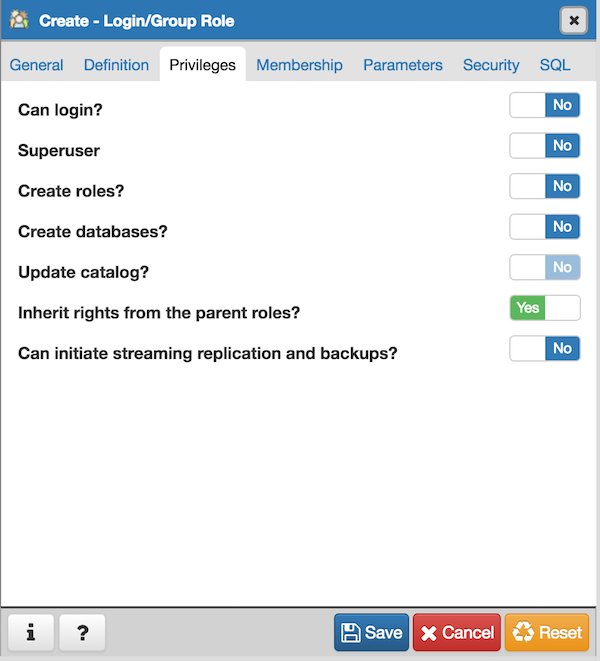
Then switch to the tab. The only role privilege you need is Inherits rights from parent roles?. That's it. No password required. And you don't have to add any information under the other tabs that are shown. Click when done.
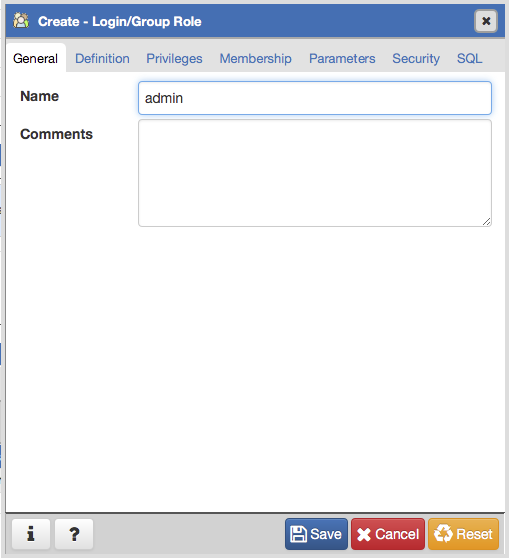
Now that you have the xtrole group role defined, the next step is to create the "admin" user and place the user in the group xtrole. Once again, right-click on the section, select . The next screenshot shows how you can access the screen for creating a new login role.
Login roles
Beginning on the General tab, enter Name: admin.
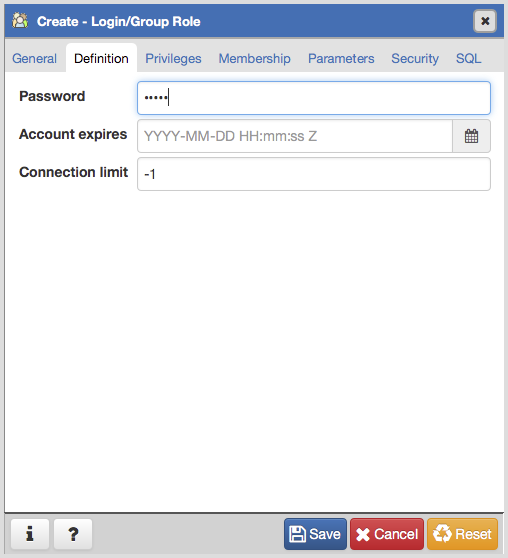
Go to the tab and enter the Password as "admin". If you don't need the account to expire at a certain point, then just leave the Account Expires date blank. That will keep the account open indefinitely.
On the tab, select Yes for all options.
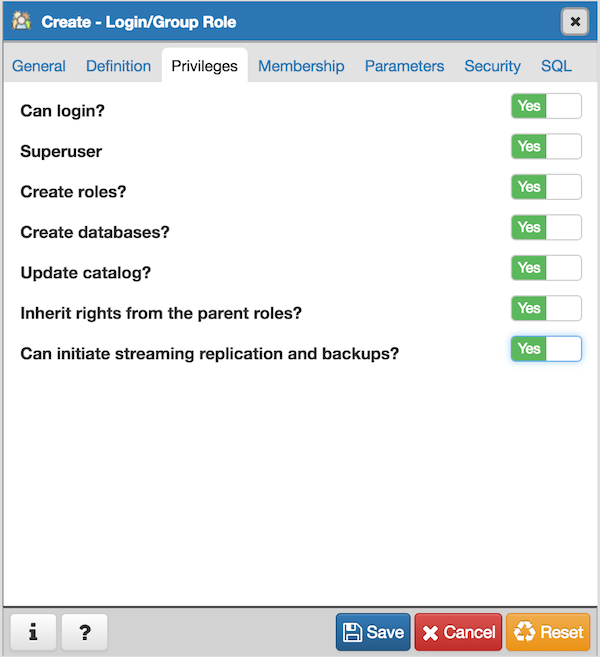
Login role for admin user
On the tab make the user "admin" a member of the group xtrole. The following screenshot shows the end result of this action. Click when done.
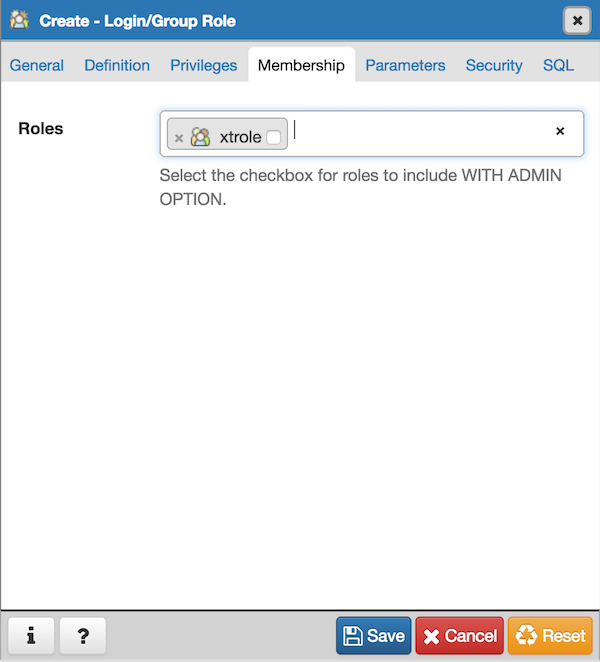
Admin in group xtrole
That's all you need to initialize PostgreSQL for xTuple. You can now load xTuple ERP databases onto the server and connect to them using your xTuple ERP client application.
| |  | |
| 1. Overview |  | 3. Creating a New Database |