|
xTuple Wholesale Distribution Product Guide |
The following steps will take you through the creation of a cost plus pricing schedule:
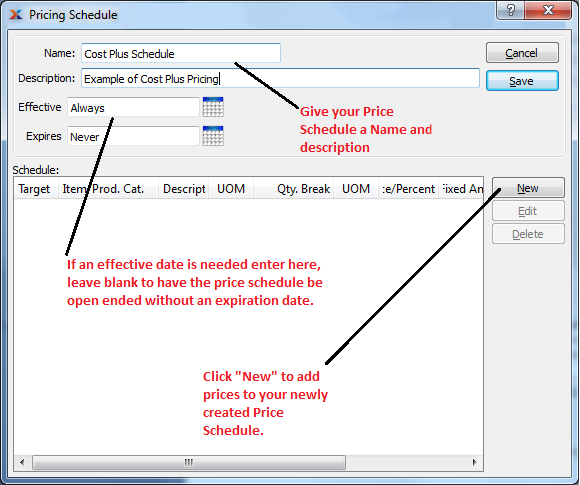
From the Pricing Schedule screen, click from the menu on the right.

Pricing Schedule
Give the new pricing schedule a name.
Enter an expiration date, if applicable.
Click to add a new price to the pricing schedule.

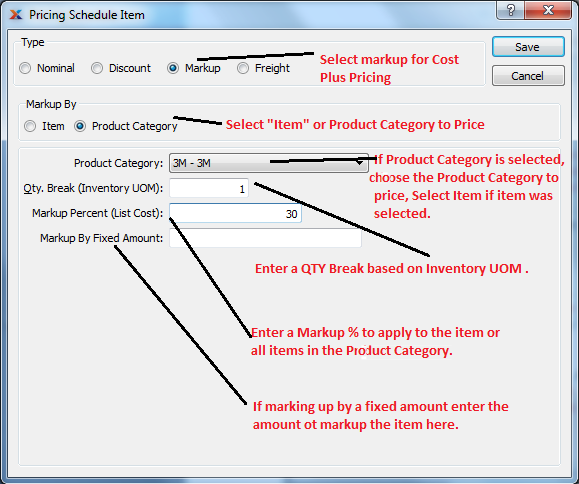
Pricing Schedule Item
Select Markup
Select to mark up by Item or Product Category, choosing the appropriate item or product category depending on your selection.
In xWD, items should be priced by product category to price a broad set of items. Exceptions to that rule can be added per item. Any item-level pricing will override the product category.
In the Qty Break field, enter "1"―unless you want to add quantity breaks for your items.
If you want to add multiple quantity breaks for an item or product category, you must set up a separate pricing schedule for each.
Enter the Markup Percent you want for this level of pricing.
To mark up your items by a fixed amount instead of a percentage, leave the Markup Percent field blank and add a fixed amount to mark up by. This will add that amount to a pricing schedule instead of marking up by a percentage.
Select .