
|
xTuple ERP Reference Guide |
|
|
xTuple ERP Reference Guide |
| 1.2.1. Enter New Voucher | ||
|---|---|---|
 | 1.2. Voucher |  |
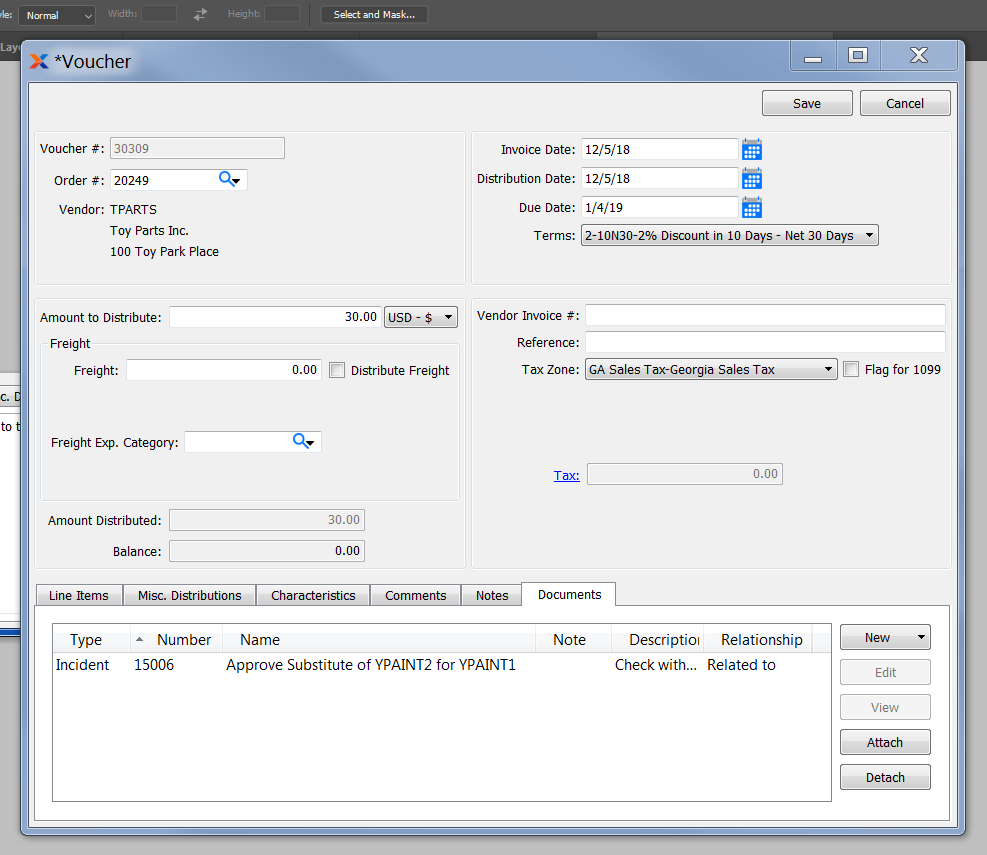
To enter a new voucher, go to . The following screen will appear:

When entering a new voucher, you are presented with the following options:
Next available voucher number will automatically display, unless your system requires you to enter voucher numbers manually. Default values and input parameters for voucher numbers are configurable at the system level.
Enter the purchase order number of the purchase order you want to create a voucher for.
The name and address of the vendor associated with the specified purchase order will display here.
Specify the dollar amount you intend to distribute to the vendor for the specified purchase order. You may enter an amount greater than the amount due on the purchase order.
Use the following fields for specifying freight information:
Enter the amount of any freight charges. This amount will be distributed at the header level (when using a freight expense category) or at the line item level (when the Distribute Freight option is selected).
Select to have the freight charge amount distributed among the line items, using the specified costing element and distribution method.
Specify the costing element you want to distribute freight charges to. If you have defined a default cost element for freight under , then that element will be displayed here.
Select one of the following methods to determine how you want the freight charges to be distributed among the line items:
The quantity to distribute for a given line will be divided by the total quantity for all lines. This fractional quantity is then multiplied by the amount entered in the Freight field. The corresponding result for each line is then distributed to the specified costing element.
The total value to distribute for a given line will be divided by the total value for all lines. This fractional value is then multiplied by the amount entered in the Freight field. The corresponding result for each line is distributed to the specified costing element.
The product weight (as defined in the Item master) will be multiplied by the quantity to distribute for a given line. That total line item weight is then divided by the total weight for all lines. This fractional weight is then multiplied by the amount entered in the Freight field. The corresponding result for each line is distributed to the specified costing element.
Select to distribute the entered freight charge among the line items, using the specified method.
If the Distribute Freight check box option is not enabled, you will see the Freight Exp. Category field. Specify the expense category you want to assign header level freight charges to. For line item level freight, use the Distribute Freight option or manually enter charges using costing elements on the line distribution screen.
Displays sum of all line item distributions for specified purchase order.
Displays the difference between amount to distribute and amount distributed.
Enter an invoice date for the voucher. The invoice date is used for determining the due date, based on the specified terms.
Enter the date of the current distribution. When the voucher is posted, this is the date when the posting will be recorded in the general ledger.
Enter the date payment is due to the vendor. The due date is derived when the specified terms are added to the invoice date.
Specify the billing terms for the voucher. By default, the billing terms will be transferred from the original purchase order. You may select alternate terms on the voucher header.
You are given the opportunity to apply any billing terms discounts when selecting a posted voucher for payment.
Enter the vendor invoice number associated with the specified purchase order. The system will issue a warning if you attempt to enter an invoice number which has already been used.
Use this field to enter any notation or reference required for further identification.
Specify the tax zone which has jurisdiction over the transaction. By default, the tax zone specified on the selected purchase order will be used.
Displays the total amount of tax to be charged on the voucher. To get a detailed view of the tax calculation, click on the link using your mouse.
Select to flag transaction for form 1099 tax reporting. This is informational only and does not impact tax calculations.
Display lists line items associated with the specified purchase order.
The following buttons are unique to this screen:
Highlight a purchase order line item and then select this button to reach the Voucher Item Distribution screen.
Highlight a purchase order line item(s) and then select this button to automatically distribute all quantities and amounts for the selected voucher item(s).
Highlight a purchase order line item(s) and then select this button to automatically clear any distributions.
Select to distribute quantities and amounts for all voucher items.
You may select multiple purchase order line items for distribution or clearing by highlighting them using your mouse—or a combination of your mouse and either the or key.
To add miscellaneous cost distributions to a voucher, select the tab. The following screen will appear:
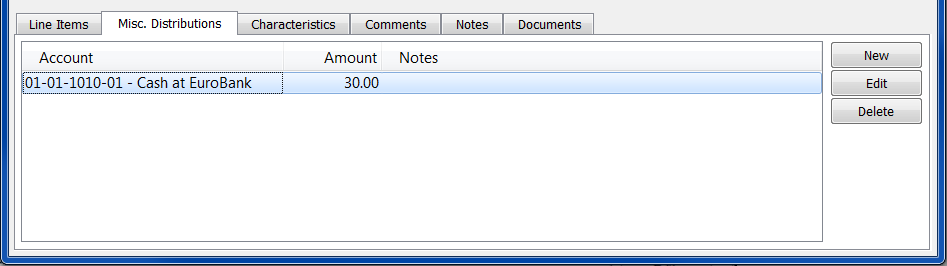
When adding miscellaneous distributions to a voucher, you are presented with the following options:
Display lists accounts and distribution amounts for any miscellaneous distributions associated with the voucher.
Voucher characteristics are user-defined definitions which may be used to provide additional layers of description about vouchers. These descriptions are static and not processed by the system, but are useful for informational purposes. To enter characteristics associated with a voucher, select the tab. The following screen will appear:
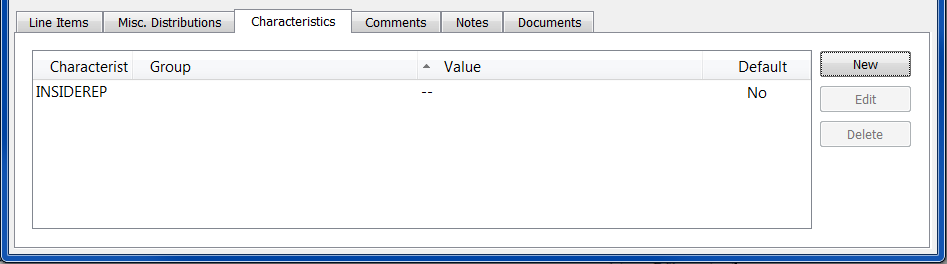
Voucher Characteristics
To create a new characteristic for your current context, select the button from the characteristics list. The following screen will appear:
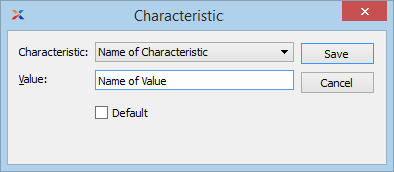
When creating a new characteristic, you are presented with the following options:
Select a characteristic from the list of characteristics available for your current context. To learn more about how characteristics are linked to specific contexts, please see Section 9.2.2.1, “Characteristic”.
Enter a value to associate with the characteristic.
In some contexts, the Default option will appear. Select if the value entered is the default value for the specified characteristic. Default values will always be listed first where characteristics are used.
To add comments to a voucher, select the Comments tab. The following screen will appear:

When adding or reviewing comments, you are presented with the following options:
Select to display all comments in the list in an expanded view which includes the entire text of each comment. To edit a comment, simply select the link next to the comment. That link will not be shown for changelog comments, which can't be edited. If the Verbose Text option is not selected, the comment list will display only header level information for each comment.
Display lists comments related to the record.
The following buttons are available:
Opens screen for creating a new comment.
Highlight a comment and then select this button to reach a read-only view of the Edit screen.
Enables you to edit highlighted comments—as long as the comments are not changelog comments. ChangeLog comments are system-generated and may not be edited. The Edit screen is the same as that for creating a new comment—except that when editing, the fields will contain comment information. Double-clicking on a comment will also bring you to the editing screen.
To enter a new comment, select the button. The following screen will appear:
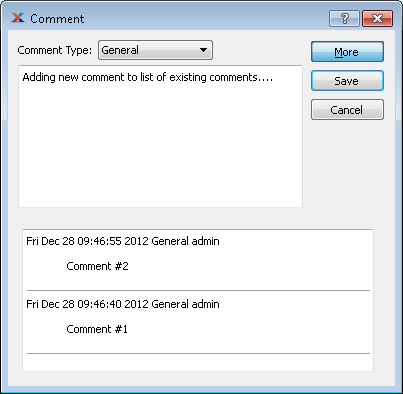
Select a comment type from the drop-down list to classify the comment. This is a required step. Comment types may be system-defined (i.e., changelog and general) or user-defined, as described in Section 13.2.3, “Comment Types”. Once you have specified a comment type, begin typing your comment in the main text area. The text area features word-wrapping and scroll-bar support for longer comments.
The following buttons are unique to this screen:
Select to show the complete list (i.e., thread) of comments associated with the record. To hide the list, simply select the button again. The comment thread will show the most recent comment first.
To add notes to a voucher, select the tab. The following screen will appear:
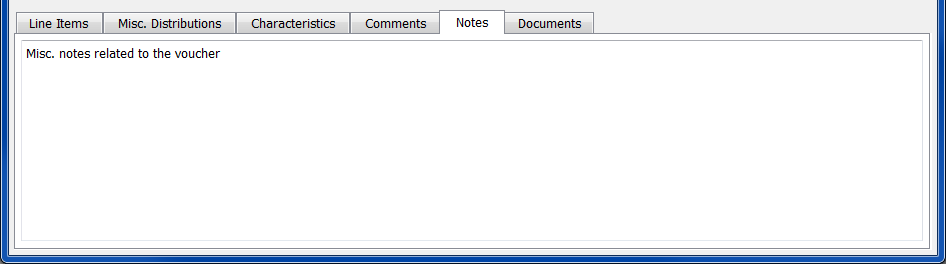
When adding notes to a voucher, you are presented with the following options:
This is a scrolling text field with word-wrapping for entering general notes related to the voucher. These notes are for internal use only.
To associate documents with a voucher, select the tab. The following screen will appear:
When associating documents, you are presented with the following options:
Select to create a new document and associate it with the current record. You may create the following document types:
Select to create a new image association.
Select to create a new fixed asset association.
Select to create a new maintenance order association.
Select to create a new incident and associate it.
Select to create a new project and associate it.
Select to create a new opportunity and associate it.
Select to create a new task and associate it.
Enables you to edit associated documents. The Edit screen is the same as that for creating a new document—except that when editing, the fields will contain document information. Double-clicking on a document will also bring you to the editing screen.
Highlight a document and then select this button to reach a read-only view of the Edit screen.
Select to associate already-existing documents. The following document types may be attached: contact, account, customer, employee, file, image, incident, item, opportunity, project, purchase order, sales order, vendor, web site, work order.
Highlight a document and then select this button to remove the association.
To associate already-existing documents, select the button. The following screen will appear:
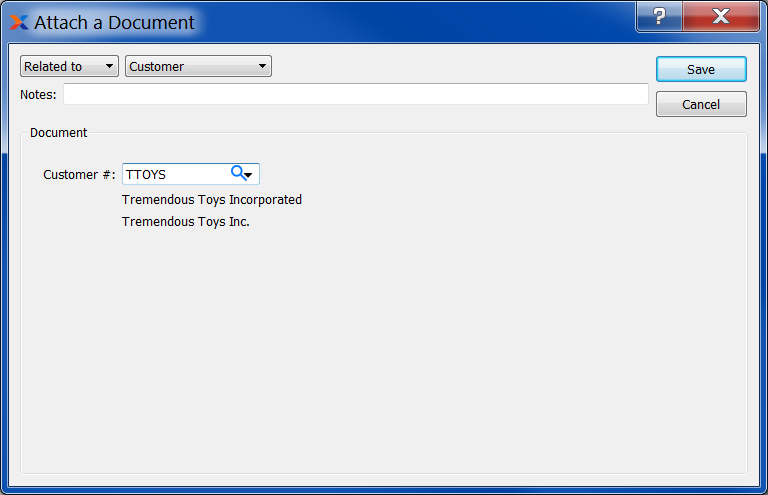
When associating already-existing documents, you are presented with the following options:
Indicate how the document is related to the current record. The following relationship options are available: related to, parent of, child of, duplicate of.
Specify the kind of document you want to associate. The following document types may be attached: contact, account, customer, employee, file, image, incident, item, opportunity, project, purchase order, sales order, vendor, web site, work order. When associating files, you will also be given the option to save the file to the database.
There is no file size restriction when saving files to the database. However, excessively large files could cause storage and performance issues.
Leave any notes on the document file as needed.
Use the lookup tool to identify the specific document you want to attach. The data entry options will vary depending on the document type you select.
To distribute quantities from purchase order line items to the voucher, highlight a line item and then select the button. The following screen will appear:

An item's per unit actual cost will be automatically updated after a voucher is posted if the vouchered cost differs from the item's current actual cost. The vouchered cost for an item is determined by dividing the amount to distribute by the quantity to voucher.
When distributing quantities from a purchase order line item to the voucher, you are presented with the following options:
Displays purchase order number specified on previous screen.
Displays line item selected for distribution on previous screen.
Displays item number associated with specified line item.
Inventory unit of measure (UOM).
Displays the following price information for the purchase order line item:
Displays the unit price for the line item.
Displays the extended price for the line item.
Displays the amount of line item freight, if any.
Displays the following quantity information for the purchase order line item:
Displays the quantity ordered for the line item.
Displays the quantity received to date of the line item.
Displays the quantity rejected to date of the line item.
Displays the uninvoiced quantity received to date of the line item.
Displays the uninvoiced quantity rejected to date of the specified line item.
This is a read-only field displaying the purchase order line item quantity tagged to be vouchered for the given voucher item. The quantity displayed equals the tagged received quantity minus any returned quantity which may also have been tagged. The quantity to voucher is a divisor applied to the distribution amount. The resulting amount—that is, the voucher item distribution amount divided by the quantity vouchered—determines the per unit actual cost for an item. The system will automatically handle any differences between the inventory and vendor UOMs—if any differences exist.
If you want to partially pay for a receipt—but find you cannot edit the value in the Qty. to Voucher field—you should first correct the quantity on the original receipt to be the amount you want to pay for, then enter a second receipt for the balance. To correct receipt quantities, use the right-click menu on the Uninvoiced Receipts and Returns screen.
Displays the monetary amount of the line item quantity being vouchered.
Display lists uninvoiced receipts and returns for the specified line item. To change the tagged status for a line item, double-click on the quantity in the Uninvoiced Receipts and Returns display. If a received (or returned) quantity has been tagged Yes, this means the quantity will be marked as invoiced when the voucher is posted.
You can split or correct a receipt by right-clicking on a line item in the Uninvoiced Receipts and Returns window.
Select to close the line item automatically when the voucher is posted. This flag will be selected automatically if the received quantity tagged for vouchering is equal to or greater than the order quantity.
Display lists costing elements used for distributing voucher costs. At the bottom of the display, the total amount distributed will display. This total includes costing element distributions and any purchase order line item freight charges.
Specify the tax type for the line item. By default, the tax type specified on the selected purchase order will be used.
Enter the amount of any purchase order line item freight charges. The freight amount entered in this field will be added to the total amount for the voucher item. If you are vouchering for less than the original quantity ordered—and if line item freight was entered when the purchase order was created—then you should consider adjusting the line item freight amount accordingly. To make this adjustment, multiply the quantity you are vouchering by the per unit freight charge. The per unit freight charge is determined by dividing the original line item freight amount by the original line item quantity.
Displays the amount of tax associated with the line item, if any.
Displays the total amount distributed for the line item.
To view detailed line item information, select the tab. The following screen will appear:

When viewing detailed line item information, you are presented with the following options:
Displays the date the line item was expected to be received, based on the purchase order information.
Displays the item number the vendor assigns to the specified item from the item source record.
Displays the unit of measure (UOM) used by the vendor for the specified item from the item source record.
Displays the description the vendor uses to describe the specified item from the item source record.
To distribute purchasing costs to specific costing elements for the item quantity being vouchered, select the button. The following screen will appear:

An item's per unit actual cost will be automatically updated after a voucher is posted if the vouchered cost differs from the item's current actual cost. The vouchered cost for an item is determined by dividing the amount to distribute by the quantity to voucher.
When distributing purchasing costs to a specific costing element, you are presented with the following options:
Specify the costing element you want to distribute purchasing costs to. The material costing element will be selected by default once line item quantity has been tagged. You may distribute costs to more than one costing element per voucher item. The list of available costing elements includes the system-defined material costing element, as well as any user-defined costing elements designated as available to accept purchase order distributions.
Be sure to specify the amount to distribute based on the pricing found on the purchase order. The system will automatically handle any calculations required to accommodate inventory/vendor unit of measure (UOM) ratios which are not 1:1.
Specify the purchasing amount to distribute to the specified costing element. By default, the extended price for the purchase order line item will be entered here once line item quantity has been tagged. Any difference between the distribution amount and the current actual cost amount for the costing element will result in the posting of automatic updates to the current actual cost when the voucher is posted.
Select if the voucher item is entitled to a terms discount. This option may be used on a line-by-line basis—all within one voucher. For example, purchased items may be discountable; however, freight charges may not be. When selecting a voucher for payment within the discount period, only discountable items will be discounted.
This is a scrolling text field with word-wrapping for entering general notes related to the voucher item distribution. These notes are for internal use only.
To split a purchase order receipt into different, smaller quantities, highlight a receipt and then select the option from the right-click menu. The following screen will appear:
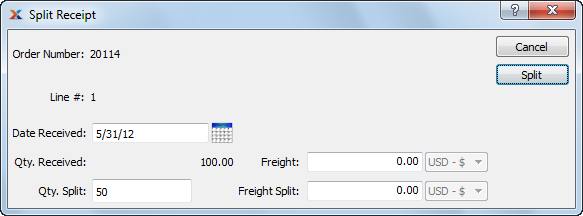
When splitting a receipt quantity, you are presented with the following options:
Displays the order number of the purchase order whose receipt is to be split.
Displays the specific purchase order line item to be split.
By default, the date of the original receipt will be displayed here. However, you may change the date.
Displays the quantity received for the selected line item.
Enter the quantity you want to split off from the original receipt quantity. A new receipt line will be created in the quantity specified here.
By default, the original freight amount will be displayed here. However, you may change the freight amount.
Enter the amount you want to split off from the original freight amount. The new freight amount will be added to the new receipt line.
The following buttons are unique to this screen:
Select to create a new receipt line using the specified parameters.
In addition to line item specific distributions, you may also enter miscellaneous distributions to affect the voucher as a whole. To enter a miscellaneous distribution, select the button from the main Voucher screen. The following screen will appear:
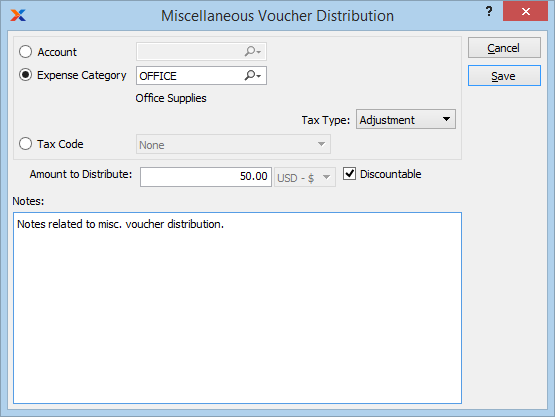
When entering a miscellaneous voucher distribution, you are presented with the following options:
Select one of the following distribution options:
Select a general ledger account to use for the distribution.
Select a project to associate with the transaction. The project number will be added as the final segment of the G/L account number.
Select an expense category to use for the distribution.
Select a tax code to use for the distribution. When using this option, the distribution amount will be charged to the general ledger account associated with the tax code. To have tax calculated automatically for the distribution, use the option.
Specify the amount of the miscellaneous distribution. If there is a balance still to be distributed once all voucher items have been distributed, then that remaining amount will be entered here by default.
Select a tax type to associate with the distribution. Tax will be calculated automatically if a tax assignment matches both the tax type and the specified tax zone.
Select if the voucher item is entitled to a terms discount. This option may be used on a line-by-line basis—all within one voucher. For example, purchased items may be discountable; however, freight charges may not be. When selecting a voucher for payment within the discount period, only discountable items will be discounted.
This is a scrolling text field with word-wrapping for entering general notes related to the voucher. These notes are for internal use only.
| |  | |
| 1.2. Voucher |  | 1.2.2. Enter New Miscellaneous Voucher |