
|
xTuple ERP Reference Guide |
|
|
xTuple ERP Reference Guide |
| 9.2.1. External Vendor Catalog Configurations | ||
|---|---|---|
 | 9.2. Master Information |  |
The External Vendor Catalog screen displays your current list of conversion configurations. The list will be as long (or short) as the total number of vendor catalogs you have configured to integrate with xTuple ERP. To access the list of external vendor catalog configurations, go to . The following screen will appear.
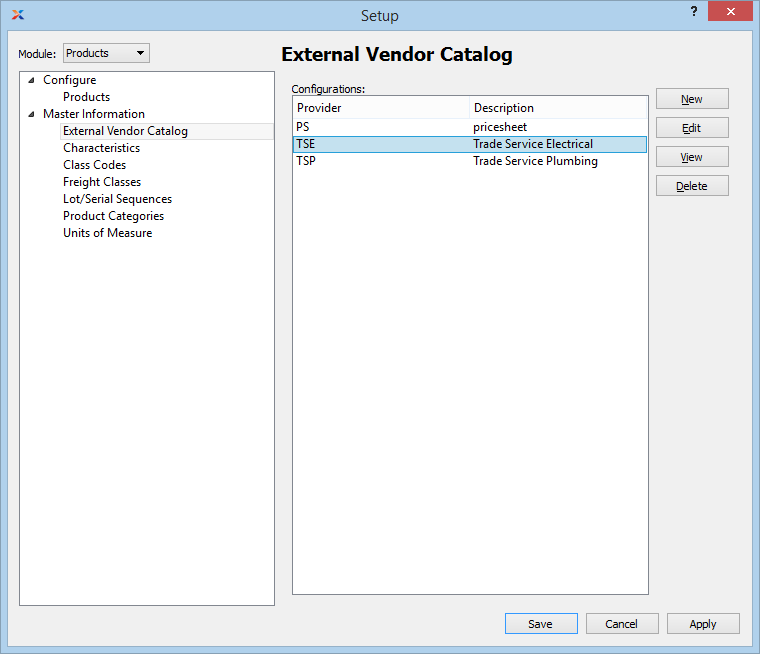
The External Vendor Catalogs screen displays information on all existing external vendor catalog configurations, including provider name and description.
Each external vendor catalog conversion specifies the default values you want to assign to vendor items when they are converted to become inventory items in xTuple. Conversions may vary from provider to provider, depending on the nature of the catalog and your own particular needs.
To create a new vendor catalog conversion, select the button. The following screen will appear:
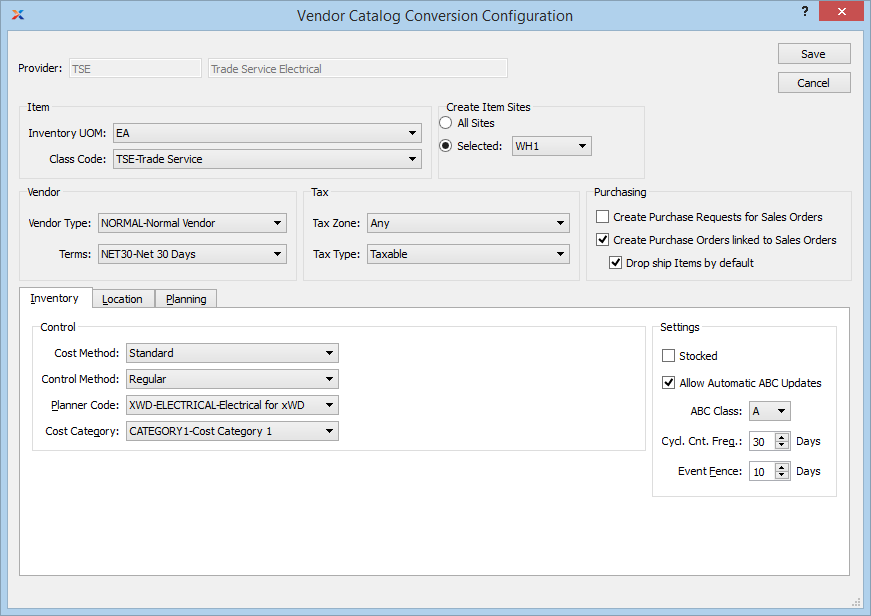
When creating a new vendor catalog conversion, you are presented with the following options:
Enter the provider code (e.g., TSE, TSP) in the first field and the name of the provider in the second field.
Specify the following default item information you want converted items to assume in xTuple:
Specify the default inventory unit of measure you want to assign to converted items (e.g., EA).
Specify the default class code you want to assign to converted items.
Specify the following default item site information:
For more information about item site settings, please see Section 9.1, “Enter Item Site”.
Select if you want to create item sites for converted items in all sites.
Specify the site where you want item sites for converted items to reside.
Specify the following default vendor information to be used if vendor records from the catalog don't already exist in xTuple and need to be created:
For more information about vendor records, please see Section 7.1, “Create New Vendor”.
Specify the default vendor type you want to assign to any vendor records that need to be created.
Specify the default vendor terms you want to assign to any vendor records that need to be created.
Specify the following tax information for newly-created vendor and item records:
Specify the default tax zone you want to assign to any vendor records that need to be created.
Specify the default tax type you want to assign to converted items.
Specify the following default inventory control information you want converted items to assume:
Specify the default item costing method you want to assign to converted items.
Specify the default inventory control method you want to assign to converted items.
Specify the default planner code you want to assign to converted items.
Specify the default cost category you want to assign to converted items.
Specify the following additional inventory settings:
Select to make creating a purchase order or purchase request optional when entering sales orders for converted items.
Select to make ABC updates automatic for converted items.
Specify the default ABC class for converted items.
Specify the default cycle count frequency for converted items.
Specify the default event fence for converted items.
To define location control information for converted items, select the tab. The following screen will appear:
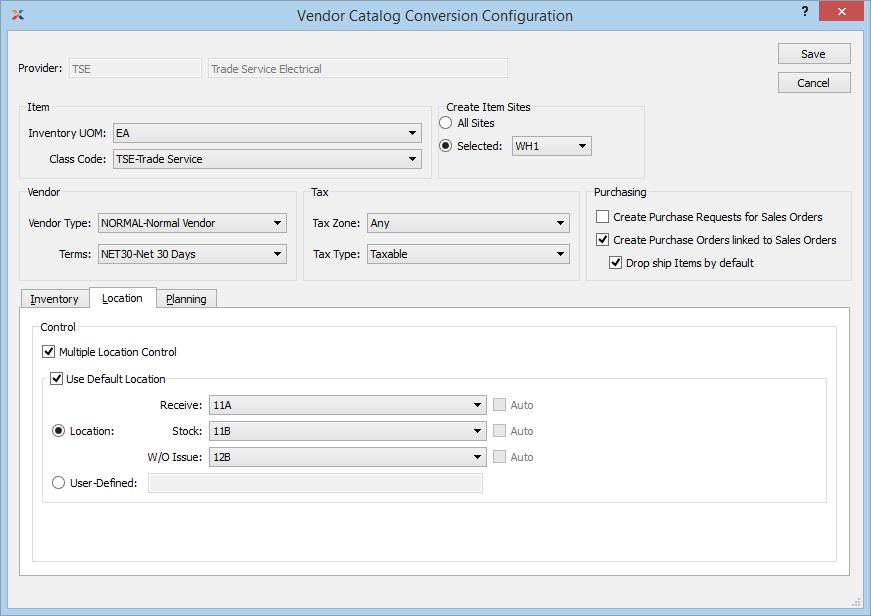
When defining location control information for converted items, you are presented with the following options:
This is an optional setting which allows items to be stored in multiple locations in a single site. If selected, converted items will use multiple location control (MLC).
If MLC is enabled, you will also have the option to store converted items in a default location. Choose from the following default location options:
Select if you want to specify default receiving, stocking, and issuing locations for the converted items.
Select if you want to specify a user-defined default location for the converted items.
To define the settings the material requirements planning (MRP) system will use to plan for converted items, select the tab. The following screen will appear:
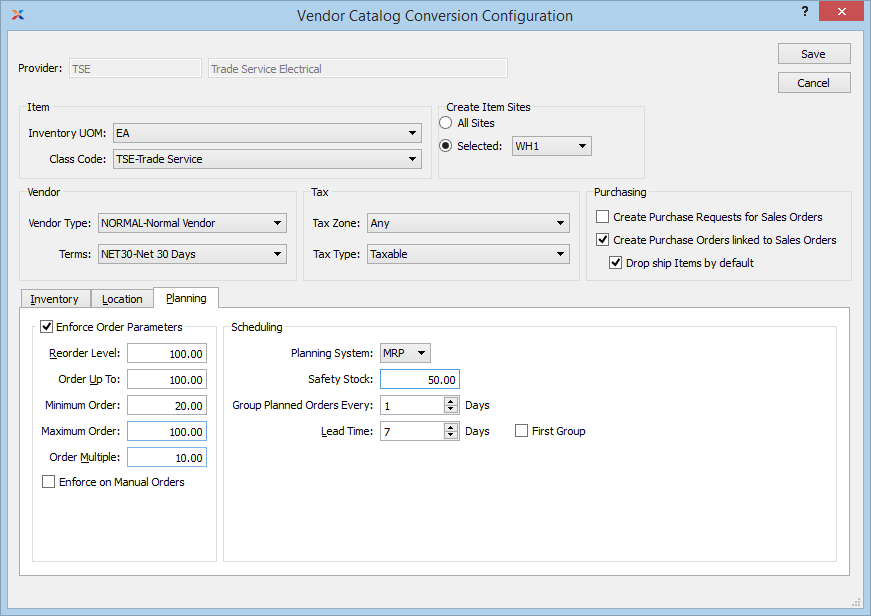
When defining the planning settings for converted items, you are presented with the following options:
Select to define the following parameters MRP will use when planning for converted items:
Specify the level inventory availability must fall to before triggering a planned replenishment order.
Specify the quantity planned orders should replenish up to.
Specify the minimum planned order quantity.
Specify the maximum planned order quantity.
Specify the multiple to be used for planned orders (e.g., order in multiples of 10, 100, etc.).
Select to also enforce the specified order parameters when entering manual orders, such as sales orders.
The following additional scheduling options can be defined for converted items:
Specify which planning system the converted items should belong to by default (i.e., MRP, MPS).
Specify the safety stock quantity you want to always have available on hand.
Specify the group setting for planned orders.
Specify the item site lead time.
Select to include a special first group when grouping planned orders with MRP.
| |  | |
| 9.2. Master Information |  | 9.2.2. Characteristics |