
|
xTuple ERP Reference Guide |
|
|
xTuple ERP Reference Guide |
| 3.1.1. New Task List Item | ||
|---|---|---|
 | 3.1. New Project |  |
To enter a new task item, go to . The following screen will appear:
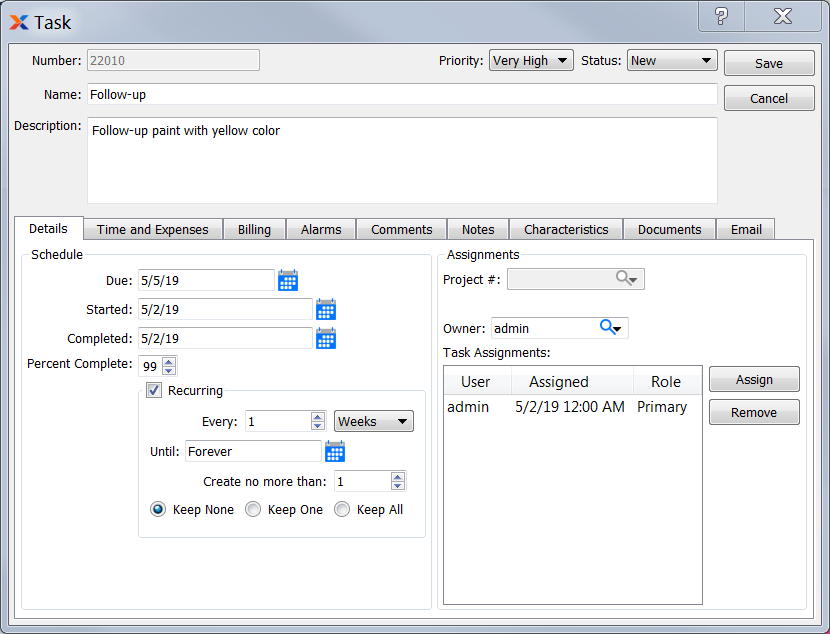
When entering a new task item, you are presented with the following options:
Enter a code to identify the task.
Enter a priority from the drop down list to help you prioritize your task items. Priority options include, Very High, High, Normal, Low, Very Low.
Enter a status from the drop down list to mark the current status of the task. Status options include, New, Pending, In-Process, Deferred, Completed.
Enter a brief name to identify the task.
Enter a brief description of the task item.
Date task is due.
Date task actually started.
Date task was actually completed.
Enter or scroll to the value of how complete the task is.
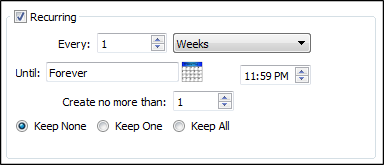
When creating a recurring event, you are presented with the following options:
Check this box if you want the event to repeat itself at regular intervals, using the frequency settings you specify below. Recurring events are generated when you run the Recurring Items utility, which is described in more detail here: Section 10.2, “Create Recurring Items”.
Enter a number and select a unit of time to describe how frequently you want the event to occur. You can choose any regular schedule, ranging from once every 1 minute to once every 99 years.
Enter a date and time at which to start the first event. The default value is the time the screen opened. The From option only appears on some screens.
Enter a date and time after which the event should no longer occur.
Enter the maximum number of future copies of this event you want the system to maintain. Whenever the Create Recurring Items screen is run, it will create up to the number you enter here.
If you delete all copies of a recurring event, the event will stop repeating even if the until date has not yet been reached. xTuple recommends setting this to at least 2 to reduce the likelihood of deleting all copies of the event.
Select to make the next job catch up if work was missed.
Select to create one catch-up job if work was missed.
Select to create any missed jobs.
The project number of the project the task is associated with (if any).
Select task owner.
List of users who are assigned to the task.
Click this button to assign a user to the task and to give them a role.
Click this button to remove a user from the task assignments list.
To view a time and expenses summary of the task, select tab. The following screen will appear:

When viewing the time and expenses summary for a task, you are presented with the following options:
Specify the number of hours associated with the task using the following fields:
Enter the number of hours budgeted for the task. This information may be saved and updated later.
Enter the actual number of hours consumed performing the task. This information may be saved and updated later.
Displays the difference between the budgeted and actual hours.
Click this button to open the window from the window.
Click this button to add the entered hours to the worksheet.
Specify the expenses associated with the task using the following fields:
Enter the total expenses budgeted for the task. This information may be saved and updated later.
Enter the actual expenses incurred while performing the task. This information may be saved and updated later.
Displays the difference between the budgeted and actual expenses.
You can specify customer and billing rate information by task. To specify the customer and billing rate information, select the tab. The following screen will appear:

When specifying customer and billing rate information, you are presented with the following options:
Specify the CRM account the task is associated with.
Select this option if you want to enable specifying a customer billing rate for the task.
Specify the customer billing rate for the task.
Select this option if you want to enable specifying an item number for the task.
Select an item to associate with the task.
To create reminder alarms for a task item, select the tab at the bottom of the screen, as shown below:
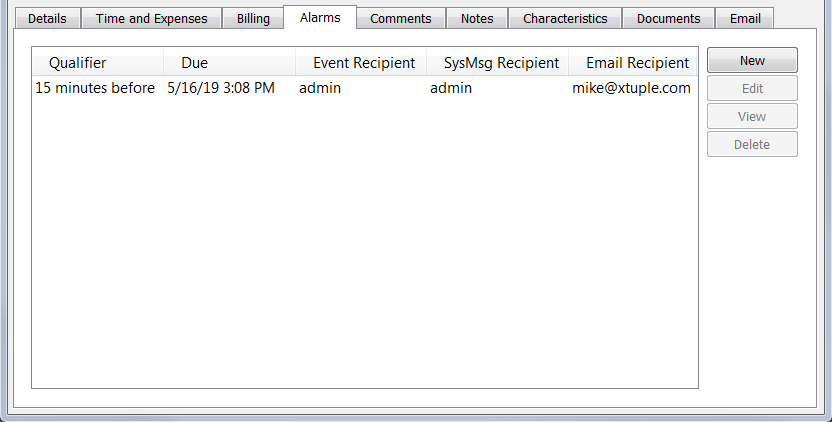
To create a new alarm, select the button. The following screen will appear:
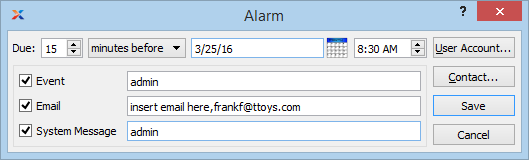
When creating a new alarm you are presented with the following options:
Add the date and time when you want the alarm to alert specific users and contacts.
Select if you would like an event to trigger the alarm. You may select from an unlimited list of users to be notified.
Select if you would like an email notification to be sent as an alarm. You may select from an unlimited list of users to be notified.
Select if you would like a system message to be issued as an alarm. You may select from an unlimited list of users to be notified.
The following buttons are available:
Allows you to choose unlimited number of users created in the system.
Allows you to choose from unlimited number of contacts created in the system.
Creates the alarm and adds it to the list of alarms.
Closes the screen without creating an alarm, returning you to the previous screen.
To add comments to a task, select the tab. The following screen will appear:
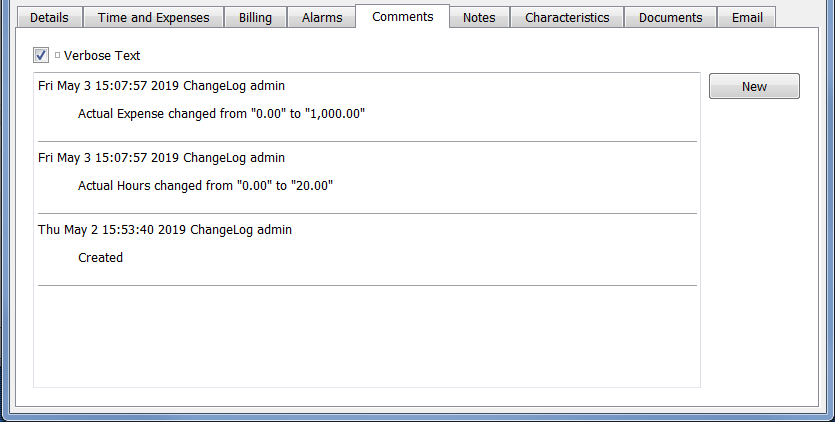
When adding or reviewing comments, you are presented with the following options:
Select to display all comments in the list in an expanded view which includes the entire text of each comment. To edit a comment, simply select the link next to the comment. That link will not be shown for changelog comments, which can't be edited. If the Verbose Text option is not selected, the comment list will display only header level information for each comment.
Display lists comments related to the record.
The following buttons are available:
Opens screen for creating a new comment.
Highlight a comment and then select this button to reach a read-only view of the Edit screen.
Enables you to edit highlighted comments—as long as the comments are not changelog comments. ChangeLog comments are system-generated and may not be edited. The Edit screen is the same as that for creating a new comment—except that when editing, the fields will contain comment information. Double-clicking on a comment will also bring you to the editing screen.
To enter a new comment, select the button. The following screen will appear:
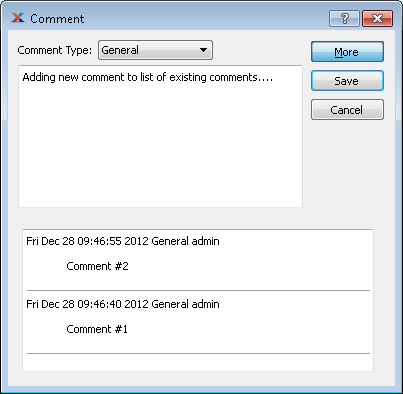
Select a comment type from the drop-down list to classify the comment. This is a required step. Comment types may be system-defined (i.e., changelog and general) or user-defined, as described in Section 13.2.3, “Comment Types”. Once you have specified a comment type, begin typing your comment in the main text area. The text area features word-wrapping and scroll-bar support for longer comments.
The following buttons are unique to this screen:
Select to show the complete list (i.e., thread) of comments associated with the record. To hide the list, simply select the button again. The comment thread will show the most recent comment first.
To enter notes for a task, select the tab at the bottom of the screen, as shown below:

This is a scrolling text field with word-wrapping for entering notes related to the task.
To enter characteristics for a task, select the tab. The following screen will appear:
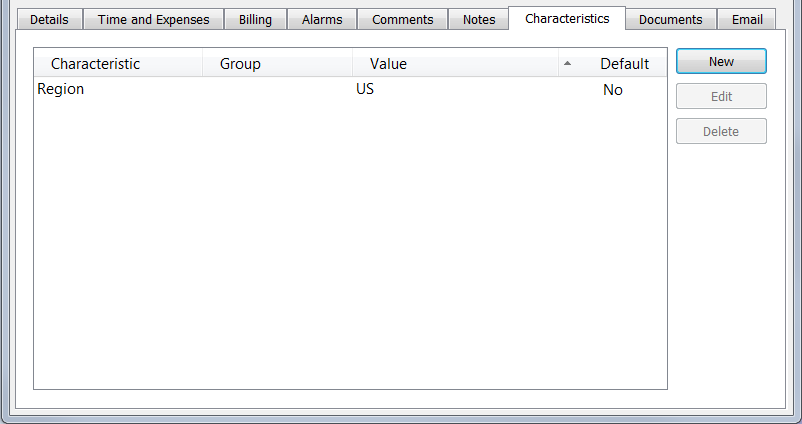
To create a new characteristic for your current task, select the button. You will then get the following screen:

When creating a new characteristic, you are presented with the following options:
Select a characteristic from the list of characteristics available for your current context. To learn more about how characteristics are linked to specific contexts, please see Section 9.2.2.1, “Characteristic”.
Enter a value to associate with the characteristic.
To view the documents associated with a task, select the tab. The following screen will appear:
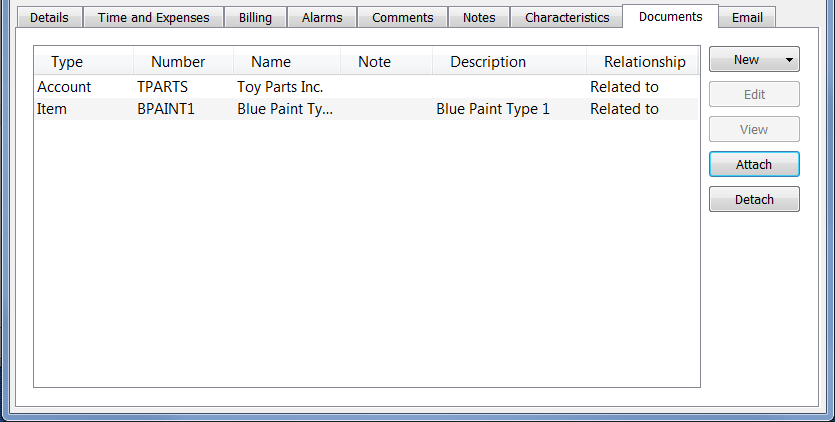
Task Documents
When associating documents, you are presented with the following options:
Select to create a new document and associate it with the current record. You may create the following document types:
Select to create a new image association.
Select to create a new fixed asset association.
Select to create a new maintenance order association.
Select to create a new incident and associate it.
Select to create a new project and associate it.
Select to create a new opportunity and associate it.
Select to create a new task and associate it.
Enables you to edit associated documents. The Edit screen is the same as that for creating a new document—except that when editing, the fields will contain document information. Double-clicking on a document will also bring you to the editing screen.
Highlight a document and then select this button to reach a read-only view of the Edit screen.
Select to associate already-existing documents. The following document types may be attached: contact, account, customer, employee, file, image, incident, item, opportunity, project, purchase order, sales order, vendor, web site, work order.
Highlight a document and then select this button to remove the association.
To associate already-existing documents, select the button. The following screen will appear:
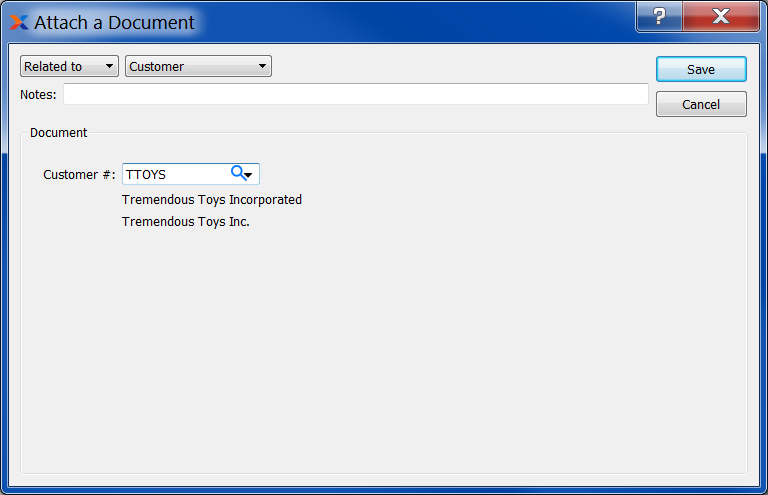
When associating already-existing documents, you are presented with the following options:
Indicate how the document is related to the current record. The following relationship options are available: related to, parent of, child of, duplicate of.
Specify the kind of document you want to associate. The following document types may be attached: contact, account, customer, employee, file, image, incident, item, opportunity, project, purchase order, sales order, vendor, web site, work order. When associating files, you will also be given the option to save the file to the database.
There is no file size restriction when saving files to the database. However, excessively large files could cause storage and performance issues.
Leave any notes on the document file as needed.
Use the lookup tool to identify the specific document you want to attach. The data entry options will vary depending on the document type you select.
To view email associated with a task item, select the tab. The following screen will appear:
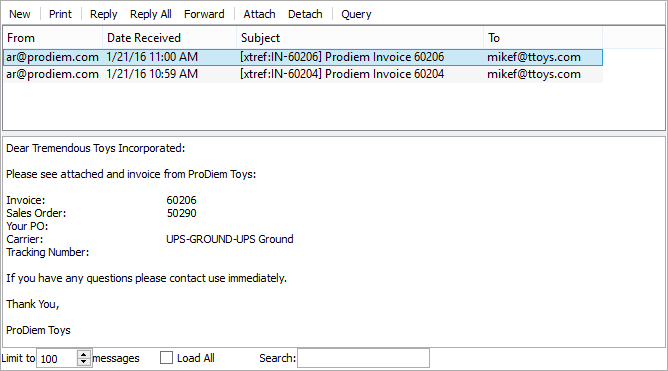
When viewing associated emails, you are presented with the following options:
Display lists associated emails.
The content of a highlighted email will be displayed here.
Specify the maximum number of associated emails you want to be displayed in the email list. If the list is extremely long, you may experience some slowness when opening the screen.
Select to load all associated emails into the list.
Enter a string of letters or complete words to search for matches in the list of associated emails. The search will scan through subject lines, To addresses, and From addresses.
The following buttons are unique to this screen:
Select to send a new email, using the default email program on your computer.
Highlight an email and then select this button to print a copy of the email.
Highlight an email and then select this button to reply to the email's sender, using the default email program on your computer.
Highlight an email and then select this button to reply to everyone associated with the email, using the default email program on your computer.
Highlight an email and then select this button to forward the email to another person(s), using the default email program on your computer.
Highlight an email and then select this button to attach an email associated with a contact in your contact list.
Highlight an email and then select this button to remove the associated email from the list.
| |  | |
| 3.1. New Project |  | 3.2. List Projects |