
|
xTuple ERP Reference Guide |
|
|
xTuple ERP Reference Guide |
| 3.1.1. Bill of Materials Item | ||
|---|---|---|
 | 3.1. Enter New Bill of Materials |  |
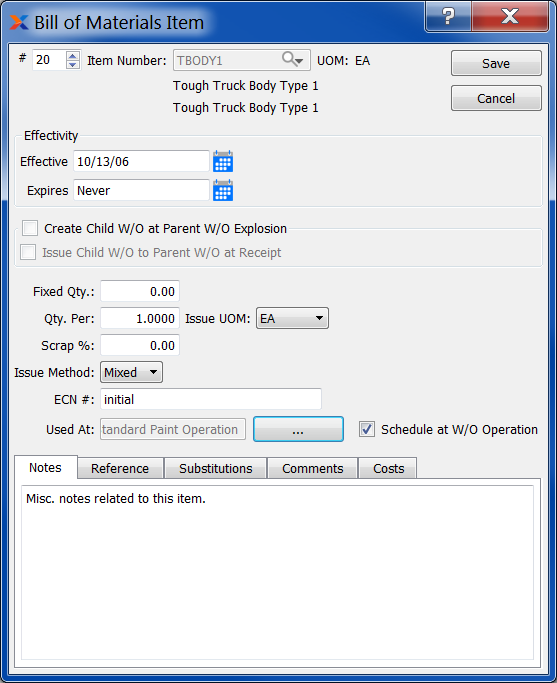
To add new components to a bill of materials (BOM), select the button. The following screen will appear:
BOM component items must have an item site defined to be valid.
When adding a new component item to a BOM, you are presented with the following options:
Shows the BOM item's sequence number. This field allows for manual editing of a BOM item's placement in a sequence. This field appears once the BOM item has been saved and is opened for editing.
Enter the item number of the item you want to add to the BOM.
Inventory unit of measure (UOM). You may also select a global conversion ratio here. Global conversions have the label Global appended to them.
Description of item.
Specify the component's effectivity, using the following parameters:
The system enables you to specify when a component can be used in a BOM. For example, the company's engineering department may be working on a new design for an existing item—but that new design will not be available for use until a given date in the future. In this case, you can specify a future effective date to indicate when the component will be available for use.
The system also enables you to specify when a component is planned to be obsoleted from (i.e., no longer used in) a BOM. As mentioned above, the company's engineering department may be working on a new design for an existing item—but that new design will not be available for use until a given date in the future. In this case, the old component item must be marked for expiration on the date when the new item becomes effective. Setting this parameter will instruct the system to stop using the specified component on the date entered into this field.
Select to create work orders for manufactured components when their parent items are exploded. This option applies only to manufactured items appearing as components on a BOM. If selected, a work order will automatically be created for the manufactured component when the parent item is exploded. The impact on work order numbers will be visible. For example, a "-1" will be appended to the parent level work order and a "-2" to the child level work order—as in, #1061-1 and #1061-2. If this option is not selected, a child work order will not be created when the parent item is exploded.
The Create Child W/O at Parent W/O Explosion option will cause the creation of lower level work orders BOTH at work order explosion and also during the explosion that takes place during master production Scheduling (MPS) and material requirements planning (MRP) runs.
Select to have the completed item (i.e., subassembly) issued to the parent work order at the point when production for the child work order is posted.
Use this option to specify a flat quantity of material required that is independent of the total quantity produced on a batch or work order. For example, tooling items added to a BOM generally have a fixed quantity regardless of the total quantity of finished goods produced. Batch size does have an impact on the costing for fixed quantity items, however. For example, if the parent item's batch size is 100 and the cost of the fixed quantity item is $100, then the fixed item's cost should be distributed across the batch, as in the following: ((1/100) * $100) = $1.
To ensure fixed quantity item costs are distributed accurately across an entire batch, make sure you select the Fractional option on the Item master for the item. If the item is not fractional, then the batch size conversion may not prorate the fixed quantity costs accurately.
Specify the quantity of the component item required per BOM. This is a required field.
Specify the UOM you want to use when issuing item quantity to work orders. You may also select a global conversion ratio here. Global conversions have the label Global appended to them. Unless you specify an alternate UOM, the inventory UOM will be used by default.
Number entered should represent a percentage of material quantity that is additionally consumed as scrap. This is a required field.
Using the Create Child W/O at Parent W/O Explosion option can greatly simplify the processing of work orders. If this option is not selected, child work orders will need to be created independently.
Method: Select one of the available issue methods:
Select if you want the component item to be issued to work orders by a specific material issue transaction. Because a specific material issue transaction must be used, push items enable you to monitor material usage variances. Standard issue quantities are not automatically backflushed to work orders, as is true for pull items. If a component item uses the push issue method, you must manually issue quantities to work orders.
Select if you want the component item to be issued to work orders by a material backflush. Pull items are automatically issued to work orders when work order production is posted. Using the pull issue method saves time, since materials do not need to be manually issued to work orders by a specific material issue transaction.
Select if you want the component item to take upon itself the issue method applied to it initially—that is, either pull or push. Assigning the mixed issue method to a component item gives you the flexibility of deciding on a work order by work order basis whether you want to assign the pull or push method to the component item.
You can define a default issue method for new BOM component items at the level.
Enter the engineering change notice number—if applicable—for the specified component item.
BOM-defined substitutions are the only substitutes which may be implemented during work order processing. To substitute a component item on a work order, use the Substitute option found on the right-click menu of the Maintain Work Order Material Requirements screen.
Specify which operation the component is used at. Using the lookup feature located to the right of the field, select a routing sequence number to identify which operation the component is used at. Linking a component with an operation will have certain effects. First, when posting operations, components that are linked to a given operation will be backflushed if the issue method for the components is either pull or mixed and the operation is set to auto issue components. Secondly, work order paperwork, such as routings, will show the relationship between linked work order material requirements and work order operations.
If an operation is expired, the link between the operation and the component item will be removed.
Select to indicate that this component is not due until the work order operation that will consume it is scheduled to begin. The scheduling of operations is handled by the execution day indicator on the Routings Item screen. For example, let's say we have an operation with an execution day = 5. This means the operation is scheduled to begin five days after the start date of the work order. Components scheduled with this operation are due the day before the operation starts—that is, on day four after the work order start date—to ensure they will be available when the operation is scheduled to begin. If this option is not selected, then the component scheduling will be governed by the start and due dates set on the work order header.
Enter additional notes related to the item.
To add reference information related to a BOM item, select the tab. The following screen will appear:
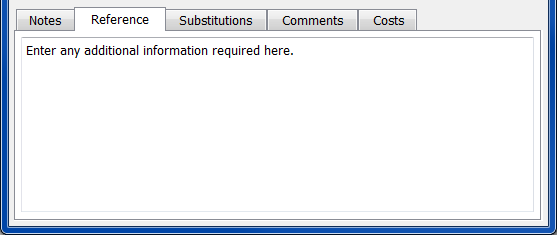
The Reference field can be used to identify any additional attributes associated with an item.
To add substitution information related to a BOM item, select the tab. The following screen will appear:
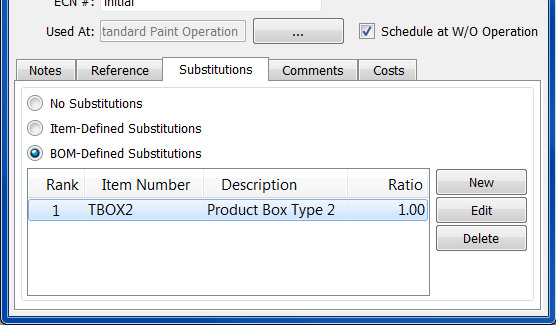
Choose one of the following item substitution options:
Select if no substitutions exist for the component item.
Select if substitutions are defined on the Item master for the component item. Selecting this option will not cause item-defined substitutions to display here. You are simply indicating that Item master level substitutions do exist.
Select to define item substitutions at the BOM level.
To ensure availability, a BOM-defined substitution must be located in the same site as the component item it replaces. If the substitute is located in a different site, it will not be available for substitution.
To create a new BOM-defined substitution, select the button. The following screen will appear:
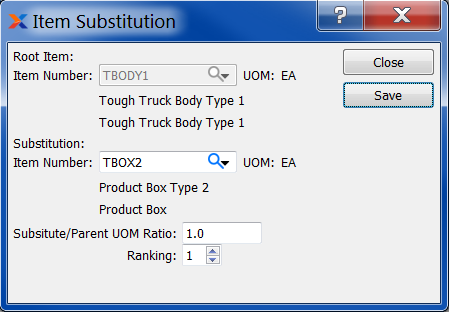
When adding a new BOM-defined substitution, you are presented with the following options:
Displays item number of specified component item.
Inventory unit of measure.
Enter the item number of the substitute item.
Inventory unit of measure.
Indicate the ratio between the issue UOM for the specified BOM item and the corresponding issue UOM for the substitute item.
Select a number using the arrows, or manually enter a value up to a maximum of nine. Enter the specified ranking order of the item substitute. You may assign the same ranking to multiple items, if this is appropriate.
To add comments to a component item, select the tab at the bottom of the Bill of Materials Item screen. The following screen will appear:
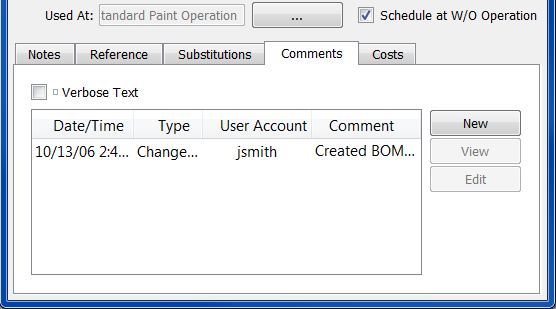
When adding or reviewing comments, you are presented with the following options:
Select to display all comments in the list in an expanded view which includes the entire text of each comment. To edit a comment, simply select the link next to the comment. That link will not be shown for changelog comments, which can't be edited. If the Verbose Text option is not selected, the comment list will display only header level information for each comment.
Display lists comments related to the record.
The following buttons are available:
Opens screen for creating a new comment.
Highlight a comment and then select this button to reach a read-only view of the Edit screen.
Enables you to edit highlighted comments—as long as the comments are not changelog comments. ChangeLog comments are system-generated and may not be edited. The Edit screen is the same as that for creating a new comment—except that when editing, the fields will contain comment information. Double-clicking on a comment will also bring you to the editing screen.
To enter a new comment, select the button. The following screen will appear:
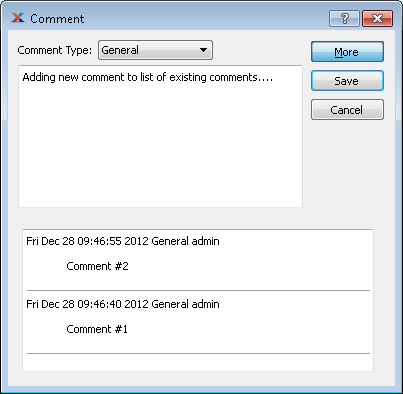
Select a comment type from the drop-down list to classify the comment. This is a required step. Comment types may be system-defined (i.e., changelog and general) or user-defined, as described in Section 13.2.3, “Comment Types”. Once you have specified a comment type, begin typing your comment in the main text area. The text area features word-wrapping and scroll-bar support for longer comments.
The following buttons are unique to this screen:
Select to show the complete list (i.e., thread) of comments associated with the record. To hide the list, simply select the button again. The comment thread will show the most recent comment first.
To view or maintain the current standard costs for the selected item, select the tab at the bottom of the Bill of Materials Item screen. The following screen will appear:
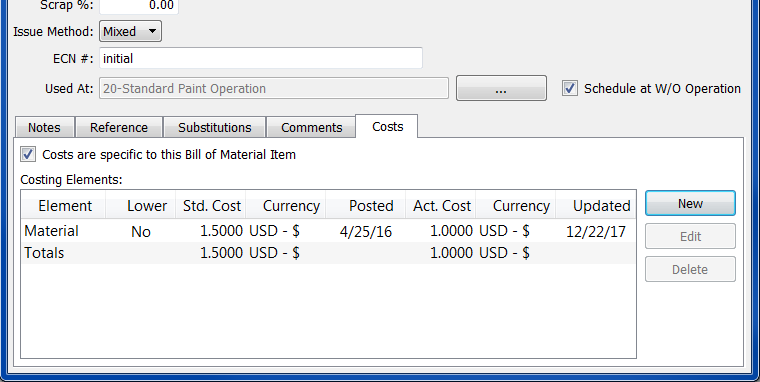
When opening the BOM's item costs, you are presented with the following options:
Select this option to manually edit the current standard costs of the item. If this option is not selected, a read only list of the current standard costs for the item is displayed.
If this option is unchecked after the costs have been changed, the list will revert to displaying standard costs.
A list of the costing elements with current standard cost of the BOM item is displayed.
To link a BOMs component to a routing item, select the lookup feature located to the right of the Used At field. The following screen will appear:
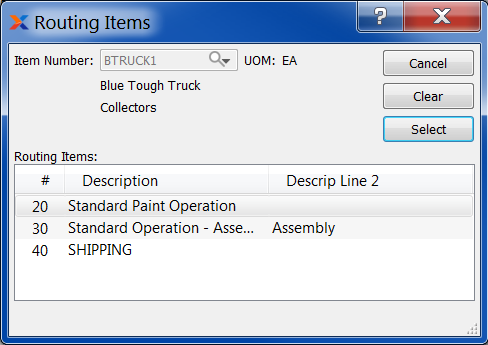
When linking BOM components to routings items, you are presented with the following options:
The component item selected on the Bill of Materials screen will display here.
Inventory unit of measure.
Display lists routing items for the same manufactured item whose BOM is being specified. Highlight the operation you want to link the BOM item to, then hit the button.
The following buttons are unique to this screen:
Removes the link between a BOM component and a routing item if such a link has been made.
Links the routing item to the specified BOM component. Highlight the desired routing item before selecting the button.
On a BOM, if the parent item is a configured item (i.e., configured job item or reference item), then you will have the option to link BOM items to specific parent item characteristics. For example, let's say the parent item has a characteristic for paint finish with the values flat and glossy. At the BOM item level, you can specify whether the BOM item goes with flat or glossy. If you choose glossy to associate with the BOM item, then that means the BOM item will be included as a material requirement whenever orders call for the glossy version of the parent item. If no characteristic association is made at the BOM item level, then the BOM item will always appear on work orders—regardless of the parent-level configuration selection. To associate characteristics with a BOM item, select the tab. The following screen will appear:

You can learn more about item configuration in xTuple ERP by reading the Assemble to Order (ATO) Configuration Topic.
When associating characteristics with a BOM item, you are presented with the following options:
Select a characteristic from the list of characteristics. These characteristics are item characteristics defined on the Item master for the parent item on the BOM. Linking parent characteristics to child BOM items means the child item will be included as a material requirement whenever orders call for the same parent item characteristic.
Enter a value to associate with the selected item characteristic.
| |  | |
| 3.1. Enter New Bill of Materials |  | 3.2. List Bills of Materials |