
|
xTuple ERP Reference Guide |
|
|
xTuple ERP Reference Guide |
| 3.1. Scheduled Job | ||
|---|---|---|
 | 3. xTuple Connect Console |  |
To edit an xTuple Connect job, select the button. The following screen will appear:
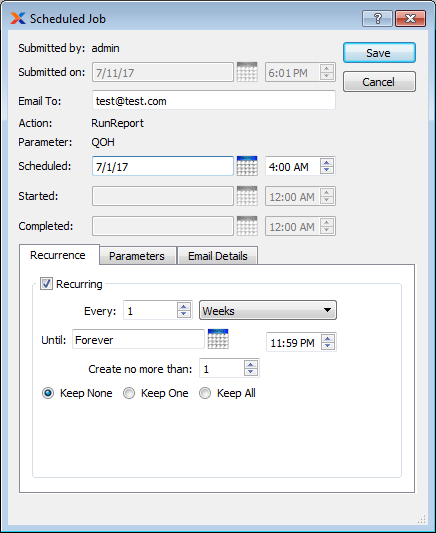
When editing an xTuple Connect job, you are presented with the following options:
Displays the name of the user who submitted the job.
Displays the date and time when the job was submitted.
Displays the email address of the person who will receive the email or job results once the scheduled action is run. Send to multiple recipients, using a comma to separate each email address.
Displays the type of action to be performed when the job is run.
Displays an additional piece of information about the action, if relevant. For example, if the action is RunReport then the parameter is the name of the report to run.
Specify a date in the first field using a standard date format. Use the arrows in the second field to specify a time of day.
Displays the date and time when processing of the job began.
Displays the date and time when processing of the job was completed.
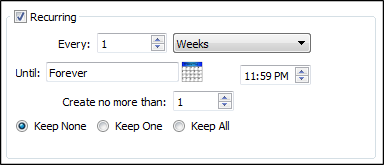
When creating a recurring event, you are presented with the following options:
Check this box if you want the event to repeat itself at regular intervals, using the frequency settings you specify below. Recurring events are generated when you run the Recurring Items utility, which is described in more detail here: Section 10.2, “Create Recurring Items”.
Enter a number and select a unit of time to describe how frequently you want the event to occur. You can choose any regular schedule, ranging from once every 1 minute to once every 99 years.
Enter a date and time at which to start the first event. The default value is the time the screen opened. The From option only appears on some screens.
Enter a date and time after which the event should no longer occur.
Enter the maximum number of future copies of this event you want the system to maintain. Whenever the Create Recurring Items screen is run, it will create up to the number you enter here.
If you delete all copies of a recurring event, the event will stop repeating even if the until date has not yet been reached. xTuple recommends setting this to at least 2 to reduce the likelihood of deleting all copies of the event.
Select to make the next job catch up if work was missed.
Select to create one catch-up job if work was missed.
Select to create any missed jobs.
In addition to the single parameter described above, individual jobs usually require additional details to execute successfully. For example the user might have requested that a report be run showing information about a particular class code. In this case the parameter described above will hold the name of the report but the report also needs to know which class code the user selected. To see these details, select the tab. The following screen will appear:
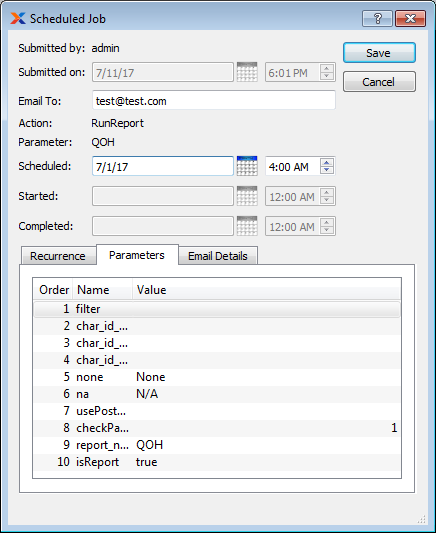
Parameter details passed to a Scheduled Job
To review the details of the email notification related to a scheduled job, select the tab. The following screen will appear:

Email Details passed to a Scheduled Job
Email details can be manually changed on this screen. However, if you find yourself making changes frequently, you may want to consider updating your EDI profile. That way routine changes will become part of the template.
When reviewing the details of an email notification, you are presented with the following options:
Displays the email address the email is being sent from.
Displays the reply-to email address.
Displays any email addresses being copied on the email.
Displays any email addresses being blind copied on the email.
Displays the subject line of the email
Displays the contents of the email.
| |  | |
| 3. xTuple Connect Console |  | 4. View Database Log |