
|
xTupleCommerce Product Guide |
|
|
xTupleCommerce Product Guide |
| 2.3.1. Adding a File | ||
|---|---|---|
 | 2.3. Images and Documents |  |
If you have a file, such as a .jpeg or PDF, that you want to appear on the web portal, you can attach the document to the item directly.
To attach a file, here are the steps you need to follow:
In the ERP, on the Item master, navigate to the tab.
From there, click .
Leave the first drop-down menu as Related To.
In the second drop-down, select the File option.
Give the document a name.
Select the file using the browse button.
The MIME Type will be identified once the file is verified.
Check the Save to Database checkbox.
To allow users on the web portal to be able to view the file, check the Public can access File checkbox.
Click .
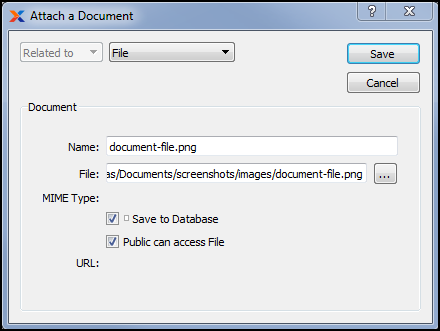
Attaching a file
The ERP will add the file to the list of documents along with a URL on a separate line. However, the document will not appear on the web portal until the URL is published.
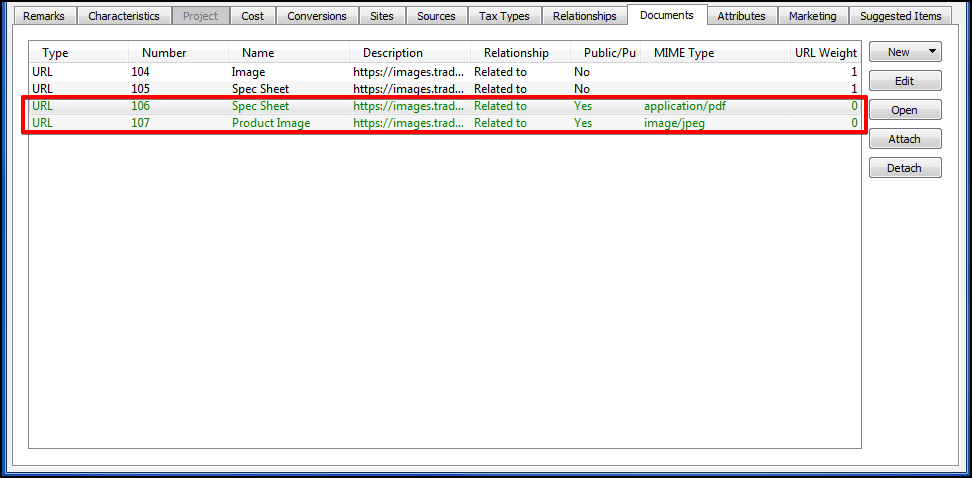
Documents tab list of files and URLs
Here are the steps you need to follow to publish the URL:
Select the URL line that you want to publish and click .
The Name and URL fields should already be populated with the information from the file that you've attached.
Check the Publish URL on parent resource checkbox.
The Content Type will identified once the URL is verified.
The default Weight is set to 1. This number is not exclusive—more than one document may share the same weight. The lower the number, including negative numbers, the closer to the "top" it will appear on the web portal.
Click .
A pop-up will appear. Click to publish the URL.
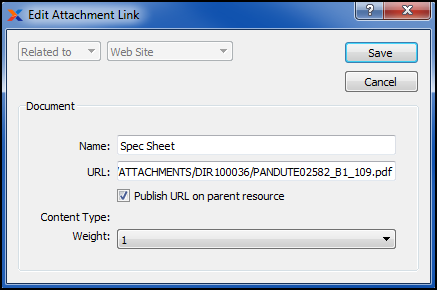
Publishing a URL
Once saved, the system verifies that the URL is usable. If there is an error with the URL, the line will appear in a different color than the verified lines.
| |  | |
| 2.3. Images and Documents |  | 2.3.2. Adding a URL |