So far, all of the jobs we have submitted have been for a single execution performed ASAP (As Soon As Possible). But, what about jobs we want to run at the same time each day, week, or month? These are recurring jobs and the xTuple Connect Batch Manager can accommodate them.
There are some jobs you only need to send once, such as emailing a Purchase Order to a Vendor. But there are other jobs, like keeping your Actual Costs updated, that you want to run on a regular, recurring basis. The xTuple Connect Batch Manager supports both approaches. In this next scenario, we will show how to make a xTuple Connect Batch Manager job recurring.
Any job can be set as recurring—even jobs which have already been completed. In fact, it's often the already completed jobs which you will want to make repeating. To begin the process of setting up a recurring job, follow these steps:
Follow this path:
Select the check the "Show Completed Actions" option
Results like those shown in the following screen will appear:
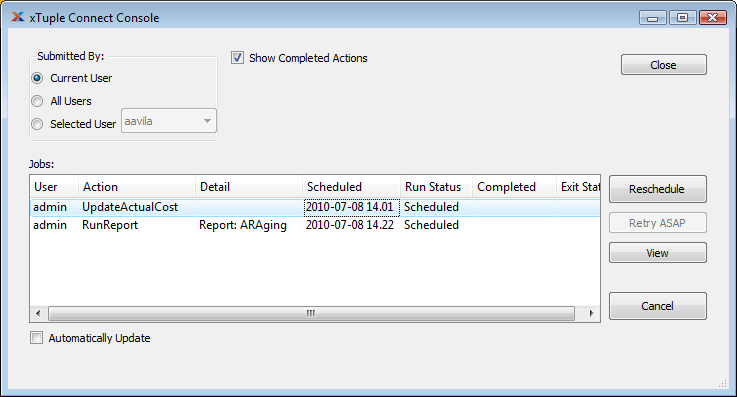
For this exercise, we will reschedule the Update Actual Cost job which we originally described in Section 1.1, “Submitting Jobs”. This job is the first one listed in the screenshot shown above. To make this a recurring job, follow these steps:
Highlight the job you want to reschedule
Then select the RESCHEDULE button
In the "Scheduled" field, enter the first date and time you want the job to run
Select the "Recurring" option
Enter how frequently you want the job to run by typing a number in the "Every" field and selecting a time unit from the drop down list
Enter the maximum number of copies of this job to have pending (new ones will be recreated automatically as old ones complete)
The Update Actual Costs job is set to be recurring in the following screen:
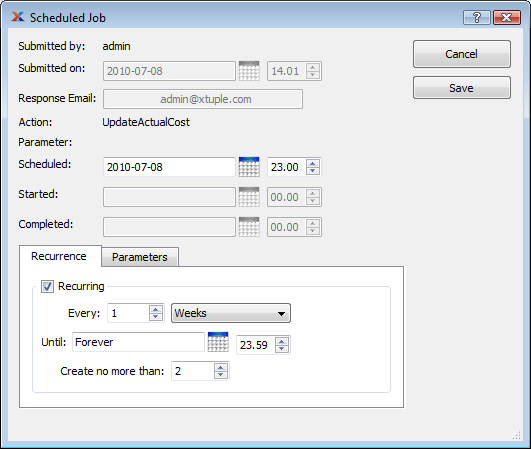
Once you select the SAVE button, the job will be scheduled to run as often as you specified. In our example, we scheduled the Actual Cost update to run on a weekly basis. And, since this is a resource-intensive job, we have scheduled the job to run after hours at 11 PM. For documentation and safety purposes, the recurrence is set to create no more than 2 jobs. This setting lets the user see at a glance when the next two jobs will be run without cluttering the list of jobs. It also guards against someone accidentally deleting the recurrence by cancelling the only scheduled cost update. To verify the two jobs have been scheduled, follow these steps:
Return to the xTuple Connect Console screen
De-select the "Show Completed Actions" option to show all currently scheduled jobs
Verify that two Update Actual Cost jobs are in the list
Keep in mind that the user who originally submitted the job will receive a confirmation email each time the job is run.
Note
You can cancel a job at any time by highlighting it and selecting the CANCEL button. If you do this to a complete set of recurring jobs, you may need to repeat the steps described in this section to schedule the recurrence to run again—if that's what you want to do.