
|
xTuple for Service Businesses Demo Guide |
|
|
xTuple for Service Businesses Demo Guide |
| 7.3. Processing Checks | ||
|---|---|---|
 | 7. Paying Vendors |  |
Now that the voucher has been selected for payment, we are ready to cut the check. To process a check for our vendor, follow these steps:
Go to .
Select the tab.
In the Bank Account field, select .
To create the check run, select the button.
Confirm the check date and click .
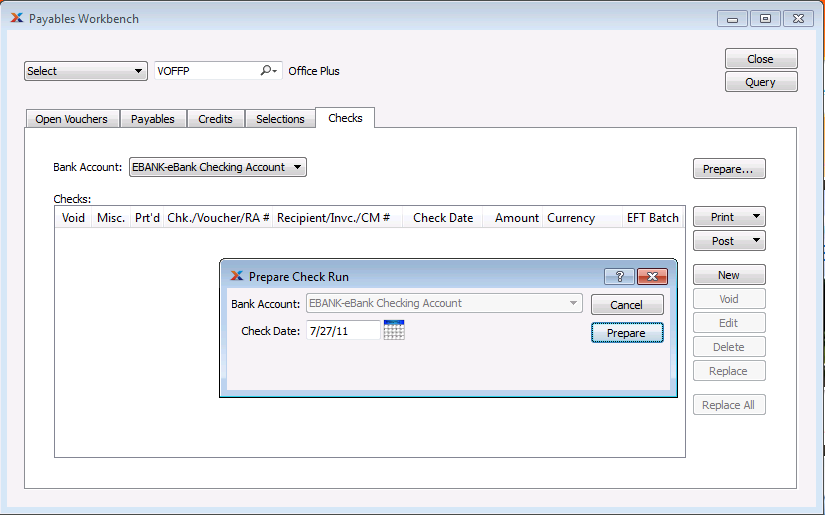
On the Prepare Check Run screen there is only one final step to create the check run:
Select the button.
Now that the check run is ready, all we need to do is print and post the check—and then we're done! We covered the printing and posting of checks earlier in this chapter. In that previous example, we were issuing a refund check to a customer. Printing and posting vendor checks works the same way. To print a vendor check, follow these steps:
Highlight the check we just created.
Select the button, using the Selected Check option.
The screen should look as follows:

Notice on the Print Check screen that the next check number is shown. As we saw previously, the next check number is defined on the Bank Account screen. We are now ready to print the check:
Select the button.
Choose a printer from your operating system's printer dialog and print the check.
Click to indicate the check was printed successfully.
Once the check has been printed, the Check Run screen will be updated to show the check's printed status. A check must be printed before it can be posted. To post the check, follow these steps:
Highlight the check.
Select the button, using the option.
The screen should look as follows:

On the Post Check screen there is one final step:
Select the button.
That's it. We've now completed the purchasing process flow. We have our office supplies—and the vendor has been paid.
| |  | |
| 7.2. Selecting for Payment |  | 7.4. Miscellaneous Vouchers |