|
xTuple for Service Businesses Demo Guide |
Next we will post the invoice. Remember, we could have posted it on the Print Invoices screen. But we decided to reserve invoice posting as a separate operation. Smaller businesses might wish to post the invoice directly from the Print Invoices screen. However, many larger businesses like to have this step broken out as a control point. In fact, posting invoices is often the job of someone completely different.
To post the invoice, follow these steps:
Go to .
Instead of the All Customers option, use the Select option.
Enter the "TTOYS" customer number.
Select .
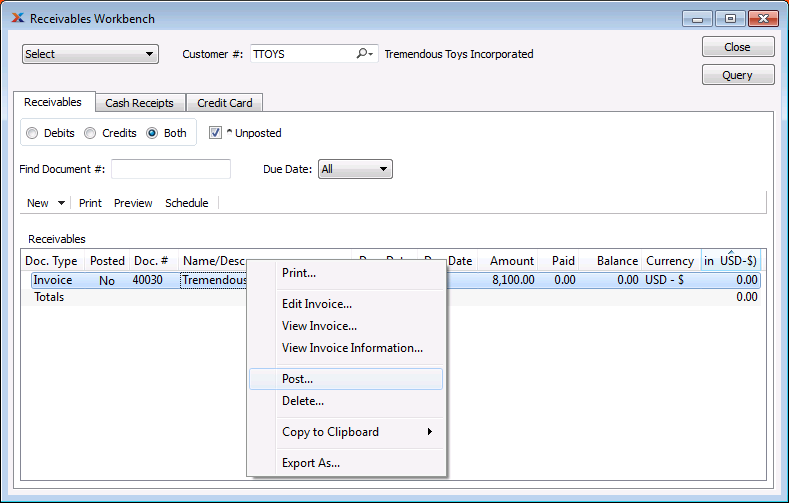
Right-click on the unposted invoice.
Select the Post option, as shown below:

After selecting the Post option, you'll need to follow these steps:
You will be presented with the Get G/L Distribution Date screen where you should use the defaults and click the button
The invoice is now associated with the customer's receivables