We have seen how Field objects may be used to retrieve text (i.e., user email addresses) from a database. In this section, we will show how to create running totals using Field objects.
Our goal for this exercise is to provide a running total of all active users. There are currently three active users in the database. We will add a fourth user and make that user inactive, as shown in the following screen:
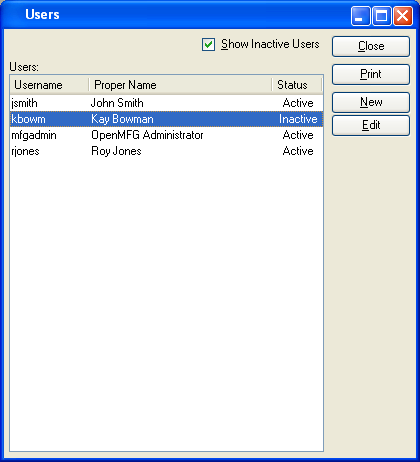
If we are successful, the Field object should ignore the inactive user and include only the three active users in the running total.
To begin, we will create a Report Footer section in the report definition. As you may recall, Report Footers print only on the last page of a report—which is exactly what we want. We want the running total to print at the end of the report.
Note
For more information on Report Footers, see the “Report Footers” section in the Report Writer Basics chapter.
To create a Report Footer section, we select the “Section Editor” option from the “Document” menu. The following screen will appear:
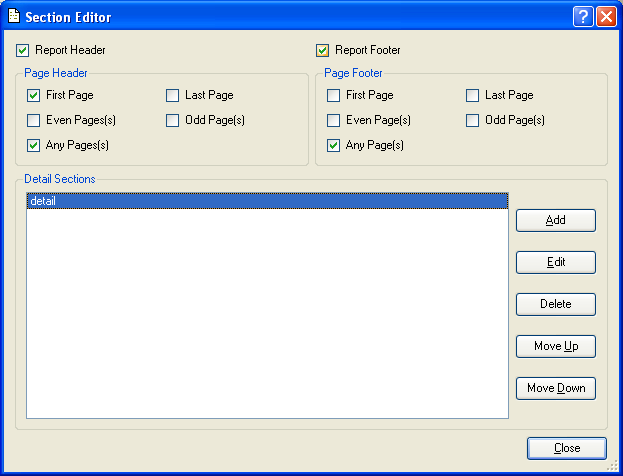
As you can see, we have selected the “Report Footer” option. Selecting this option causes a Report Footer to be added to the report definition, as shown in the following screen:
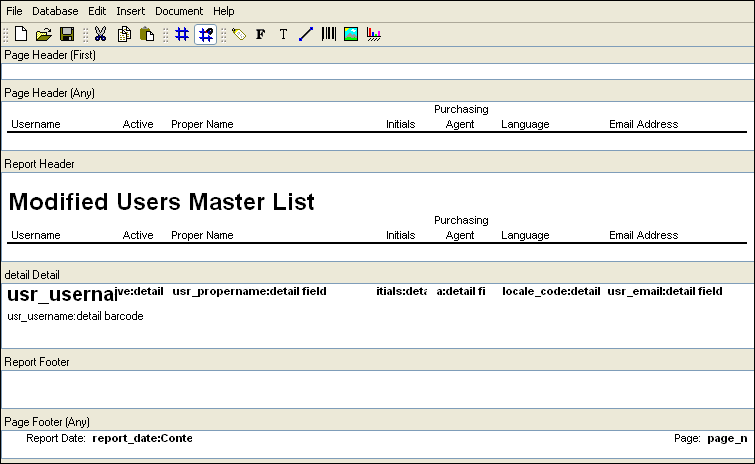
Now that we have added the Report Footer section, our next step is to add a Field object to the section. The Field object will display the running total of all active users.
To add a Field object to the report definition, we select the Field option from the toolbar and then click in the Report Footer section. We place the Field object in the section, as shown in the following screen:
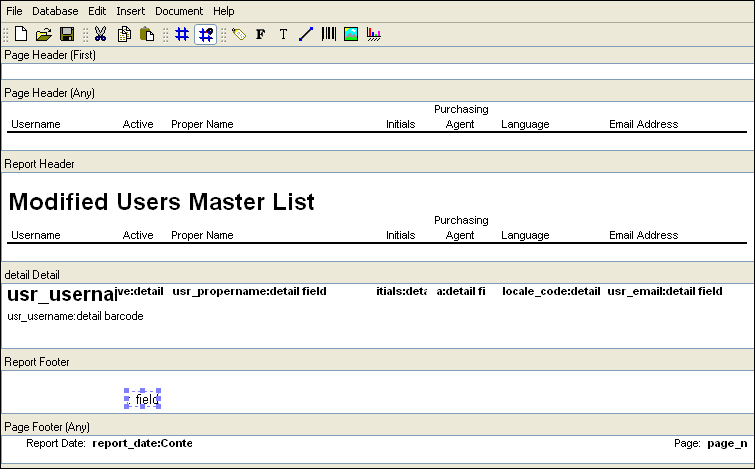
Now that we have placed the Field object, we must define its properties. Double-clicking on the Field object opens the Field properties screen:
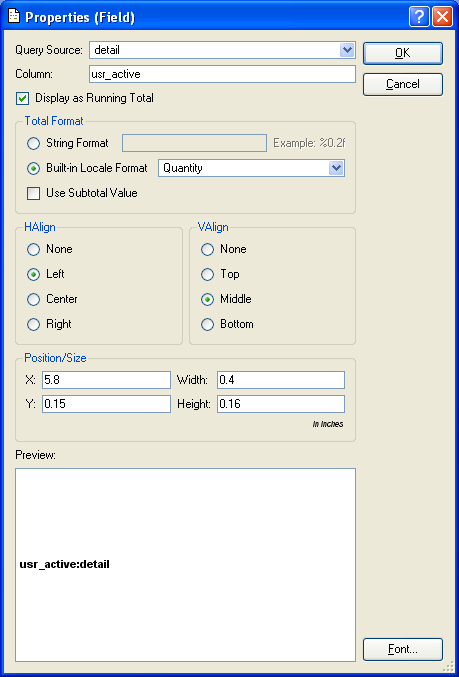
As you can see, we have filled in the following properties for the running total Field object:
- Query Source
We selected the “detail” query from the list of available query sources. This is the query whose
SELECTstatement includes the reference to theusr_activecolumn.- Column
Here we enter the name of the
usr_activecolumn—since this is the column whose data we need for the Field object. A column must be referenced in theSELECTstatement of the associated query source to successfully retrieve data from the database.- Display as Running Total
By selecting this option, we indicate we want the records on active users to be displayed as a running total. When the running total is calculated, active users will be assigned a value of “1,” while inactive users will be assigned a value of “0.”
Note
When running totals are calculated for columns designated as Boolean, the “true” values are assigned a value of “1,” while “false” values are assigned a value of “0.” In this example, active users would be assigned a value of “1”, while inactive users would be assigned a value of “0”.
- Built-in Locale Format
We specify we want the running total to be displayed as a quantity.
- Preview
The preview shows us both the name assigned to the Field object
usr_active:detailand also the font choice. To make the font consistent with the other Field objects in the report definition, we select the FONT button and specify 8-pt bold Arial.
After we select the OK button, we see the Field object has been updated in the report definition, as shown below:
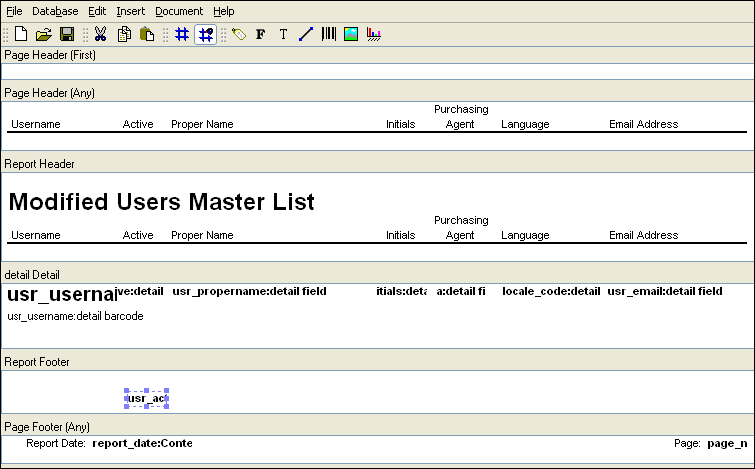
We have added the Field object which will retrieve data from the usr_active column and display the information as a running total. Next, we need to insert a Label object to appropriately identify the Field.
To add the new Label, we select the Label option from the toolbar and then click in the Report Footer section. We place the Label object to the left of the usr_active:detail field, as shown in the following screen:
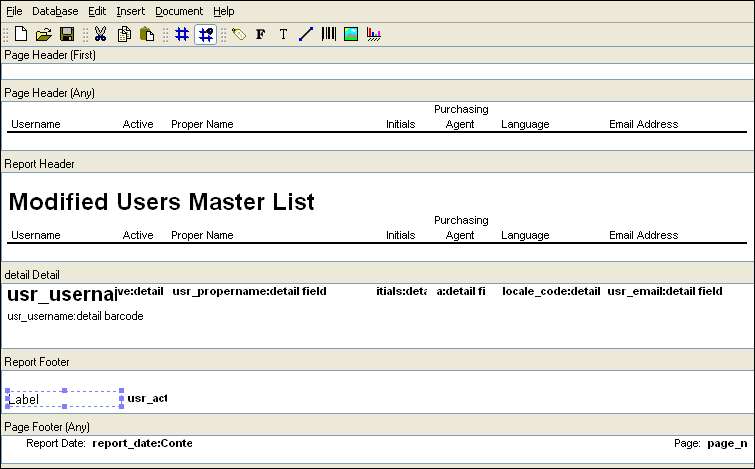
Now that we have placed the Label object, we must define its properties. Double-clicking on the Label object opens the Label properties screen:
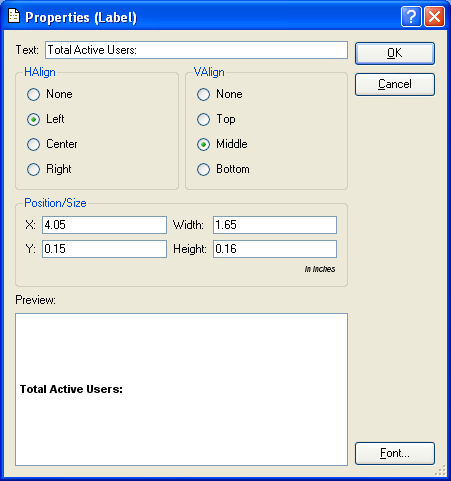
As you can see, we have entered “Total Active Users:” in the “Text” field. This text identifies the running total, as shown in the following screen:
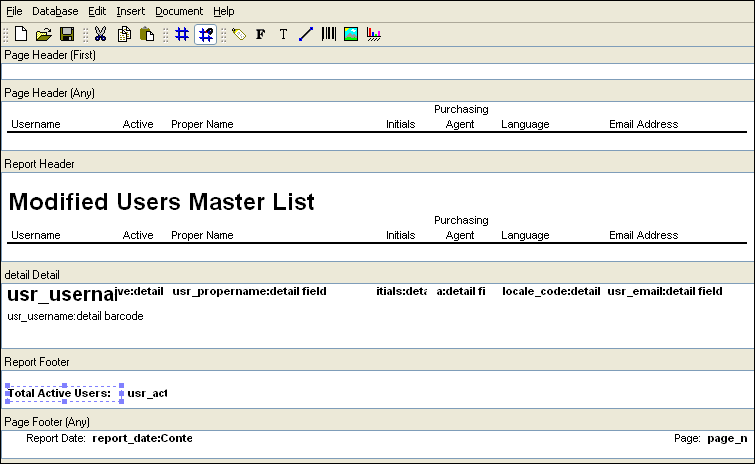
We have now added the running total to the report definition—and labeled it appropriately. Once we save the report definition changes to the database, we will be ready to run the report and see the results.
To run the Users Master List report from xTuple, select the “Maintain Users” option from the System Module menu. After selecting the PRINT button, the following report is generated:
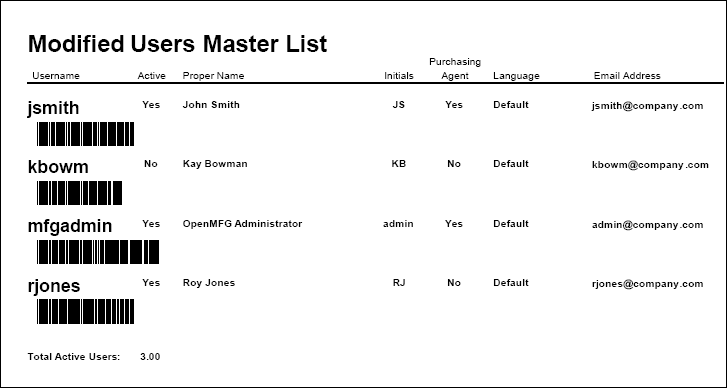
If we scrutinize the example closely, we see the appearance of the report would benefit if we added a horizontal line separating the user names from the running total. In the next section, we will add a separator line.
Lines make reports easier to view. In this section, we will add a horizontal Line to separate the user names from the running total at the bottom of the report.
To add a Line, we select the Line option from the toolbar and then click in the Report Footer section.
Tip
If you hold down the SHIFT key when you are dragging a Line object, this will keep the Line perfectly straight. Also, to reposition a Line, simply click in its mid-point and drag the object to a new location.
We place the Line just above the running total field—and then drag the Line using our mouse from the left margin to the right margin. Finally, we double-click on the Line object to adjust its properties. The following screen appears:

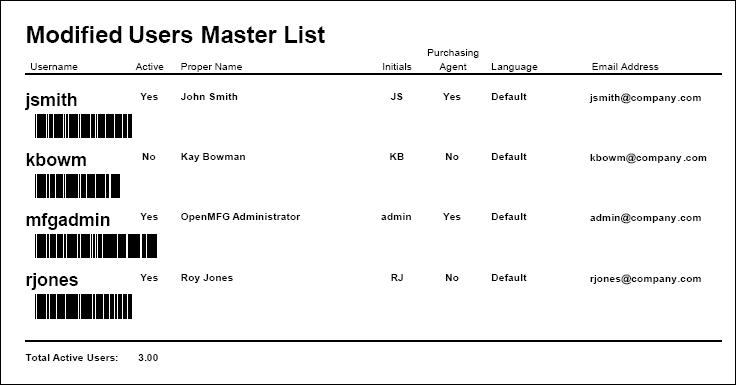
In the “Width” field, we set the width of the Line to “2.” Line widths are measured in pixels. After saving our changes to the database, we print the Users Master List report. The following screenshot shows our result:
We are almost done modifying the “UsersMasterList” report definition for this chapter. However, we still want to display a total of all users—as a complement to the running total of active users. We will add this additional information in the next section.