The last change we will make to the “UsersMasterList” report definition in this chapter is to add a total count of all displayed users. This total will complement the running total of active users, which we have already added, since the “UsersMasterList” report may display both active and inactive users.
To provide this total information, we will add a COUNTER variable to the “detail” query source. The COUNTER variable will increment by 1 for every row returned by a query. For example, if a column contains 10 rows of data, the COUNTER will total “10” after the query has been run.
To add the COUNTER, we open the “detail” query source by double-clicking on it from the list of available query sources. Next, we add the COUNTER to the query’s SELECT statement, as shown in the following screen:

As you can see, the COUNTER syntax is highlighted at the end of the SELECT statement. The “1 AS COUNTER” syntax indicates two things: 1) For every row of data retrieved from the database, that row will be assigned a value of “1,” and 2) the result set of retrieved rows will be stored in memory in a temporary column we have called COUNTER. Notice we have been careful to add a comma after the reference to the locale_code column. The comma separates the COUNTER from the other items in the SELECT statement series. We do not insert a comma after the COUNTER line.
Now that we have inserted the COUNTER into the query source, we are ready to add a Field object to display the results.
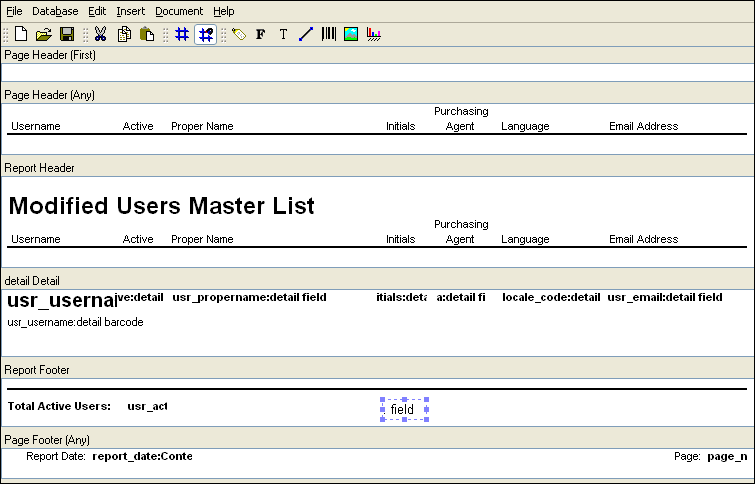
To add a Field object to the report definition, we select the Field option from the toolbar and then click in the Report Footer section. We place the Field object in the section, as shown in the following screen:
Now that we have placed the Field object, we must define its properties. Double-clicking on the Field object opens the Field properties screen:
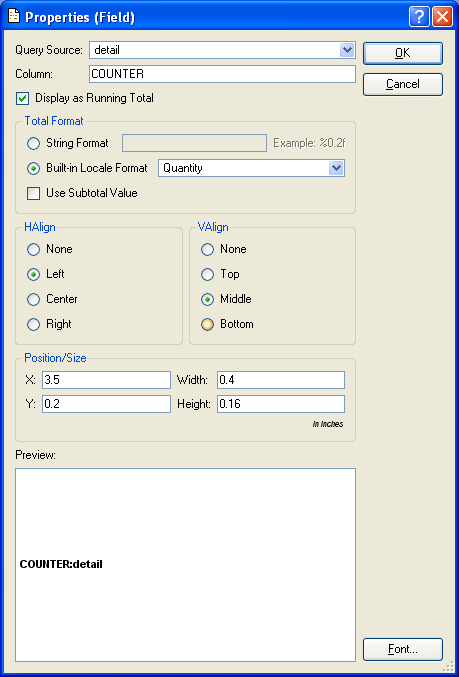
As you can see, we have filled in the following properties for the COUNTER Field object:
- Query Source
We selected the “detail” query from the list of available query sources. This is the query whose
SELECTstatement includes the reference to the temporaryCOUNTERcolumn.- Column
Here we enter the name of the temporary
COUNTERcolumn—since this is the column whose data we need for the Field object. A column must be referenced in theSELECTstatement of the associated query source to successfully retrieve data from the database.- Display as Running Total
By selecting this option, we indicate we want all the records written to the
COUNTERcolumn to be displayed as a running total. When the running total is calculated, each record (i.e., displayed user) will be assigned a value of “1.”- Built-in Locale Format
We specify we want the running total to be displayed as a quantity.
- Preview
The preview shows us both the name assigned to the Field object
COUNTER:detailand also the font choice. To make the font consistent with the other Field objects in the report definition, we select the FONT button and specify 8-pt bold Arial.
After we select the OK button, we see the Field object has been updated in the report definition, as shown below:
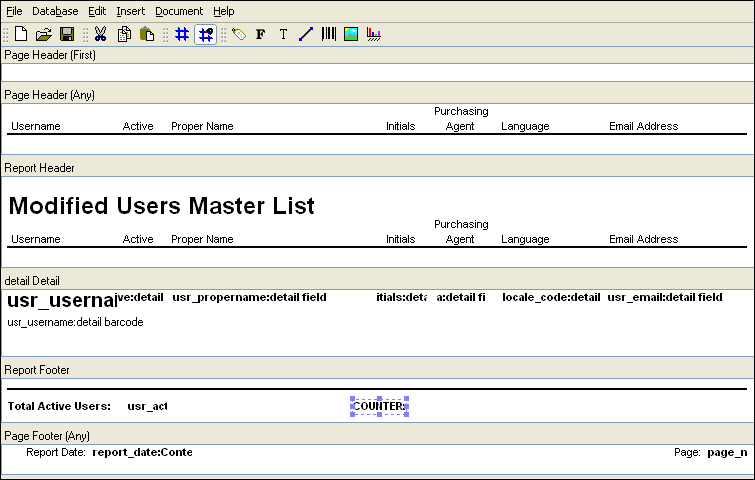
We have added the Field object which will retrieve data from the COUNTER column and display the information as a running total. Next, we need to insert a Label object to appropriately identify the Field.
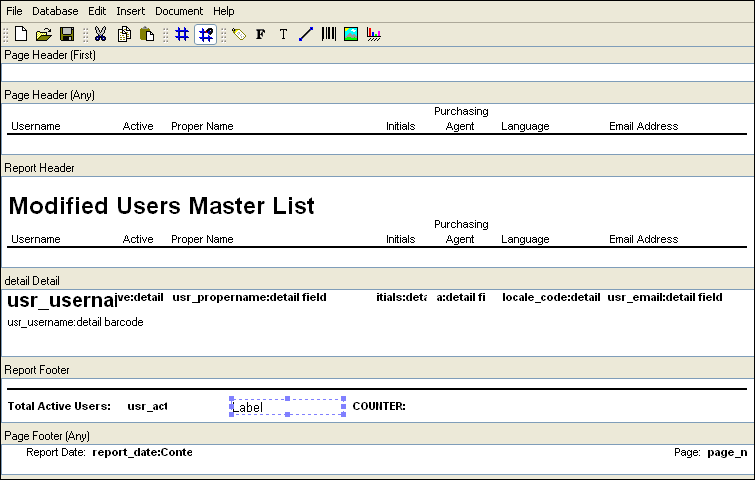
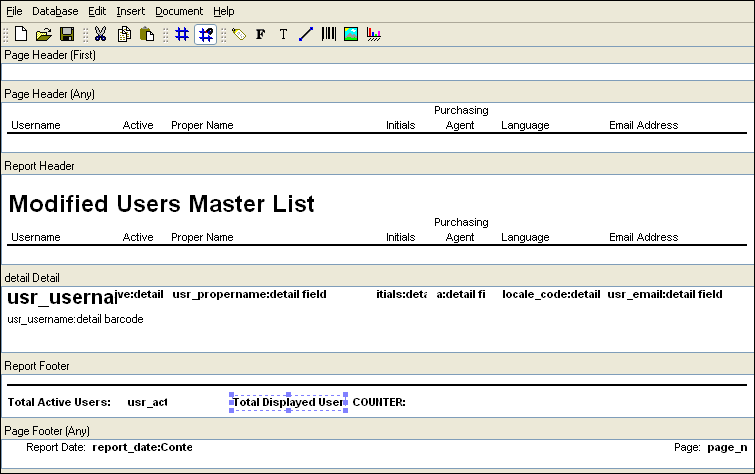
To add the new Label, we select the Label option from the toolbar and then click in the Report Footer section. We place the Label object to the left of the “COUNTER:detail” Field, as shown in the following screen:
Now that we have placed the Label object, we must define its properties. Double-clicking on the Label object opens the Label properties screen:
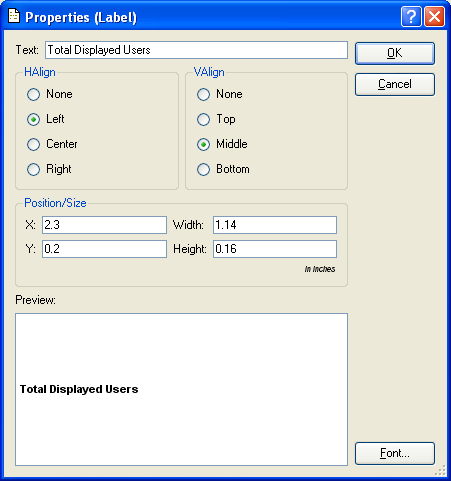
As you can see, we have entered “Total Displayed Users:” in the “Text” field. This text identifies the running total, as shown in the following screen:
We have now added a COUNTER to the report definition—and labeled it appropriately. Once we save the report definition changes to the database, we will be ready to run the report and see the results.
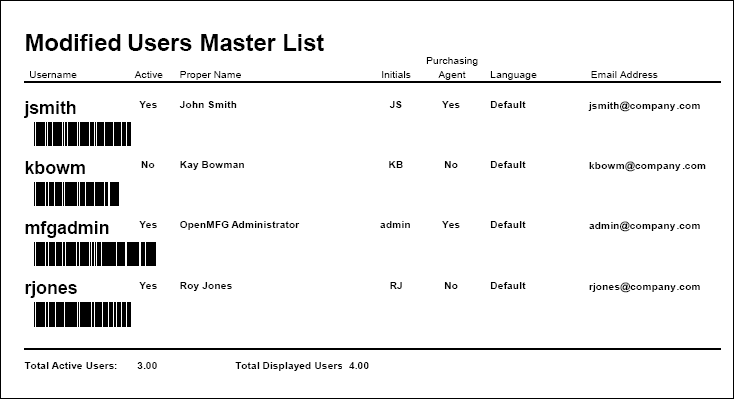
To run the Users Master List report from xTuple, select the “Maintain Users” option from the System Module menu. After selecting the PRINT button, the following report is generated:
We have now reached the end of the exercises contained in the this chapter. Over the course of this chapter we have taken a hands-on approach to learning fundamental report writer functionality. You should now understand how the report writer retrieves information from a database and displays that information in printed form. More advanced functionality will be explored in subsequent chapters.