We’ve successfully added a column heading called “Email Address” to our report definition. Now we need to work on retrieving user email addresses from the database. To begin, let’s look at the query sources defined for this report definition. To view the available query sources, select the “Query Sources” option from the “Database” menu. The following screen will appear:

As we have seen before, the “detail” query source is the only query source defined for the “UsersMasterList” report definition. To open the query source for editing, simply double-click on it, or highlight it and select the EDIT button. The following screen will appear:
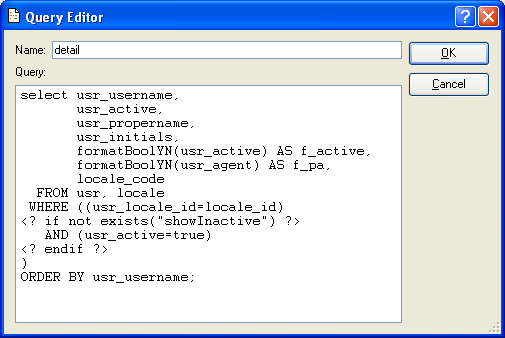
Because we are familiar with our sample database, we know the usr table has a column called usr_email, which stores user email addresses. However, if we look closely at the SELECT statement, we do not see references to the usr_email column. Without a reference to the usr_email column, we will not be able to retrieve user email address information from the database. We need to add that reference to the SELECT statement.
As we saw in the previous section, the SELECT statement in our query source does not refer to the usr_email column. Without that column reference, we will not be able to retrieve user email address information from the database. In this section, we will edit the SELECT statement so the usr_email column is referenced. The SQL found in the “Query” display of a query source is straight text. It can be edited in the same was as any text can be edited. We simply click in the SELECT statement after the reference to the usr_initials column. Then, after hitting ENTER to create an extra line, we type in the usr_email reference, as shown below:
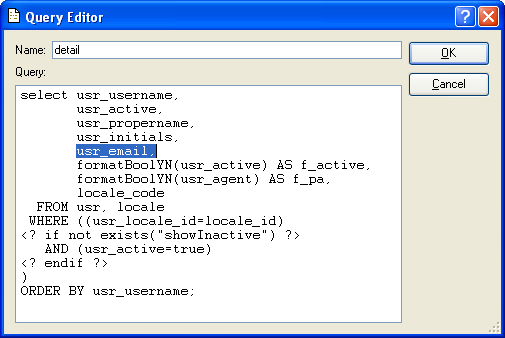
We are careful to add a comma “,” at the end of the usr_email reference, to indicate the column is one in a series of columns data may be retrieved from. To save the edited SQL, select the OK button. Finally, we save all report definition changes to the database.
In our next step, we will add a new Field object to the Detail section of the report definition. The Field object will handle the display of user email addresses retrieved from the database.
Field objects are used to display dynamic data retrieved from a database. Typically, they are placed in the Detail section of a report definition. In this section, we will add a Field object to handle our user email addresses.
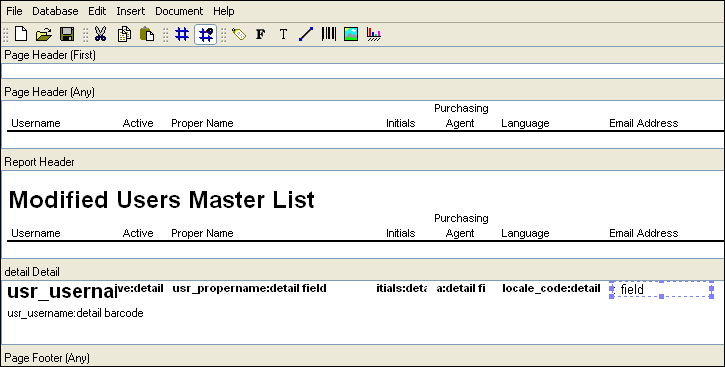
To add a Field object to the report definition, we select the Field option from the toolbar and then click in the Detail section. We place the Field object to the far-right of the section, lined up beneath the “Email Address” column heading, as shown in the following screen:
Now that we have placed the Field object, we must define its properties. Double-clicking on the Field object opens the Field properties screen:
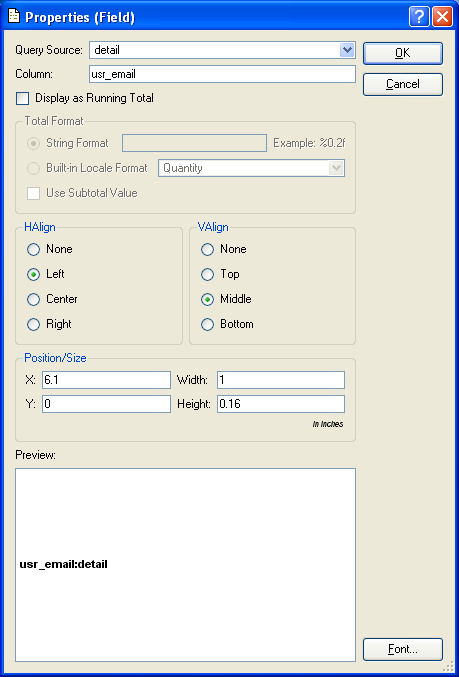
As you can see, we have filled in the following information:
- Query Source
We selected the “detail” query from the list of available query sources. This is the query whose
SELECTstatement includes the newly-added reference to theusr_emailcolumn.- Column
Here we enter the name of the
usr_emailcolumn—since this is the column whose data we need for the Field object. A column must be referenced in theSELECTstatement of the associated query source to successfully retrieve data from the database.- Preview
The preview shows us both the name assigned to the Field object
usr_email:detailand also the font choice. To make the font consistent with the other Field objects in the report definition, we select the FONT button and specify 8-pt bold Arial.
After we select the OK button, we see the Field object has been updated in the report definition, as shown below:
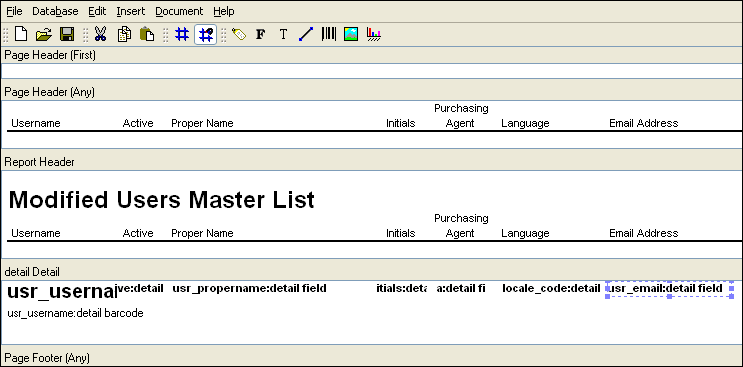
We have now added the Field object to the report definition—and aligned it correctly beneath the “Email Address” column headings. Once we save the report definition changes to the database, we will be ready to run the report and see the results.
To run the Users Master List report from xTuple, select the “Maintain Users” option from the System Module menu. After selecting the PRINT button, the following report is generated:
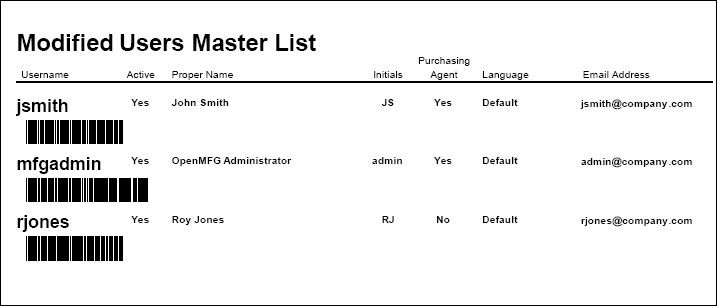
As you can see, the user email addresses have been successfully added to the report.