
|
xTuple ERP Reference Guide |
|
|
xTuple ERP Reference Guide |
| 13.2.1. Workflow | ||
|---|---|---|
 | 13.2. Master Information |  |
Workflow is a feature in xTuple that allows you to link activities together into dependent sequences (workflows), and to assign activities to specific users. For example, you can create workflow for fulfilling sales orders. When a new sales order comes into the system, it can generate activities for picking and shipping the order, and assign these activities to users to perform.
To set up workflow, go to . The following screen will appear:

To create a new workflow step, select the button. The following screen will appear:

When defining workflow steps, you are presented with the following options:
Identify the module for the workflow.
Specify the step's type. The type will change depending on the module selected.
Select a standard action from the list of available actions. Standard actions are used to drive the activity list and open up screens automatically. The choices will vary depending on the module selected.
Enter a name to describe the step.
Enter a brief description of the step.
Specify the priority the step should be given.
Specify the sequence order for the step.
Specify the owner of the step.
Specify the person the step should be assigned to.
Select the EDI profile to be used for sending notifications to users when workflow activities are generated from the step.
Specify the initial status of the step.
Dates are used to define when a subsequent step must begin.
Select to have the start date calculated automatically.
Select to have the start date determined by a specified number of offset days.
Dates are used to define when a subsequent step must be completed.
Select to have the end date calculated automatically.
Select to have the end date determined by a specified number of offset days.
An open text field for additional notes relating to the workflow
Use this tab to specify the next step(s) in the workflow once the current step is completed. With the button you can add available successor steps or remove them using the button.
To define successor steps to take when the current workflow step has failed or has not been successfully completed, select the tab. The following screen will appear:
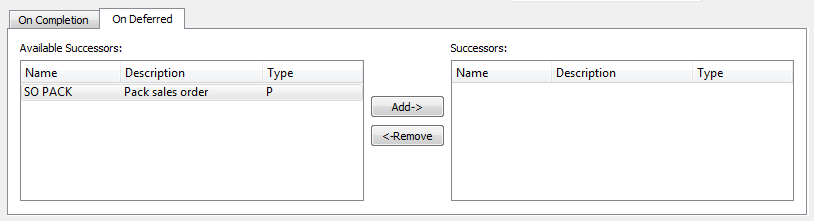
Use the tab to add or remove successor steps to be taken when the current workflow step has failed or has not been successfully completed.
The following buttons are unique to this screen:
Highlight an available successor and then select this button to move the item to the Successors list.
Highlight a successor and then select this button to remove the item from the Successors list.
| |  | |
| 13.2. Master Information |  | 13.2.2. Calendars |