
|
xTuple ERP Reference Guide |
|
|
xTuple ERP Reference Guide |
| 3.3.1. Worksheet | ||
|---|---|---|
 | 3.3. Worksheets |  |
The worksheet is the weekly container for holding time and expenses entered by employees. As employees enter time and expense sheets during the course of a week, the worksheet organizes those entries. When the next week arrives, a new worksheet is created and employee time and expense entries are contained there. Typically, worksheets are approved on a weekly basis.
To review an already-existing worksheet, select the option on the main Worksheets workbench. The following screen will appear:

For more information on using worksheets to help manage projects, please see the eBook Managing Projects with xTuple.
When reviewing a worksheet, you are presented with the following options:
Displays the system-generated number of the worksheet.
Displays the date for the week contained by the worksheet. The date is set manually when creating a new worksheet.
Displays the site associated with the work. The site is chosen manually when creating a new worksheet.
Displays the name of the employee associated with the worksheet. The employee is entered manually when creating a new worksheet.
Select to automatically print the worksheet whenever it is saved.
The following buttons are unique to this screen:
Select to add a new time or expense entry to the worksheet.
To enter notes related to a worksheet, select the tab. The following screen will appear:

The tab provides a text area where you can add miscellaneous notes related to the worksheet.
To associate documents with a worksheet, select the tab. The following screen will appear:

When associating documents, you are presented with the following options:
Select to create a new document and associate it with the current record. You may create the following document types:
Select to create a new image association.
Select to create a new fixed asset association.
Select to create a new maintenance order association.
Select to create a new incident and associate it.
Select to create a new project and associate it.
Select to create a new opportunity and associate it.
Select to create a new task and associate it.
Enables you to edit associated documents. The Edit screen is the same as that for creating a new document—except that when editing, the fields will contain document information. Double-clicking on a document will also bring you to the editing screen.
Highlight a document and then select this button to reach a read-only view of the Edit screen.
Select to associate already-existing documents. The following document types may be attached: contact, account, customer, employee, file, image, incident, item, opportunity, project, purchase order, sales order, vendor, web site, work order.
Highlight a document and then select this button to remove the association.
To associate already-existing documents, select the button. The following screen will appear:
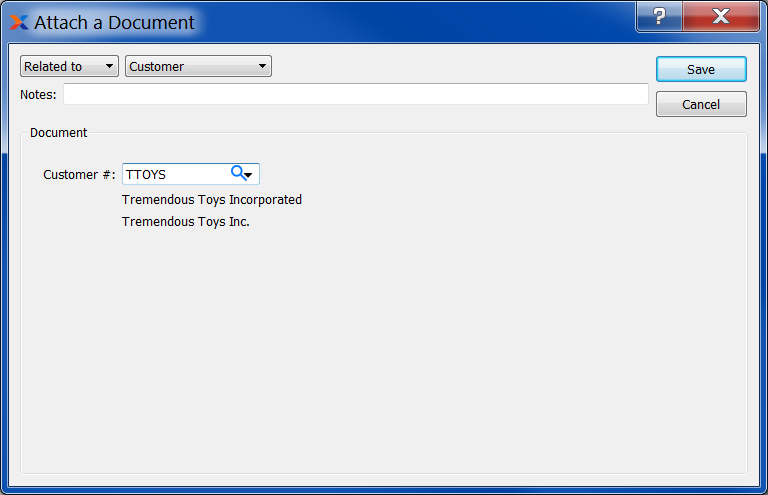
When associating already-existing documents, you are presented with the following options:
Indicate how the document is related to the current record. The following relationship options are available: related to, parent of, child of, duplicate of.
Specify the kind of document you want to associate. The following document types may be attached: contact, account, customer, employee, file, image, incident, item, opportunity, project, purchase order, sales order, vendor, web site, work order. When associating files, you will also be given the option to save the file to the database.
There is no file size restriction when saving files to the database. However, excessively large files could cause storage and performance issues.
Leave any notes on the document file as needed.
Use the lookup tool to identify the specific document you want to attach. The data entry options will vary depending on the document type you select.
The Worksheet Item screen is where employees record their actual time or expenses related to a project. To add a time or expense entry, select the button on the Worksheet screen. The following screen will appear:

When adding a time or expense entry, you are presented with the following options:
Displays the system-generated number of the worksheet.
Displays the line number assigned to the time or expense entry.
Displays the date for the parent worksheet.
Enter the number of the project associated with the entry. This is a required field. Depending on how the project is configured, many of the other fields in the entry (e.g., customer and item numbers) will be filled out automatically from the project information.
Select a task from the list of project tasks to associate with the entry. This is a required field.
Enter the date the work was performed or the expense was incurred.
Specify whether the entry is a time or expense type entry.
Enter the number of the customer associated with the entry. This field may be filled automatically from the project information, depending on how the project is configured. The customer is needed for billable entries, so the system knows who to invoice for the time and/or expense.
Enter the customer purchase order number, if any.
Enter an item number to associate with the entry, if one is not already linked from the specified project task. This is a required field. The item number is needed to map an expense account to the task, which is required for subsequent general ledger transactions. Only reference items which have been configured specifically to work with time and expense entries (on the tab of the Item master) may be selected.
Displays the name of the employee indicated on the parent worksheet.
For time entries, enter the number of hours worked on the specified task.
For expense entries, enter the quantity of expenses incurred. For example, if mileage is being reimbursed, enter the number of miles. For hotel stays, enter the number of days.
Select if the work performed or the expense incurred is billable to the specified customer. If not selected, time entries will be booked to overhead and expense entries will be reimbursable.
For billable time entries, enter the rate to be billed to the customer. Depending on how the project is configured, this information may be filled in automatically for you.
For expense entries, enter the per unit cost of the expense item. For example, enter $0.25 per mile for mileage reimbursements or $125 per night for hotel costs.
Displays the total billable amount for time entries and the total reimbursement amount for expense entries.
For time entries, displays the employee's hourly rate (or cost), as distinguished from the billable rate charged to the customer.
For time entries, displays the total cost for the employee's time spent on the task, based on the employee's hourly rate.
For expense entries, select if the item has already been paid for, making it ineligible for reimbursement.
When viewing the summary for a time and expense entry, you are presented with the following information:
Displays the following information related to the selected project task:
Displays the total hours budgeted for the task.
Displays the actual hours logged against the task.
Displays the total expenses budgeted for the task.
Displays the actual expenses logged against the task.
Displays the following information for the employee associated with the worksheet:
Displays the number of hours entered for the employee on the given work date.
Displays the employee's total hours on the parent worksheet.
The following buttons are unique to this screen:
Select to view the previous time or expense entry. If none exists, this button will be disabled.
Select to view the next time or expense entry. If none exists, this button will be disabled.
To enter notes related to a time or expense entry, select the tab. The following screen will appear:

The tab provides a text area where you can add miscellaneous notes related to the time or expense entry.
| |  | |
| 3.3. Worksheets |  | 4. Opportunity |