
|
xTuple ERP Reference Guide |
|
|
xTuple ERP Reference Guide |
| 2.4. Item Availability Workbench | ||
|---|---|---|
 | 2. Item |  |
The Item Availability workbench is designed to consolidate on one screen the functions performed by personnel who manage and track inventory. To access the Item Availability workbench, go to . The following screen will appear:
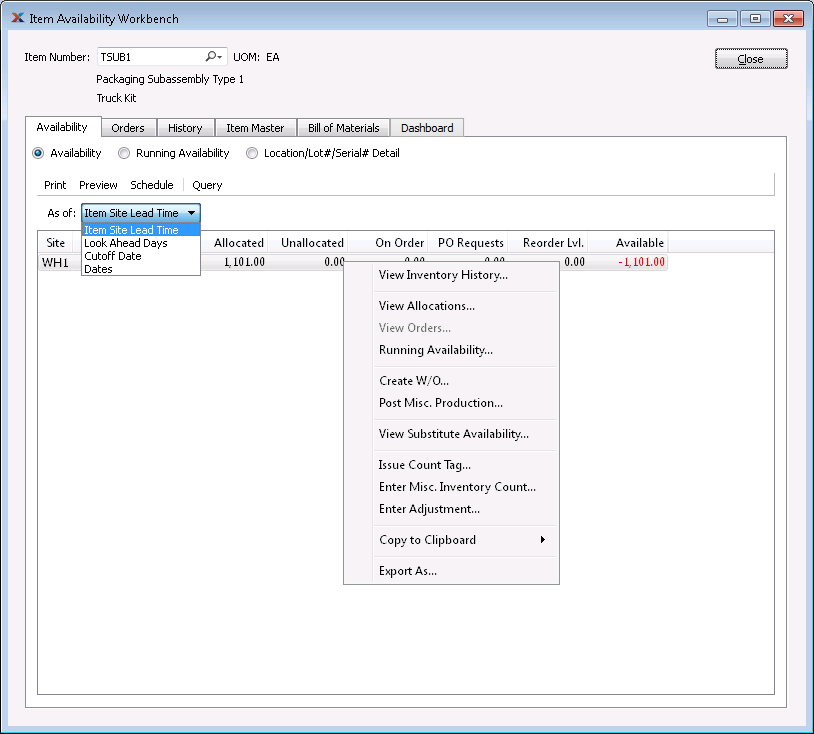
The Item Availability workbench displays the following options:
To view inventory availability for the specified item, select the Availability option on the tab.
When displaying inventory availability by item, you are presented with the following options:
Show availability using one of the following criteria:
Select to show projected availability based on the lead time specified in the Item Site master.
Select a number using the arrows, or manually enter a value up to a maximum of 1000. Future availability for the specified item will be displayed based on the value entered here.
Display will show projected inventory availability as of date entered up to a maximum of 1000 days.
Display will show projected inventory availability for the date range entered.
Display lists inventory availability by item, using the specified parameters. If planned availability displays in the color orange, this means the actual or projected quantity on hand (QOH) is at or below the reorder level. If the color is red, the current or projected QOH is below zero.
To display running availability, select the Running Availability option on the tab. The following screen will appear:
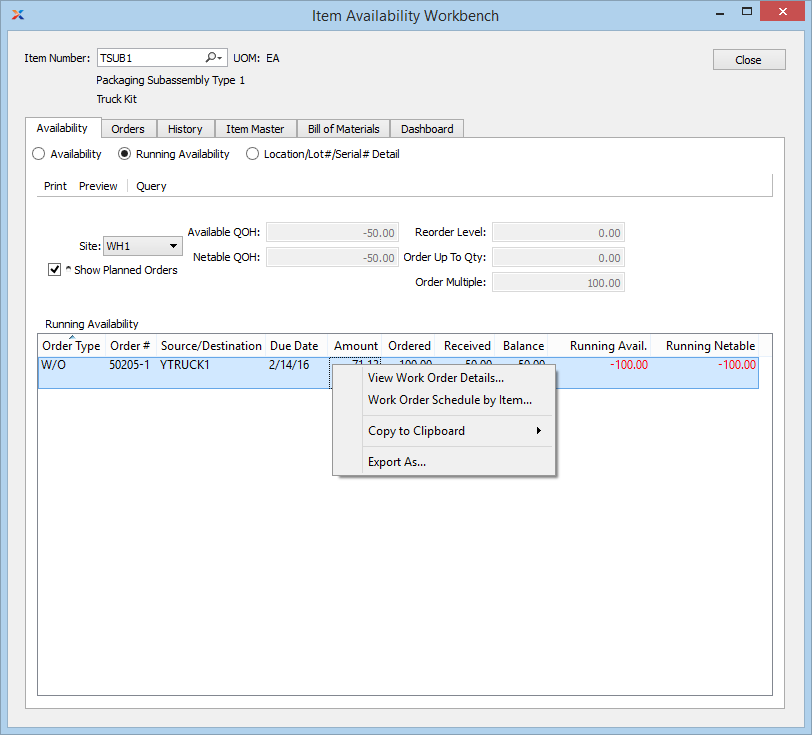
Item running Availability
When displaying running availability, you are presented with the following options:
Specify site whose running availability you want to display.
Select to show planned orders in the display. Planned orders will display in blue type.
Quantity available immediately to satisfy work order and sales order demand.
Quantity that is allowed to be used for inventory planning purposes (i.e., MRP).
Displays the reorder level, which specifies the minimum QOH allowed before an item must be reordered. The reorder level is maintained in the Item Site master.
Indicates the quantity level that MRP planned replenishment orders will order up to.
Displays the order multiple, which specifies the increments the item must be ordered in. The order multiple is maintained in the Item Site master.
Display lists running availability for the selected item, using the specified parameters. Red lettering indicates the due date has passed or running availability has dropped below zero. The color orange means the actual or projected QOH is at or below the reorder level.
To view lot/serial and/or location information for the specified item, select the tab. The following screen will appear:
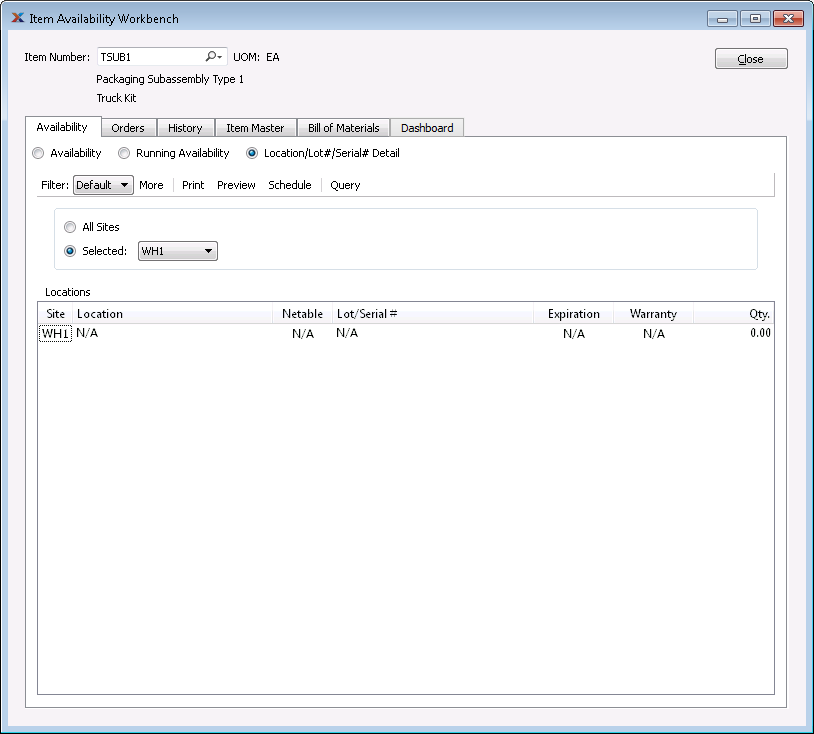
When displaying detailed inventory information, you are presented with the following options:
Select to display detailed location/lot/serial number information for all sites.
Specify site whose detailed location/lot/serial number information you want to display.
Display lists location/lot/serial number detail, using the specified parameters. Items will display in red type if the quantity in question has expired.
To view order details for the item, select the tab. If you want to view purchase order information for the item, select the Purchase Orders option. The following screen will appear:
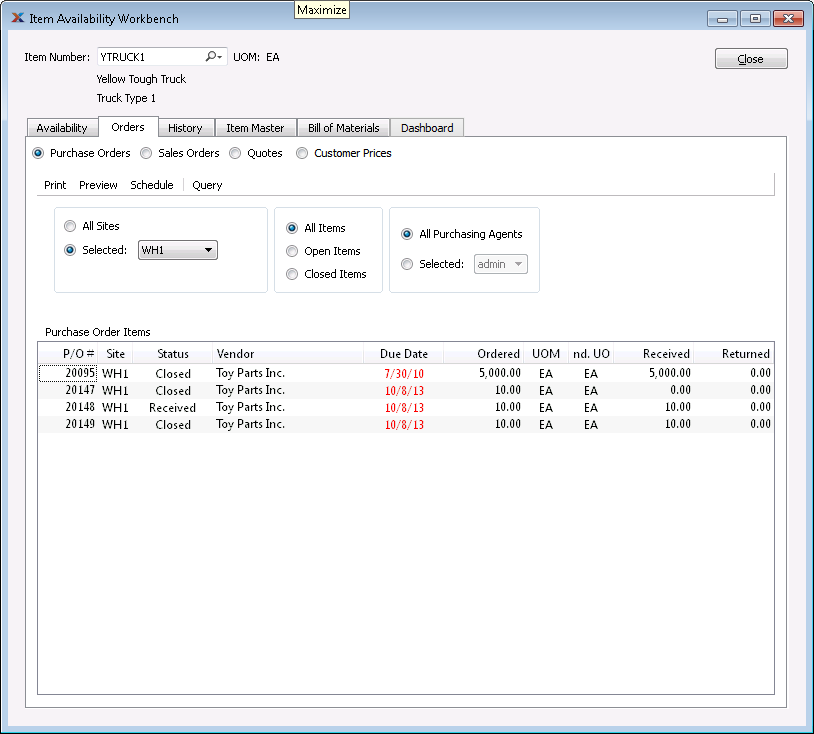
When displaying purchase orders for the item, you are presented with the following options:
Select to display inventory availability for all sites.
Specify site whose inventory availability you want to display.
Select if you want to view all purchase orders for the item.
Select if you only want to view purchase orders with open items.
Select if you only want to view purchase orders with closed items.
Select if you do not want to filter on purchasing agents.
Select if you only want to see purchase orders for a single purchasing agent. You will then need to select an agent from the drop-down menu.
Display lists purchase orders for the item according to the selected criteria.
To view sales order information for the item, select the Sales Orders option on the tab. The following screen will appear:
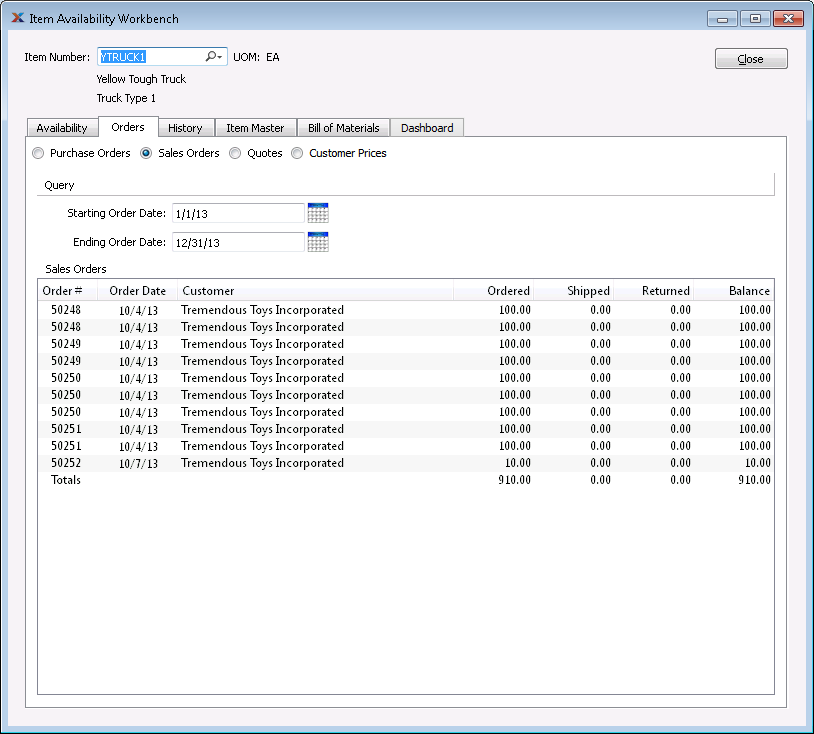
When displaying sales orders for the item, you are presented with the following options:
Enter the earliest order date you want to include in the report. By default, the starting order date will be -30 days from the current date.
Enter the latest order date you want to include in the report.
Display lists sales orders for the item according to the selected date range.
To view quote information for the item, select the Quotes option on the tab. The following screen will appear:
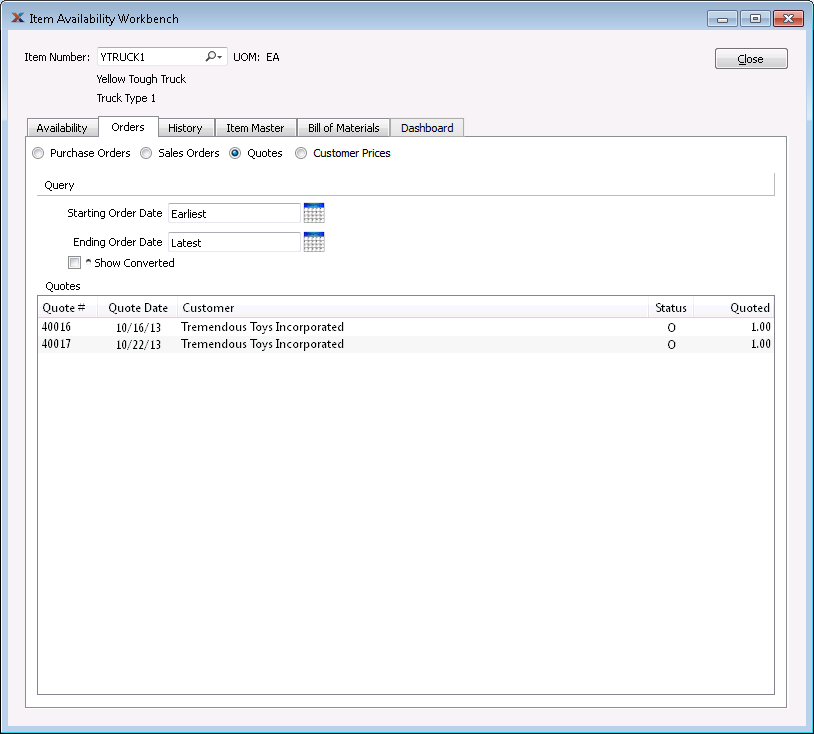
When displaying quotes for the item, you are presented with the following options:
Enter the earliest quote date you want to include in the report.
Enter the latest quote date you want to include in the report.
Select to include quotes that have been converted to sales orders.
Display lists quotes for the item according to the specified selections.
To view item pricing by customer, select the Customer Prices option on the tab. The following screen will appear:
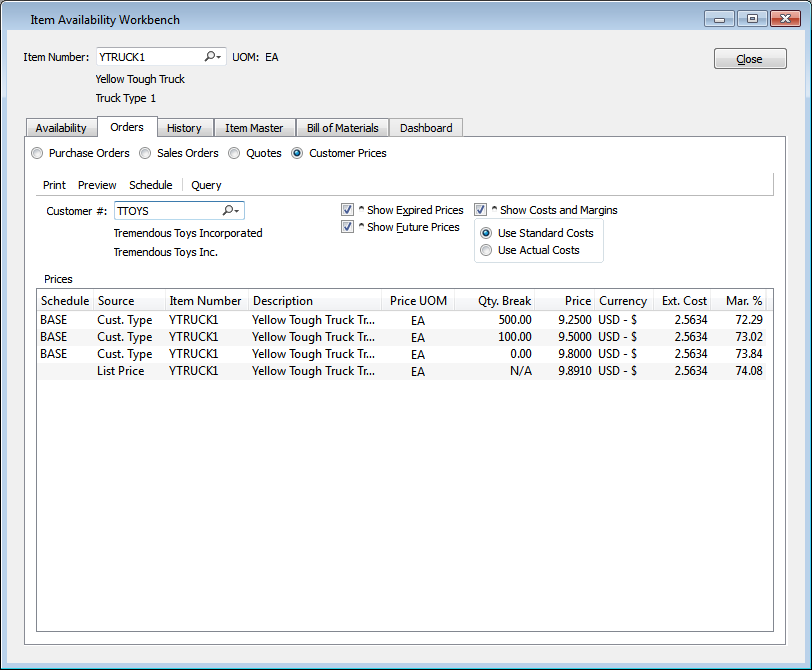
When displaying item prices by customer, you are presented with the following options:
Enter the customer number of the customer whose item prices you want to view. The lookup feature located to the right of the field leads to a searchable customers list. You may also access this list using the keyboard shortcut . Once a customer number is entered, the customer name and billing address will display. Click on the magnifying glass or symbol and select to view customer information for the specified customer. If a customer's credit is good, the button will feature a black question mark () icon. If the customer is on credit warning, the icon will turn into an orange dollar sign (). A red dollar sign () indicates the customer is on credit hold.
Select to display expired prices.
Select to display future prices.
Select to show costs and margins using one of the following costing parameters:
Select to show costs and margins using standard costs.
Select to show costs and margins using actual costs.
Display lists item prices for the specified customer. Cost and margin columns will also appear if the Show Costs and Margins parameter is selected. If the margin is negative, the value will display in red type.
To view history details for the specified item, select the tab. The following screen will appear:
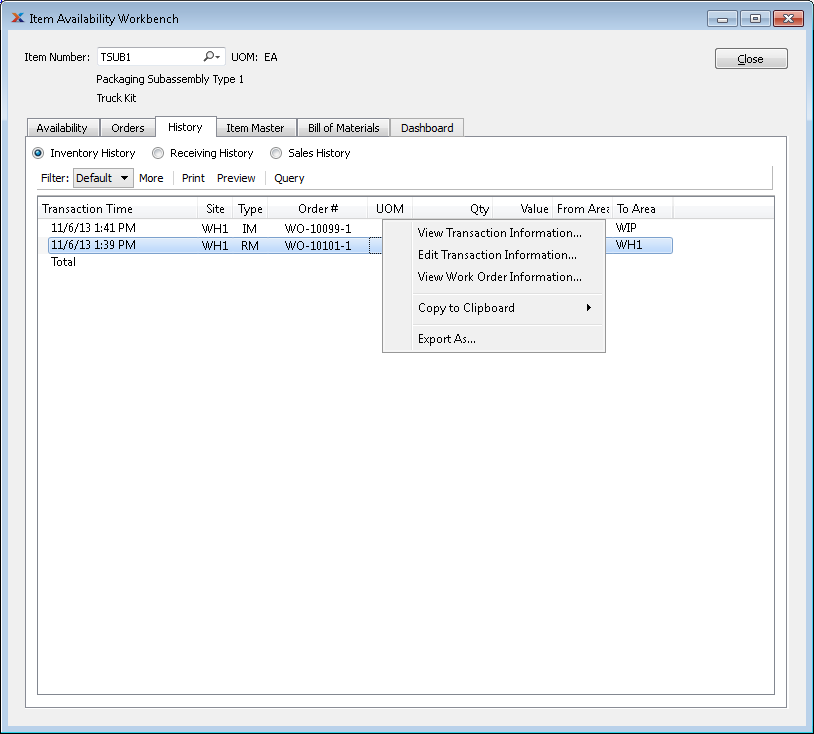
When displaying inventory history for the item, you are presented with the following options:
To view receiving history for the item, select the Receiving History option on the tab. The following screen will be displayed:
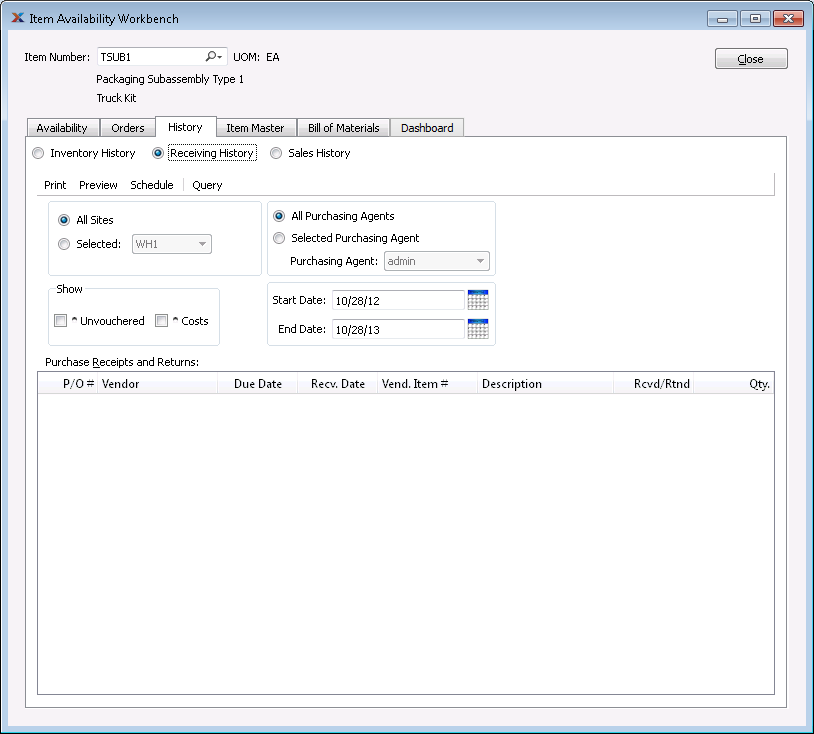
When displaying receiving history by item, you are presented with the following options:
Select to display inventory availability for all sites.
Specify site whose inventory availability you want to display.
Select to view all purchase orders for the item.
Select to include unvouchered receipts in the display.
Select to include purchasing and receiving costs in the display.
Select to include all purchasing agents in the display.
Select if you only want to see purchase orders for a single purchasing agent.
Specify the purchasing agent. This option will not be available if the All Purchasing Agents option is selected.
Enter the earliest date for which you want to see receiving history.
Enter the latest date for which you want to see receiving history.
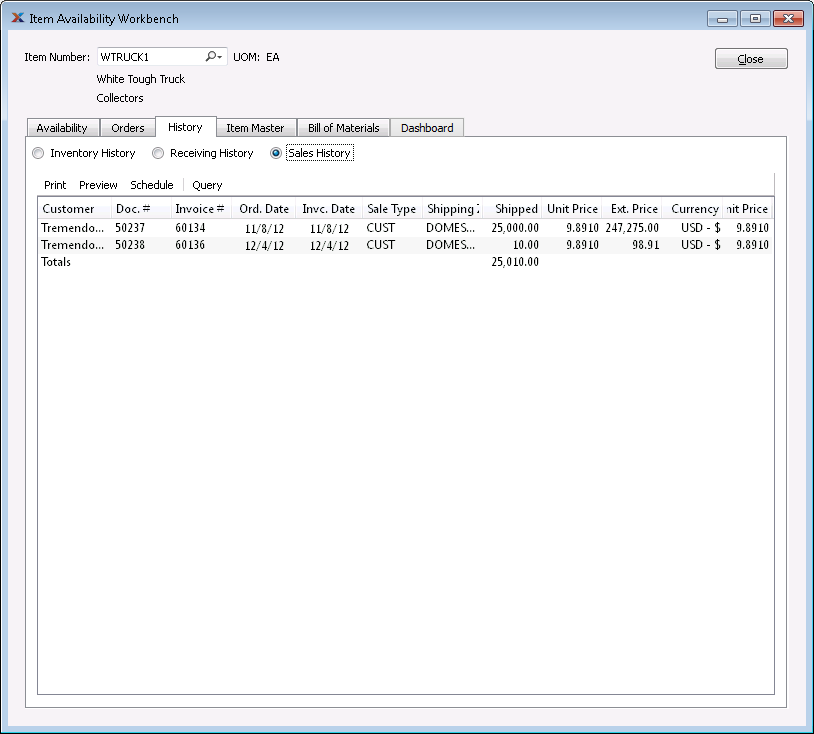
To view sales history details for the specified item, select the Sales History option on the tab. The following screen will appear:
To view Item master details for the item, select the tab. The following screen will appear:
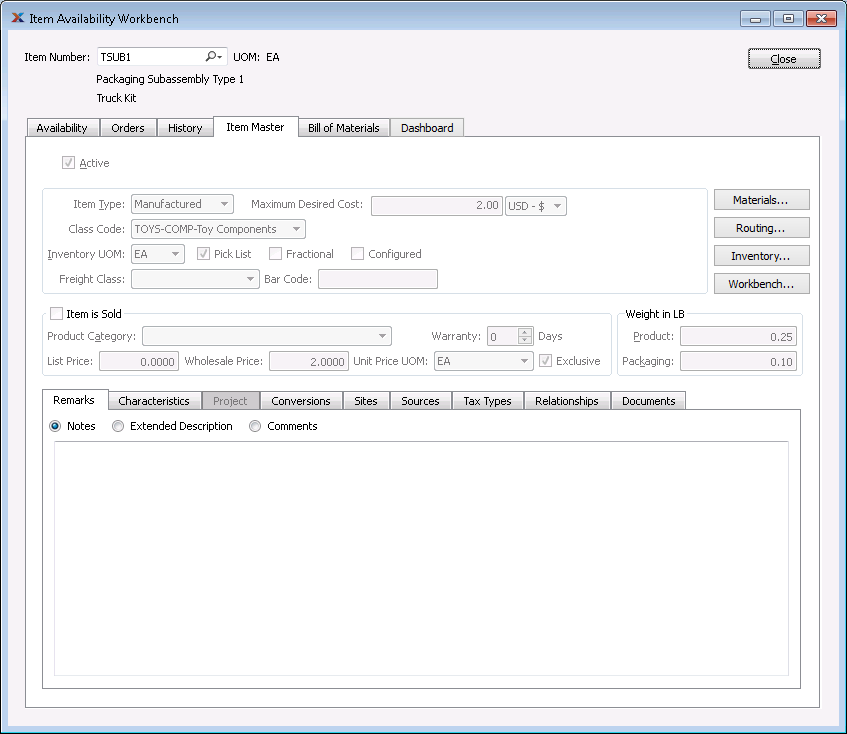
Item Master detail on workbench
The information displayed on the tab is for viewing purposes only. These viewable fields are described in detail in the products chapter under Item.
Costed indented BOM information will be displayed only if the specified item is a manufactured item.
To view BOM information for the specified item, select the tab. Then, to view a single level BOM, select the Single Level Bill of Materials option. The following screen will appear:
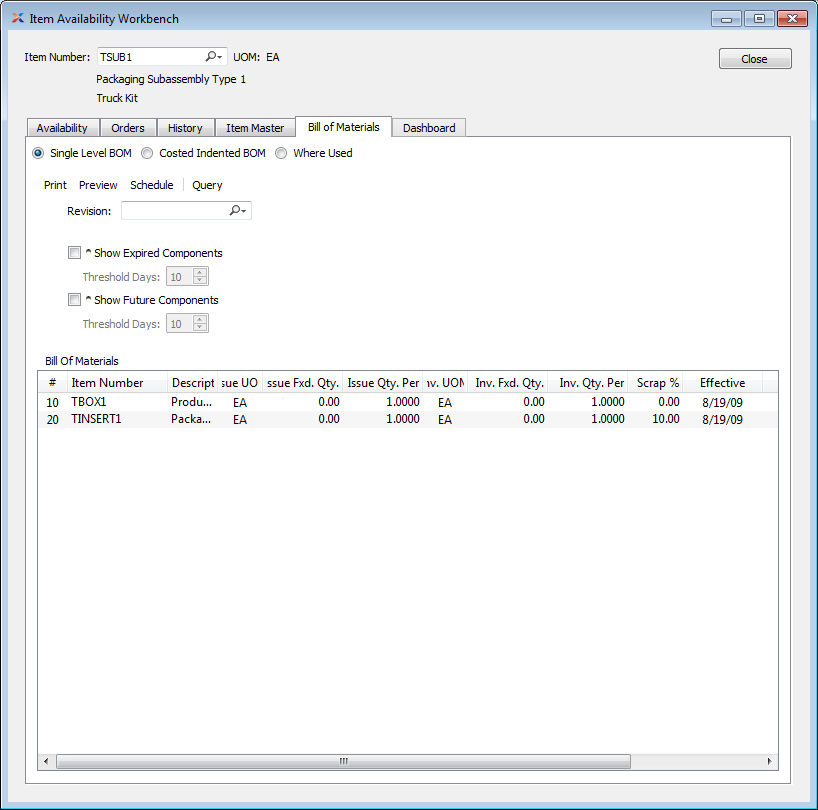
When displaying a single level BOM, you are presented with the following options:
If revision control is enabled at your site, specify the BOM revision number you want to view. If none exists, simply enter a value to create one. The status of the revision will also be displayed. The following statuses apply to revisions:
This is the current, default revision used for costing and material requirements planning (MRP). Only one revision can be active at the same time. Active revisions may be modified. However, once a revision becomes inactive, it may no longer be changed.
Select to cause expired components to be listed in the Bill of Materials display.
Select a number using the arrows, or manually enter a value up to a maximum of 999. Components that have been expired from the BOM within the specified number of days will be included in the display.
Select to cause future components to be listed in the Bill of Materials display.
Select a number using the arrows, or manually enter a value up to a maximum of 999. Components that will be added in future to the BOM within the specified number of days will be included in the display.
Display lists single level BOM components, using the specified parameters.
To view costs for a single level BOM, select the Costed Single Level BOM option. The following screen will appear:
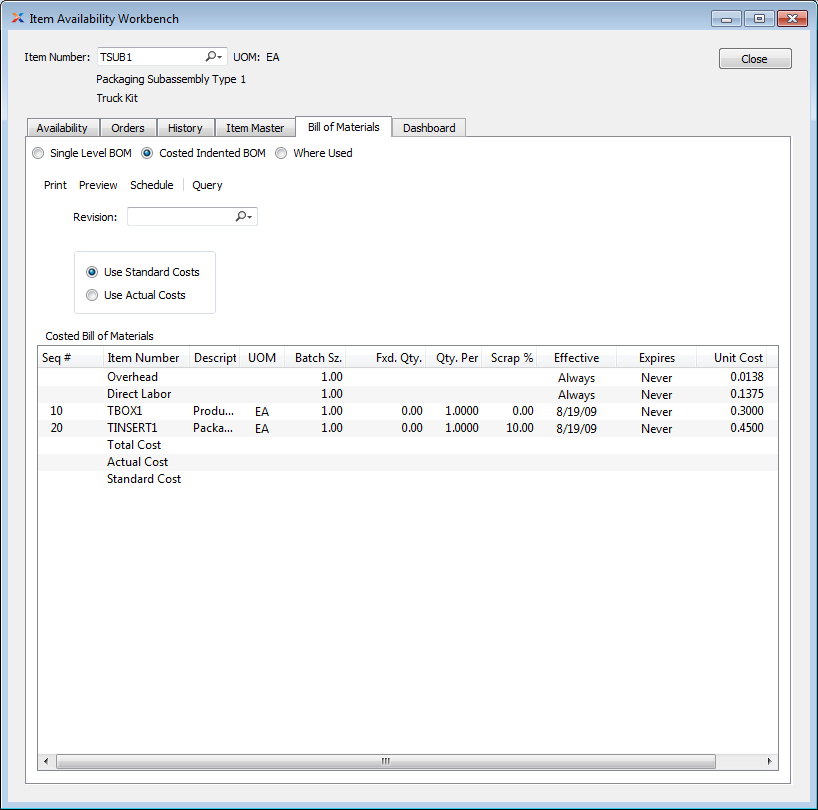
When displaying costs for an indented BOM, you are presented with the following options:
Enter the revision number for the costed indented BOM you want to display. The status (active or inactive) will be displayed beneath the revision number.
Select to display standard costs for component items in the specified item's BOM. Both the unit cost and extended cost for each component item, expressed in terms of standard cost, will be displayed—assuming standard costs have been defined for each component item.
Select to display actual costs for component items in the specified item's BOM. Both the unit cost and extended cost for each component item, expressed in terms of actual cost, will be displayed—assuming actual costs have been defined for each component item.
Display lists costed indented BOM components, using the specified parameters. The difference between the indented view and the single level view is that the indented view displays all subcomponents if there is a manufactured component listed on the BOM. Actual cost and standard cost will be calculated automatically at the bottom of the display.
In the costed indented BOM, the totals displayed on the screen are derived as follows:
This total is pulled from the Extended Cost column. The total may vary, depending on whether Use Standard Costs or Use Actual Costs is selected.
This value represents the actual cost for the parent item whose costed indented BOM is being displayed.
This value represents the standard cost for the parent item whose costed indented BOM is being displayed.
To view where the specified item is used for manufacturing, select the Where Used option on the tab. The following screen will appear:
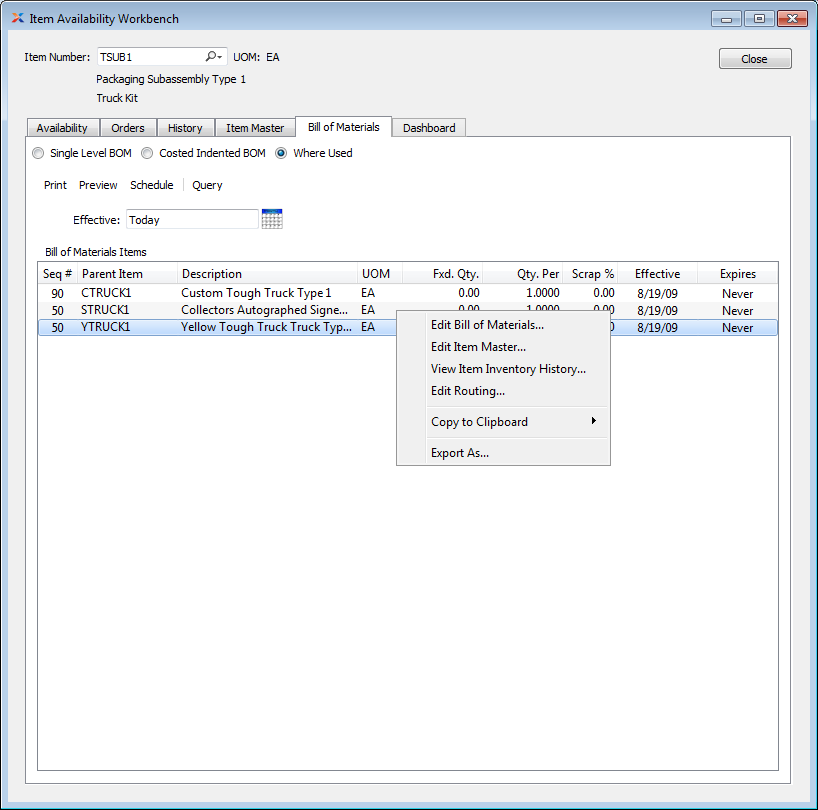
When displaying a single level BOM, you are presented with the following options:
To view the dashboard associated with your Item Availability workbench, select the tab. The following screen will appear:
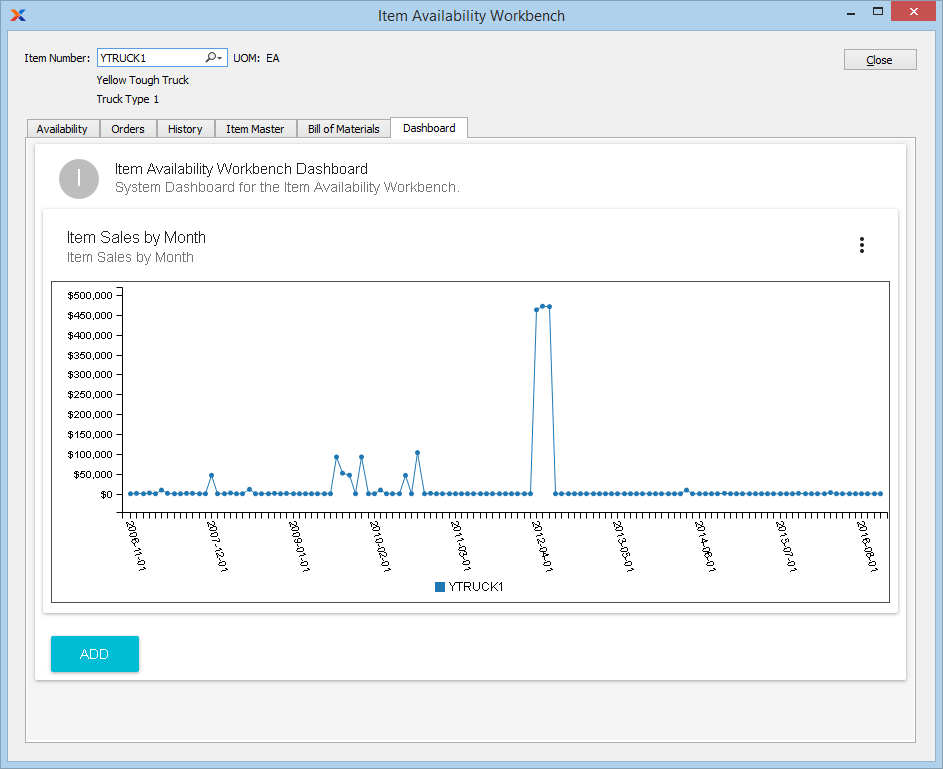
The item availability dashboard includes the following pre-loaded dashboard panes, which you can either remove or supplement with additional panes at any time:
Displays sales volume for the item by month.
Dashboard panes are used to contain charts, which are populated using datasources. To create a new dashboard pane, select the button located toward the bottom of the Dashboard window. The following screen will appear:
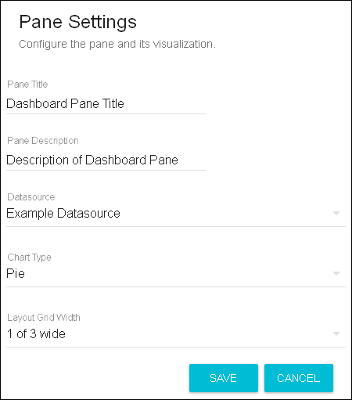
When creating a new dashboard pane, you are presented with the following options:
Enter a title to identify the pane.
Enter a brief description to describe the pane.
Specify which datasource you want to use as the source for the dashboard pane's chart. The dashboards package includes several stock datasources. You may also create custom datasources on your own. For more information, please see the xTuple Dashboards Product Guide.
Specify which chart type you want the dashboard pane to display. The chart type options will be limited to the types specified on the selected datasource definition.
Specify how many panes you want displayed in a row on the Dashboard screen, from as few as one to as many as three across. The layout grid width options will be limited to the layout options specified on the selected datasource definition.
| |  | |
| 2.3. Copy Item |  | 2.5. Item Groups |