
|
xTuple ERP Reference Guide |
To enter a new Voucher, select the "Enter New Voucher" option. The following screen will appear:
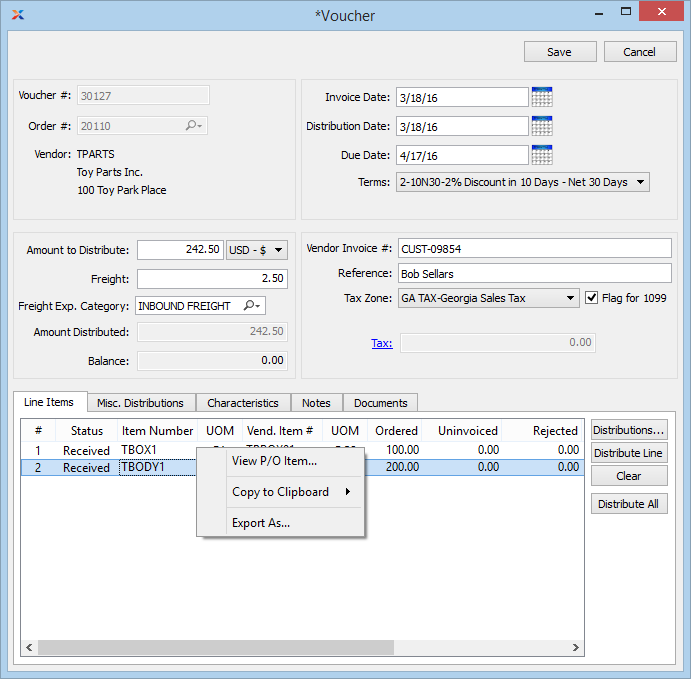
When entering a new Voucher, you are presented with the following options:
Next available Voucher Number will automatically display, unless your system requires you to enter Voucher Numbers manually. Default values and input parameters for Voucher Numbers are configurable at the system level.
Enter the Purchase Order Number of the Purchase Order you want to create a Voucher for.
The name and address of the Vendor associated with the specified Purchase Order will display here.
Specify the dollar amount you intend to distribute to the Vendor for the specified Purchase Order. You may enter an amount greater than the amount due on the Purchase Order.
Enter the amount of any Freight charges that are not being recorded at the Line Item level.
Specify the Expense Category you want to assign header level Freight charges to. If you are tracking Freight expenses at the Line Item level,
Displays sum of all Line Item distributions for specified Purchase Order.
Displays the difference between amount to distribute and amount distributed.
Enter an Invoice date for the Voucher. The Invoice date is used for determining the due date, based on the specified Terms.
Enter the date of the current distribution. When the Voucher is posted, this is the date when the posting will be recorded in the General Ledger.
Enter the date payment is due to the Vendor. The due date is derived when the specified Terms are added to the Invoice date.
Specify the billing Terms for the Voucher. By default, the billing Terms will be transferred from the original Purchase Order. You may select alternate Terms on the Voucher header.
You are given the opportunity to apply any billing Terms Discounts when selecting a posted Voucher for payment.
Enter the Vendor Invoice Number associated with the specified Purchase Order. The system will issue a warning if you attempt to enter an Invoice Number which has already been used.
Use this field to enter any notation or reference required for further identification.
Specify the Tax Zone which has jurisdiction over the transaction. By default, the Tax Zone specified on the selected Purchase Order will be used.
Displays the total amount of Tax to be charged on the Voucher. To get a detailed view of the Tax calculation, click on the Tax link using your mouse.
Select to flag transaction for Form 1099 Tax reporting. This is informational only and does not impact Tax calculations.
Display lists Line Items associated with the specified Purchase Order.
The following buttons are unique to this screen:
Highlight a Purchase Order Line Item and then select this button to reach the Voucher Item distribution screen.
Highlight a Purchase Order Line Item(s) and then select this button to automatically distribute all quantities and amounts for the selected Voucher Item(s).
Highlight a Purchase Order Line Item(s) and then select this button to automatically clear any distributions.
Select to distribute quantities and amounts for all Voucher Items.
You may select multiple Purchase Order Line Items for distribution or clearing by highlighting them using your mouse—or a combination of your mouse and either the SHIFT or CTRL keys.
To add miscellaneous Cost distributions to a Voucher, select the "Misc. Distributions" tab. The following screen will appear:
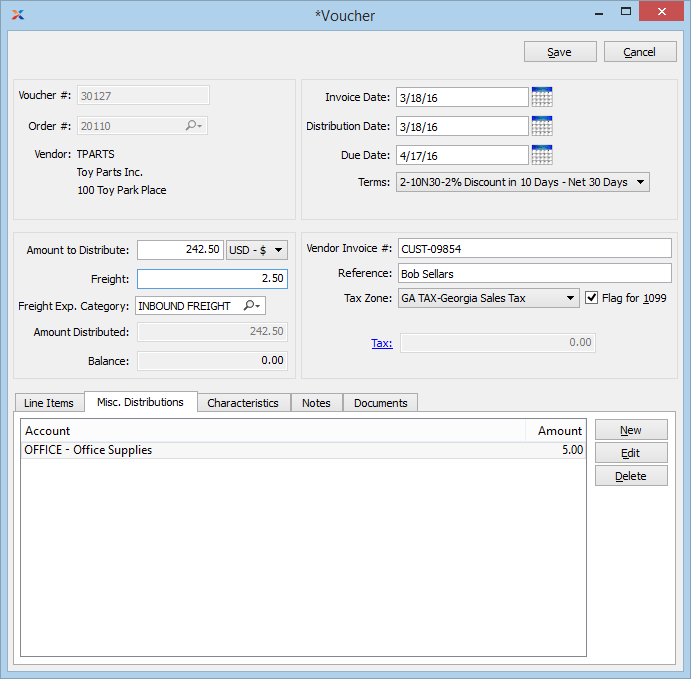
When adding miscellaneous distributions to a Voucher, you are presented with the following options:
Display lists Accounts and distribution amounts for any miscellaneous distributions associated with the Voucher.
Voucher Characteristics are user-defined definitions which may be used to provide additional layers of description about Vouchers. These descriptions are static and not processed by the system, but are useful for informational purposes. To enter Characteristics associated with a Voucher, select the "Characteristics" tab. The following screen will appear:
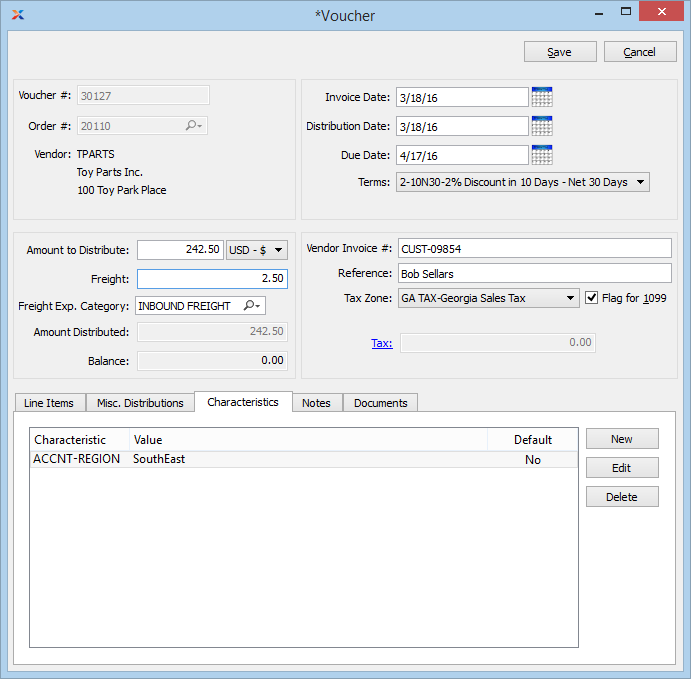
Voucher Characteristics
To create a new Characteristic for your current context, select the NEW button from the Characteristics list. The following screen will appear:
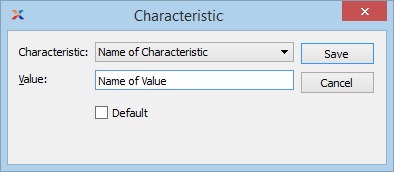
When creating a new Characteristic, you are presented with the following options:
Select a Characteristic from the list of Characteristics available for your current context. To learn more about how Characteristics are linked to specific contexts, please see Section 9.2.2.1, “Characteristic”.
Enter a value to associate with the Characteristic.
In some contexts, the default option will appear. Select if the Value entered is the default Value for the specified Characteristic. Default Values will always be listed first where Characteristics are used.
To add Notes to a Voucher, select the "Notes" tab. The following screen will appear:
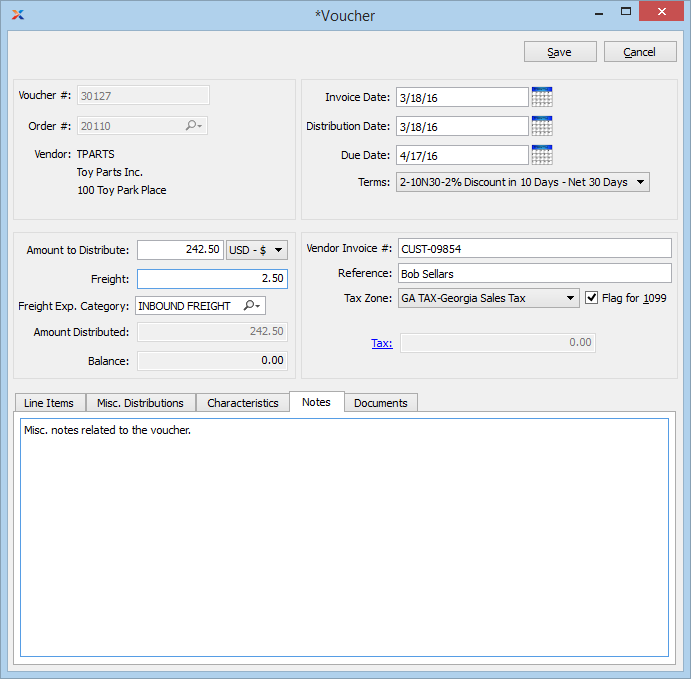
When adding Notes to a Voucher, you are presented with the following options:
This is a scrolling text field with word-wrapping for entering general Notes related to the Voucher. These Notes are for internal use only.
To associate documents with a Voucher, select the "Documents" tab. The following screen will appear:
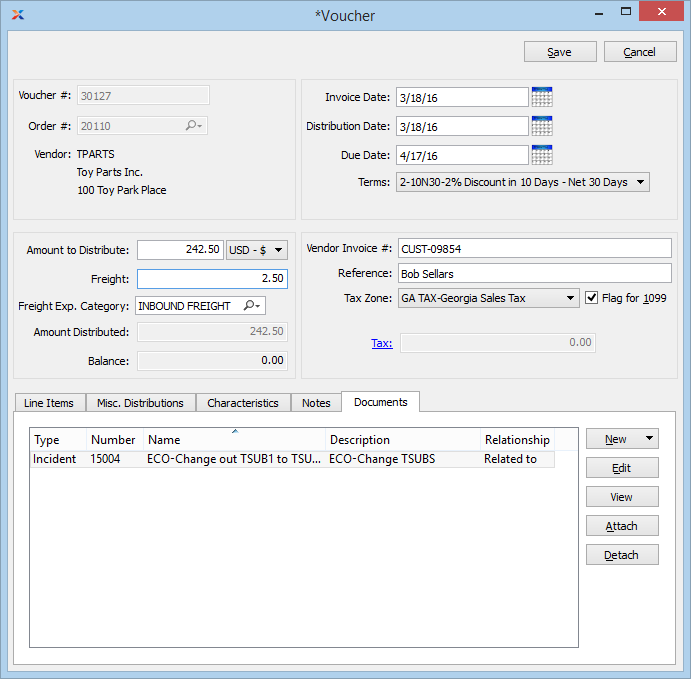
When associating documents, you are presented with the following options:
Select to create a new document and associate it with the current record. You may create the following document types:
Select to create a new Image association.
Select to create a new Fixed Asset association.
Select to create a new Maintenance Order association.
Select to create a new Incident and associate it.
Select to create a new Project and associate it.
Select to create a new Opportunity and associate it.
Select to create a new To-Do and associate it.
Enables you to edit associated documents. The edit screen is the same as that for creating a new document—except that when editing, the fields will contain document information. Double-clicking on a document will also bring you to the editing screen.
Highlight a document and then select this button to reach a read-only view of the "Edit" screen
Select to associate already-existing documents. The following document types may be attached: Contact, Account, Customer, Employee, File, Image, Incident, Item, Opportunity, Project, Purchase Order, Sales Order, Vendor, Web Site, Work Order.
Highlight a document and then select this button to remove the association.
To associate already-existing documents, select the ATTACH button. The following screen will appear:
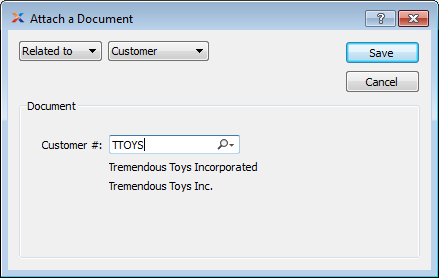
When associating already-existing documents, you are presented with the following options:
Indicate how the document is related to the current record. The following relationship options are available: Related to, Parent of, Child of, Duplicate of.
Specify the kind of document you want to associate. The following document types may be attached: Contact, Account, Customer, Employee, File, Image, Incident, Item, Opportunity, Project, Purchase Order, Sales Order, Vendor, Web Site, Work Order. When associating Files, you will also be given the option to save the File to the database.
There is no file size restriction when saving Files to the database. However, excessively large files could cause storage and performance issues.
Use the lookup field to identify the specific document you want to attach. The data entry options will vary depending on the document type you select.