|
xTuple ERP Reference Guide |
The "Projects" screen displays information on all existing Projects. Using the search feature, you can quickly locate the Projects you're looking for. And with the right-click menu you can drill down into individual records to examine them more closely.
Here are some tips for using this screen:
Locate records quickly by entering portions of Project names or descriptions in the search window.
Look up Projects by CRM Account, using the CRM Account filter option.
The date range filter allows you to search for Projects within specified date ranges.
Select the "Show Complete" option to include completed Projects in your search results.
The following screenshot shows the "Projects" screen:

When viewing the Project list, you are presented with the following option:
Select if you would like to include closed Projects in the view.
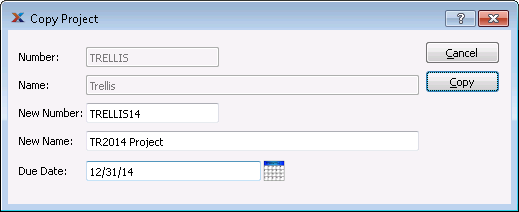
To make a copy of a Project, select the "Copy Project" option from the right click invoked menu. The following screen will appear:

When copying a Project, you are presented with the following:
Displays the existing Project number.
Displays the existing Project name.
Enter a number for the new Project you want to create.
Enter a name for the new Project.
Enter the date when the new Project is due.
The default filter on the "Projects" screen shows all open Projects. You can build your own search criteria using the following options:
Select a filter from the list of available filters, then select the QUERY button to generate search results. Only saved filters will appear in this list.
Select this button to show the parameters underlying the saved filter. To hide the parameters, click the MORE button a second time.
When building a custom query, you have the following options:
Select to add a new parameter to the query.
Select to remove a parameter from the query. This option is disabled for default parameters.
Select to save your filter for future use. Saved filters will appear in the list of available filters.
Select to manage your saved filters. To learn more about managing filters, please see Section 2.1.2, “Search Filters”.