
|
xTuple ERP Reference Guide |
|
|
xTuple ERP Reference Guide |
| 2.6.2. Open Receivables | ||
|---|---|---|
 | 2.6. Receivables Reports |  |
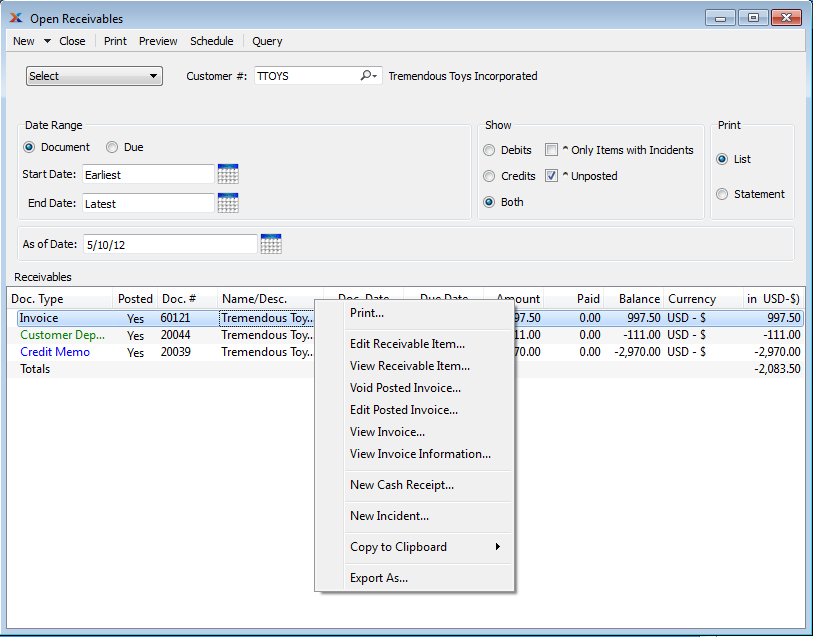
To view the complete list of open receivables, select the "Open Receivables" option. The following screen will appear:
If a Customer's open Receivables balance exceeds their Credit Limit, the Customer will automatically be placed on Credit Warning. In addition, any new or open Sales Orders for the Customer will also be placed on Credit Hold.
When displaying open receivables, you are presented with the following options:
Select all or specific Customers whose Open Receivables you want to display. To generate results in the display you must first select the QUERY button. If you are not seeing any results, this is probably the reason why.
Specify the following date range options:
Select if you want to show open receivables whose document date falls within the specified date range.
Select if you want to show open receivables whose due date falls within the specified date range.
Open receivables having document or due dates (depending on selection) on and after this date will be displayed.
Open receivables having document or due dates (depending on selection) on and before this date will be displayed.
Specify the date you want the open receivables to be relative to. The report will include any open receivables which were open—that is, not yet paid—as of the specified date. This feature provides "point-in-time" open balance functionality. The payment date used as a reference for the "As of Date" field is the G/L distribution date, not the posting date.
Specify which of the following options you want to display:
Select to include only debit balance documents in the display.
Select to include only credit balance documents in the display.
Select to include both debit and credit balance documents in the display.
Select to include only documents having linked CRM Incidents in the display.
Select to include unposted documents in the display.
When viewing open receivables for a single Customer, you can select from the following two print options. These options are not available when viewing open receivables for more than one Customer. The choice made here governs which type of document will be printed when you choose to print this report.
Select if you want to print the list of the Customer's open receivables.
Select if you want to print a Customer statement.
Display lists open receivables by Customer, using the specified parameters. The right-click menu includes many options, including the ability to enter Cash Receipts and Incidents linked to the receivable. You can also void posted Invoices and Sales Credits from the right-click menu―as long as they are unapplied. To change the color for the following Document Types, adjust your Locale settings: Customer Deposit (Alternate) and Credit Memo (Emphasis).
You can refund Credit Card charges using the right-click menu. This option only works for Credit Memos specifically created from Credit Card transactions.
If you are using the Authorize.Net payment gateway, refunds must be processed at least one day after the original charge. Authorize.Net does not allow you to refund a transaction that was charged on the same day.
The following buttons are unique to this screen:
If the Customer selection is for a group of Customers, this button will print the report associated with this screen. If a single Customer is displayed then the PRINT button gives a menu of choices. Select from one of the following print options:
Print the report associated with this screen.
Print an Receivables Statement report for the selected Customer. If the selected Customer has an EDI Profile attached, you may encounter an EDI processing interface when printing the Receivables Statement.
| |  | |
| 2.6.1. Invoice Information |  | 2.6.3. Receivables Aging |