
|
xTuple Connect Guide |
|
|
xTuple Connect Guide |
| Creating Task Alarms | ||
|---|---|---|
 | Alarm Notification |  |
The next step in this process is to create a Task item with an associated alarm. To begin, follow these steps:
Follow this path:
Select the NEW button
In the "Name" field enter "xTuple"
In the "Description" field enter "Learn about xTuple"
Set the "Priority" to "Normal"
Leave the "Status" as "New"
In the "Due" field, enter today's date but leave "Planned Start", "Started" and "Completed" blank
Leave the "Percent Complete" blank
Set the "Owner" field to your xTuple username (select it from the list)
Your xTuple username should automatically appear on the Task Assignment table as the primary user role for the task
You can add additional assignees to the Task by clicking ASSIGN and selecting their xTuple username. From there, you can update their role with this task and the assigned date. Once saved, their username will appear on the Task Assignments table as well.
Now that we have a Task created for our user, let's create an Alarm for it. To do that, follow these steps:
Select the "Alarms" tab
Select the NEW button
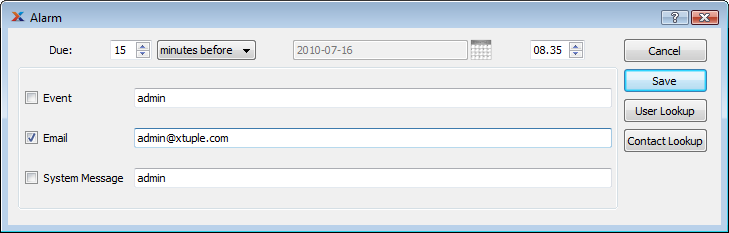
Set the "Due" field to "15"
Set the time frame to "minutes before"
Set the date to today's date
Set the time equal to the current time
Make sure the "Email" option is selected and that the correct email address appears in that field
You can lookup and add the email addresses of other users who should also receive this Alarm by selecting the USER LOOKUP button. Likewise, the email for a Contact may be added in the same way by using the CONTACT LOOKUP button.
The Alarm screen should look like this:
Once you are satisfied everything looks correct, select the SAVE button.
| |  | |
| Setting Up User Preferences |  | Sample Alarm Email |