The Batch Manager can be used to email a Sales Order Acknowledgement to a Customer as a .PDF attachment. To accomplish this, we have to establish the Customer's email details, along with the contents of the message we want to send. We also need to define a Sales Acknowledgement Form. Then we will create the S/O and indicate we want it delivered via email. Let's see how these simple steps are accomplished.
To successfully complete the Sales Order Acknowledgement exercise, you must have an acknowledgement Form defined. To define a Sales Order Acknowledgement Form, follow these steps:
Follow this path:
Select the NEW button
In the "Name" field, enter "SOAcknowlegement"
In the "Description" field, enter "SO Email Acknowledgement"
In the "Report" field, select "CustOrderAcknowledgement"
In the "Keyed On" field, select "Sales Order"
The screen should look as follows:
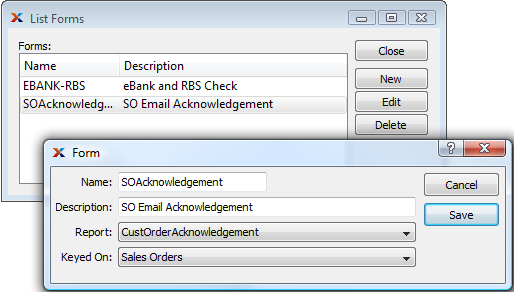
In xTuple ERP, Forms are used to create user-defined links to Report Definitions. Forms are just one of the ones users can create customized reports to meet their business needs. As we see in this example, our Sales Order Acknowledgement is "keyed on" Sales Orders. It is also possible to create Forms and make them available to other functional areas of xTuple ERP.
To save your Form definition, simply select the SAVE button.
To reach the Customer master screen where the Customer's email details may be entered, follow these steps:
Follow this path:
Open a Customer record for editing
Select the "Transmission" tab
Select the "Sales Order" option (we will explore the "Invoice" option later)
In the "Profile" field, select the "Custom Email" option
In the "EDI Email" field, enter the Customer's email address
Tip
You may enter multiple email addresses by separating each address with a comma (",").
In the "Cc" field, specify addresses you want to receive a copy of the email
In the "Subject" field, specify a subject―optionally include the </docnumber> token to dynamically include the Sales Order Number in the subject line
In the "Filename" field, specify the name you want to give the attached .PDF file version of the Sales Order―optionally include the </docnumber> token to dynamically include the Sales Order Number in the file name
In the "EDI Email Body" section, enter a detailed message to the Customer to be used whenever Sales Orders are emailed to the Customer―optionally include the </docnumber> token to dynamically include the Sales Order Number in the message body
Tip
Make certain the content of your message appears legitimate so that spam filters will not reject it.
Don't select the "Send Email as HTML" option, which, when selected, enables you to embed HTML references in the body of the email message
The following screen illustrates the steps referenced above:
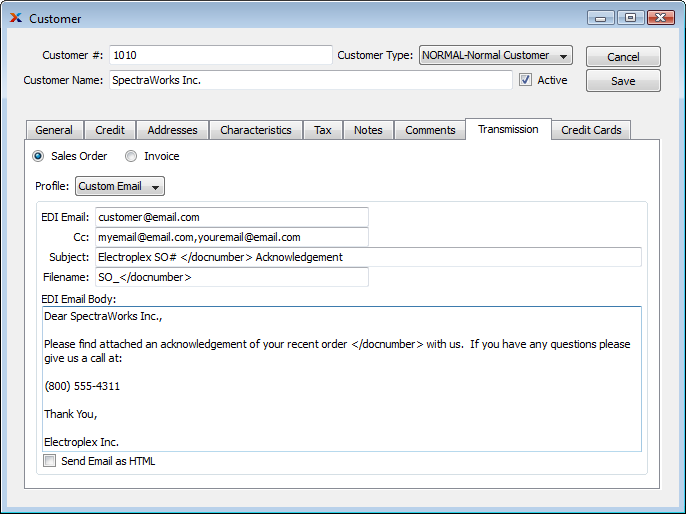
Once you are satisfied with the content of your Customer EDI Profile, select the SAVE button. You can also always return to the Customer email information and change it at a later date.
This next step assumes you know how to create a Sales Order in xTuple ERP―and that you already have one created for the Customer you've been using in the exercise. We'll begin on the E-mail Sales Order Form screen. To get there, follow these steps:
Follow this path:
Select a Sales Order for the Customer, using the browse button
The following screen will appear:
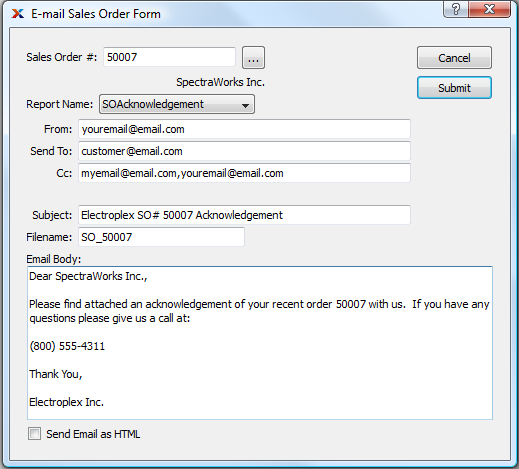
As you can see in our example, all the details from the Customer master have been transferred to the email message. Notice how in several places the </docnumber> token has been replaced by the actual Sales Order Number. Also notice how the "From" email address is the same as the email address for the user who submitted the email delivery request. You may at this point manually edit the email body if you want to change the default information displayed there. Any edits made to the email body will be included in the email to the Customer. However, if you want to make permanent changes to the default outgoing message, you need to make those changes on the Customer master.
Once you select the SUBMIT button, the job will be sent to the Batch Manager, awaiting its turn to be processed. When the job is completed, the Vendor will receive an email with a .PDF of the Sales Order attached.
Note
To check on the status of the job, simply open the Batch Manager screen―either in xTuple ERP or the Batch Manager client―and review the information there. In this case, look for jobs whose "Action" type is "RunReport". To see jobs which have already been processed, use the "Show Completed Actions" option.
Finally, we want to see what our Customers see when they receive emails from us with Sales Orders attached. The following screen illustrates a sample email received by our Customer:
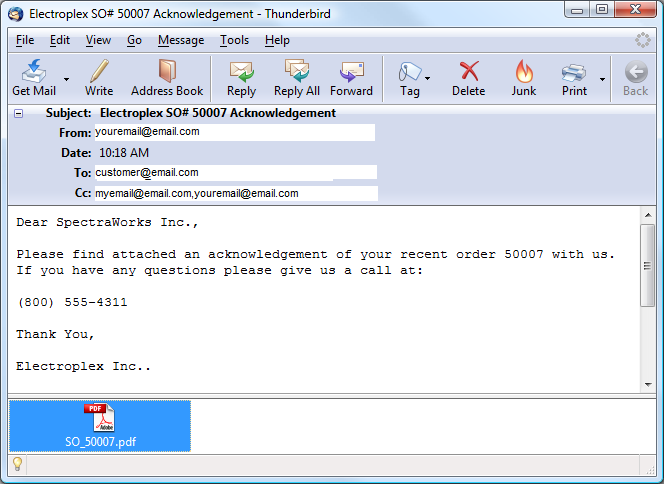
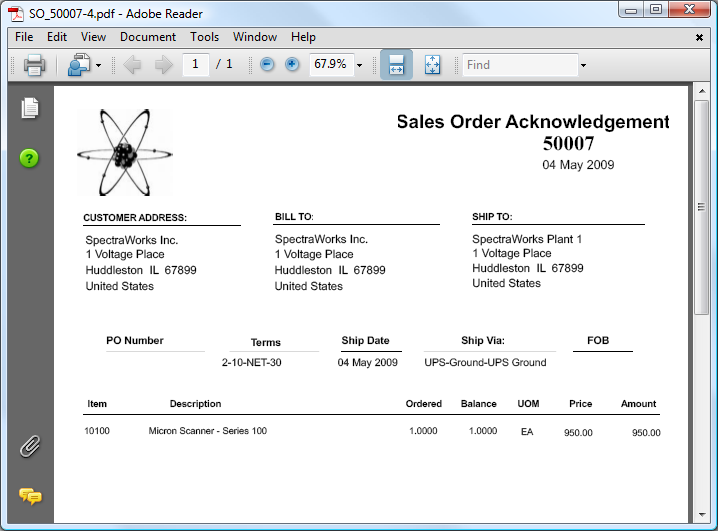
As you can see in the sample email, our Sales Order is attached in .PDF format. The following screenshot shows what the file looks like when the .PDF is opened.
Note
The attached Sales Order in .PDF format will look exactly the same to the Customer as it does to you when you print the same document yourself in xTuple ERP.