In this section we will run one of the many jobs that can be processed through the Batch Manager. The job we will use for this scenario is an Actual Cost update. This is a perfect candidate for a Batch Manager submission because it is a resource-intensive operation involving multiple database updates. Depending on the number of Items in your product catalog, an Actual Cost update can take up to several hours to complete. As a general rule, these kinds of jobs are better run after hours―when the server is not busy with production requests from multiple logged-in users.
To reach the cost update screen we will be using for this example, follow these steps:
Follow this path:
Select "All Class Codes"
Select the SELECT ALL COSTS button
Select the "Roll Up Actual Costs" option
The job is now ready for the Batch Manager, as shown in the following screen:
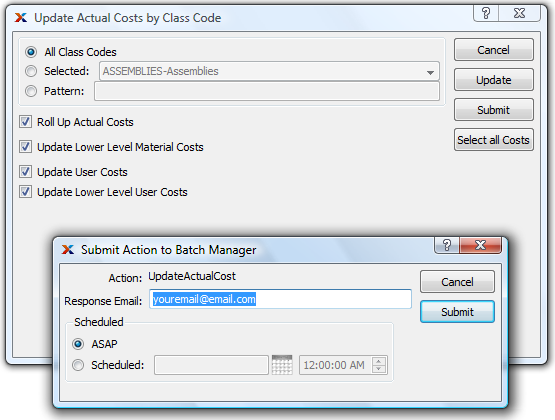
On the "Submit Action to Batch Manager" screen you can see that the "Response Email" field is pre-filled with an email address. By default, this email address belongs to the user who submitted the job. User email addresses are maintained on the user record.
In this example, the "ASAP" option is selected. This means the job should be processed immediately―or as soon as possible. Remember, since the Batch Manager is single-threaded, it can only process one job at a time. If there are already other jobs in front of this one, then this job will have to wait its turn. To send the job to the Batch Manager for processing, select the SUBMIT button.
Tip
We could have selected the "Scheduled" option and selected a date and time to run the job instead.
Once a job has been submitted to the Batch Manager, it's possible to then go to the Batch Manager screen and monitor the progress of the job. This monitoring of jobs can occur either from within xTuple ERP or within the Batch Manager client itself. To reach the Batch Manager screen within xTuple ERP, follow these steps:
Select the System Module menu
Select "Batch Manager" option
The following screen will appear:
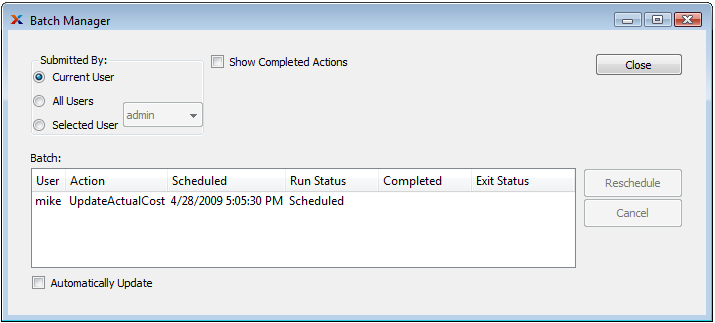
On this screen you can filter by the user who submitted the job, display completed jobs, and check the "Automatically Update" option to refresh the screen on a regular interval. Optionally, you can highlight a job and select the CANCEL button to stop it from processing. The CANCEL option may also be used to terminate recurring jobs from being processed in the future.
After the job is completed successfully, the user who submitted the job will receive a confirmation email from the Batch Manager indicating the time of completion and any related notes. The following screenshot shows a sample confirmation email:
