|
xTuple for Service Businesses Demo Guide |
After you finish issuing to shipping, you will be returned to the Issue to Shipping screen. Notice that the At Shipping column now displays a quantity of 100. Now let's follow these steps:
Click the button.
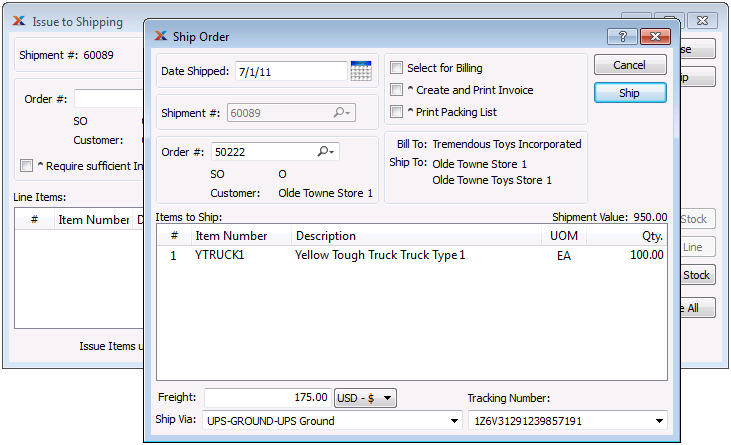
You will be presented with the following Ship Order screen:

On the Ship Order screen you have the option to indicate the means of shipment (i.e., the ship via) and the carrier's tracking number.
xTuple ERP is configured to receive freight cost and tracking number information from UPS WorldShip. At sites where UPS WorldShip is integrated with xTuple ERP, the freight cost and tracking number information displays automatically in xTuple ERP once the order has been processed in the UPS WorldShip software. If there is no UPS WorldShip integration, you may manually select the carrier (including UPS) and then manually record the freight cost and the tracking number. The tracking number may also be scanned in.
For our scenario, we follow the next steps to continue processing the shipment:
Do not check the Select for Billing option. (We will accomplish this necessary step at a later point in the process flow.)
Enter "175.00" in the Freight field.
You may optionally enter a valid UPS tracking number in the Tracking Number field—or leave the field blank.
Click the button.
Click the button.
The business flow described in this demo steps you through the various xTuple ERP control points as a way of illustrating product functionality. However, on the Ship Order screen we could have chosen the Select for Billing, Create and Print Invoices, and Print Packing List options to eliminate several of the steps we will soon be describing. By checking these options it is possible to generate the invoice at shipping for inclusion with the order.