In Chapter One we learned how to save a report definition to an XML (Extensible Markup Language) file that is external to the xTuple database. These files may be used as a backup and as a means to share reports definitions throughout the xTuple community.
In this chapter we will learn about two tools that facilitate the importation of one or more report definitions using their XML definition file. We have already seen that it is possible to use the report writer itself to open a report from its XML definition file so the main benefit to these tools is the ability to import multiple files simultaneously, or, in the case of the command line tool, write scripts that do the importation.
The first tool we will look at is the Report Import Tool. This tool runs on all supported client platforms and provides a simple, easy to use graphical user interface importation capability. The name of the binary file that you execute from a command line to start the Report Import Tool is importrptgui (note that on the Windows platform you will include the ‘.exe’ suffix).
The Report Import Tool is designed to simplify the process of uploading multiple reports to an xTuple database. For optimal performance, the importrptgui file should be placed in the same directory as the xTuple (‘.exe’ on Windows) client file.
When you open the utility, you will notice that you are brought to the standard xTuple log in screen. Log in to the database where you want to upload your reports. As with the xTuple client, you may click the OPTIONS button to change these settings.
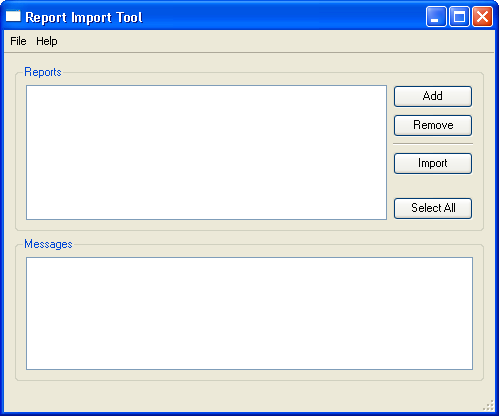
From the command line, and in the directory where the xTuple client files and the importrptgui binary files are co-located, run importrptgui. You will see:
The definitions that you import with this tool may be newly created reports, or, updated versions of already existing reports.
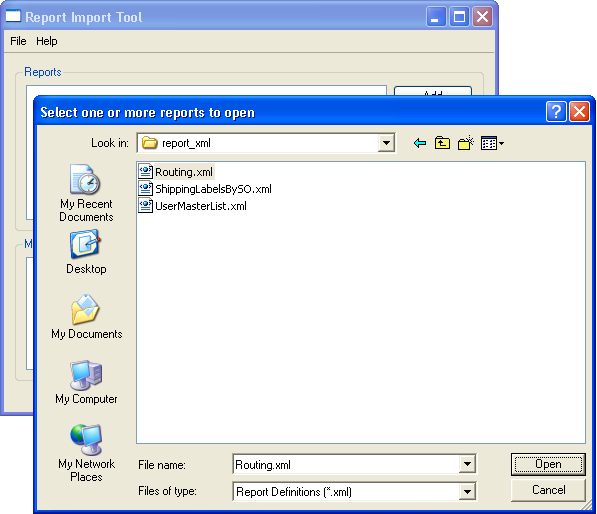
Using the ADD button on the GUI screen, browse for the directory where you have saved your report definition .xml files. Once you have located and opened the directory where the files are stored, you may add them individually by double-clicking on them one-at-a-time. Or, you may select all or a subset of the total using your window manager.
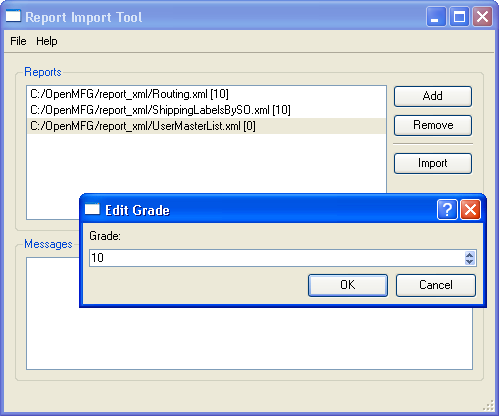
As you load reports into the list, you will see a number in brackets following the name of each report. This number is the grade assigned to each report. The reports will be loaded into the database using the grade you see here. By default this grade is zero. If you choose to change this value, you may double-click on any of the reports in the list to bring up a dialog that will allow you to set the value for the grade.
It is important to remember that when running a report, xTuple uses the report definition with the highest grade (for example, 10 runs before 9). xTuple recommends that you never overwrite the report definition with grade 0, reserving this for the definition provided by xTuple.
If after you are done adding reports to the list you find a report which you do not want to upload, simply highlight the report and select the REMOVE button. The report will be removed from the list, and it will not be uploaded.
Once you are satisfied with your list of reports and the grades you have assigned, highlight individual reports or use the SELECT ALL button to select all of the reports for importing. After the desired reports have been highlighted, select the IMPORT button. The highlighted reports will be uploaded to the database you logged into when you started your session.
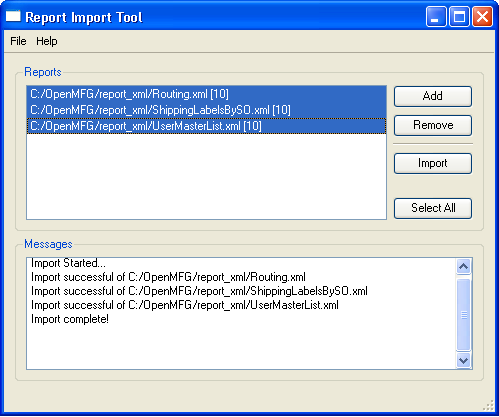
The Messages section of the Report import Tool shows the status of your import. To exit, select the EXIT option from the “File” menu―or click on the “X” in the upper-right hand corner of the screen.
After importing report definitions, you may want to open the xTuple report writer and view the report definitions you imported.
While report definitions can be loaded from the .xml definition file through the report writer itself, the Report Import Tool expedites this process when multiple report definitions require importation.
Now let’s look at a tool that enables you to import from the operating system’s command line on a client computer.
The command line import tool functions on all supported client environments and enables the importation of .xml report definitions over the network through a command line on a client computer. Systems administration personnel may embed the command line import tool in scripts that import multiple report definitions in a single run or use it iteratively from the command line.
The example provided in this document shows the command line report import tool being used on a Window client computer. The syntax is the same regardless of the operating system.
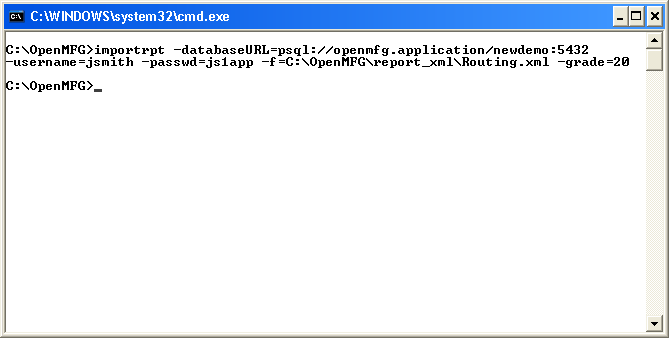
The name of the binary is importrpt (with the ‘.exe’ extension on Windows) and should be collocated with the xTuple client application files. The listing below shows the command, as executed above, in a more readable fashion:
importrpt
-databaseURL=psql://xTuple.application/newdemo:5432
-username=jsmith
-passwd=js1app
-f=C:\xTuple\report_xml\Routing.xml
-grade=10
Let’s take a look at all of the options available in importrpt to understand each a little better:
Table 5.8. Options Available to importrpt
| Option | Syntax |
|---|---|
-databaseURL=<connection URL> | Specify the connection information that importrpt should use when loading a report definition. The connection URL is in the following format: psql://servername/database[:port]. In the connection URL, the servername is the host or IP address of the server where the database is running. For example: somehost.xTuple.com. The database is the name of the actual database you want to connect to on the specified server. For example: mydb. The last option, port, is optional. If included, it must follow a colon and be a valid port number. If the port is not specified, the default port of '5432' is used. For example, if you wanted to connect to the database mydb on the server somehost.xTuple.com using the default port, you would use the following connection URL: psql://somehost.xTuple.com/mydb. Similarly, if you wanted to connect to the database dbtest on the server 192.168.128.64 using the port 2345 you would use the following connection URL: psql://192.168.128.64/dbtest:2345 |
-username=<user name> | This is user name you are using to connect to the server and database. It is the same username that the user enters when logging on through the xTuple client and must be setup using the xTuple client session Maintain Users. |
-passwd=<password> | This is the password for the user name you specified in Maintain Users. This is the same password that the user enters when logging in through the xTuple client. |
-grade=<number> | The grade used to load a report into the database. A numeric value from 0 to 99 is valid. The default value is 0 if this option is not specified. Grade 0 should generally be reserved for the baseline report definition supplied by xTuple. |
-f=<report definition> | The name of the report definition file (as it appears on your disk) that you are loading into the database. The path may be included if the file is located in a directory that is different from the one in which importrpt is located and the syntax for the path will vary by operating system. |
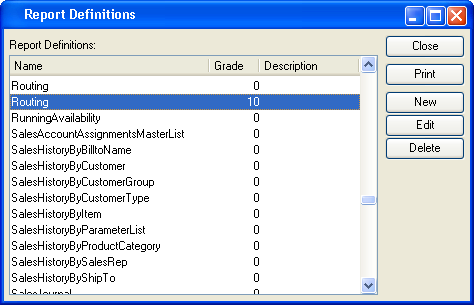
You may have noticed that the report definition loaded in our example above was for the Routing report and that grade was assigned a value of 20. If, after running importrpt, we start the xTuple report writer and browse the report definitions, we will find that we now have an additional report definition for the Routing:
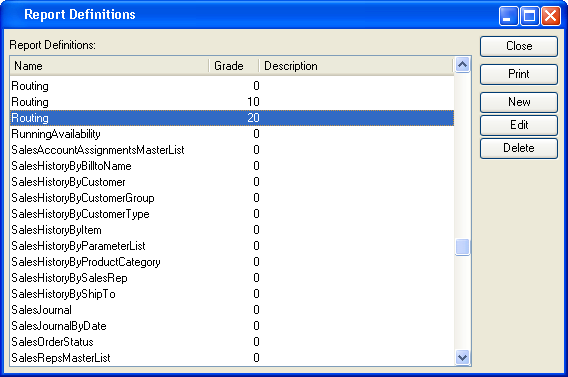
We can see that Routing has 3 definitions: 0, 10, and 20. When a user runs the Routing report, xTuple will use the definition with grade 20: the definition we just imported using the importrpt command line tool.