As we have seen, MetaSQL is a non-standard language embedded within standard SQL. MetaSQL cannot be executed directly on a database, but must first pass through and be interpreted by the MetaSQL parser. The MetaSQL parser then generates standard SQL which is sent to the target database for processing.
The MetaSQL Editor is a tool designed to facilitate the process of writing report definitions having MetaSQL elements. Using the MetaSQL Editor, report authors can develop complex queries, test them with different values for parameters, and then view the resulting standard SQL. Report authors can save time and effort using the MetaSQL Editor to test any portion of a complex query having MetaSQL elements.
Note
The MetaSQL Editor is a multi-platform tool, running identically on Windows, Linux, and Mac. For testing report definitions linked to the xTuple application, the MetaSQL binary file should be installed in the same directory as the xTuple client.
The example we will be using in this section focuses on running the MetaSQL Editor against an xTuple database. However, the MetaSQL Editor source code can be modified to work with other database applications.
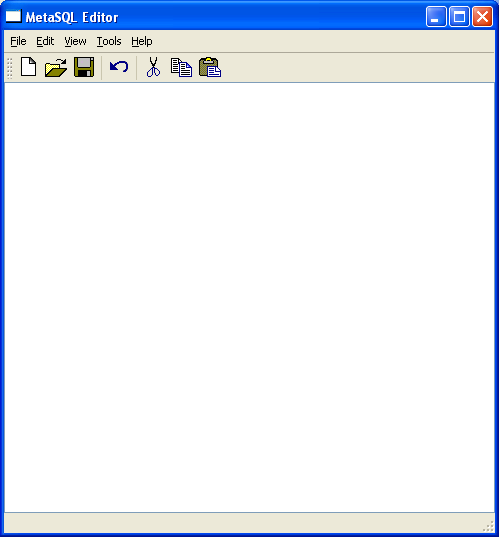
The MetaSQL Editor can be an extremely useful tool for report authors who want to test the accuracy of their MetaSQL statements during the process of writing report definitions. To open the MetaSQL Editor, run it from the location where it is installed. The following screen will appear:
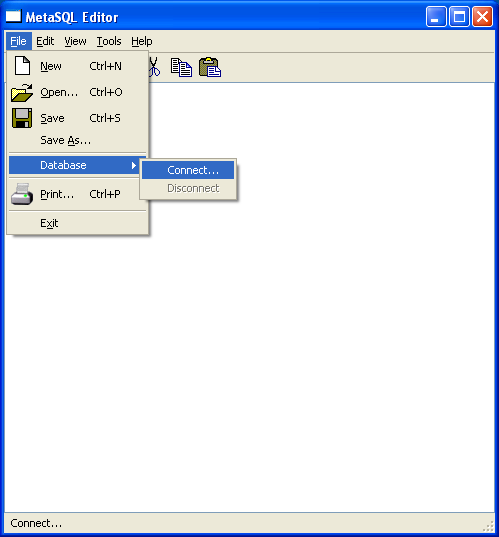
To perform tests using the MetaSQL Editor, you must first connect to your target database. To connect to a database, select the “Database” option from the “File” submenu, as shown in the following screen:
For the purposes of this example, we will be connecting to an xTuple database. That explains why, when we select the “Connect” option, we are brought to a database login screen which has been customized for the xTuple application:
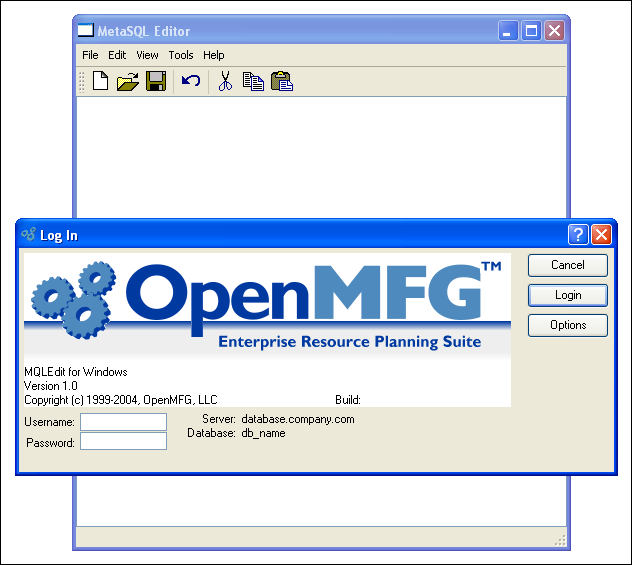
Under the OPTIONS button, we specify our server, database, and port connection information. And then, we are asked to enter a valid username and password.
Once we have successfully connected to our target database, we can begin testing the accuracy of embedded MetaSQL statements using the MetaSQL Editor.
For this exercise, we will demonstrate the MetaSQL Editor functionality using a very basic and simple query. The goal of the exercise is to leave you with an understanding of fundamental MetaSQL Editor mechanics. You are free to perform more complex and extensive testing on your own.
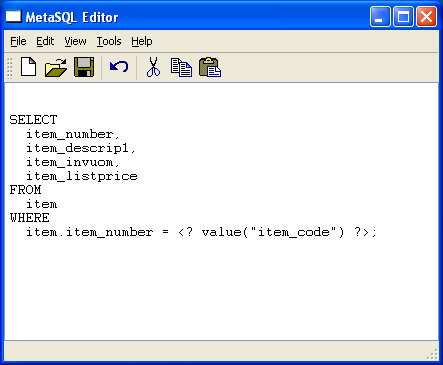
Now that we are connected to a database—in this case, an xTuple database—we can write a simple query and then test the results. To enter a query, simply type in the MetaSQL Editor’s main text field, as shown in the following screen:
Note
Test queries may be saved for future use by selecting either the SAVE or SAVE AS options from the “File” menu.
As you can see, the query begins with standard SQL. We are seeking to SELECT four pieces of Item information FROM the item table. Our MetaSQL is inserted within the WHERE clause. The MetaSQL states that the item_number for the selected Item must match a specified item_code. The term item_code is a parameter. We can set different values for the item_code parameter using the MetaSQL Editor—and then run the query to test the results.
However, before we run the query, we must first define the parameter item_code and assign it a value.
Earlier in this chapter we discussed parameters and how they enable reports to respond to dynamic conditions presented by application users. The MetaSQL Editor enables you to simulate these dynamic conditions, by defining parameters and assigning values to them.
Let’s assign a value to the parameter we entered in our MetaSQL example—namely, the parameter item_code. In our example, we are simulating a situation in which an xTuple user inputs an item_code. The item_code, in turn, corresponds to an item_number in the item table.
Before we can test our MetaSQL, we must first create the parameter item_code. To create a parameter, we open the “Parameter List” option from the “View” menu. The following screen will appear:
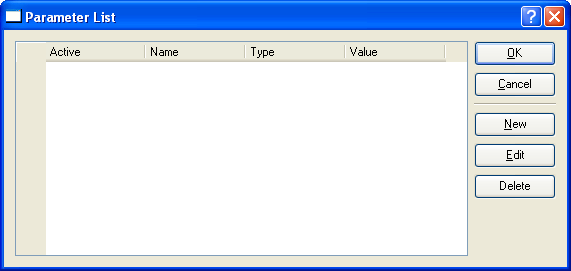
Note
Parameters will be saved only for the duration of the current MetaSQL Editor session. Once the MetaSQL Editor is closed, any saved parameters will be erased.
The parameter list screen displays information on all parameters which have been created for testing purposes, including Active status, parameter name, data type, and value.
To create a new parameter, select the NEW button. The following screen will appear:
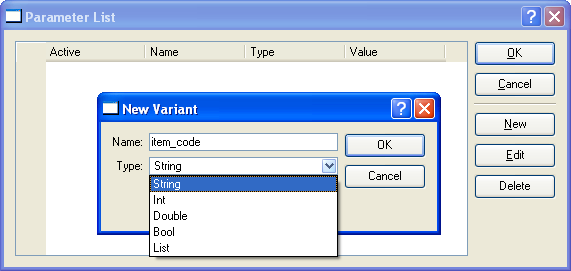
When entering a new parameter, you are presented with the following options:
- Name
Enter a name to identify the parameter. The names of parameters should correspond to parameter names referenced in your test queries.
- Type
Select the appropriate data type from the list of available data types. Data types are defined on the database—and may vary from column to column. To be successful, your selection must match the data type for the target column in the database. In our example, the target column is
item_number. The data type for this column istextin the MetaSQL Editor. Thetextdata type corresponds to thestringtype.
To the far right of the screen, the following buttons are available:
- OK
Select to save the entered values.
- CANCEL
Select to cancel the transaction and return to the parameter list.
After we have entered the appropriate values and selected the OK button, the following screen appears:
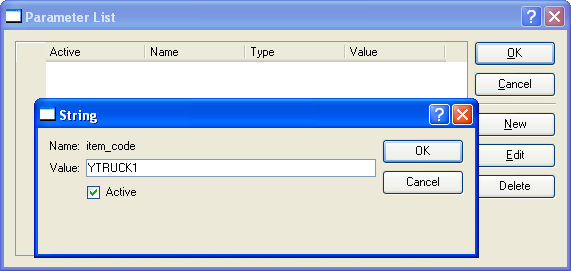
As you can see, we are asked to enter a value for the parameter. In this case, we enter YTRUCK1. This is an item_number from our sample database. By entering that value here, we are linking the parameter item_code to item_number YTRUCK1. Selecting the OK button saves our information.
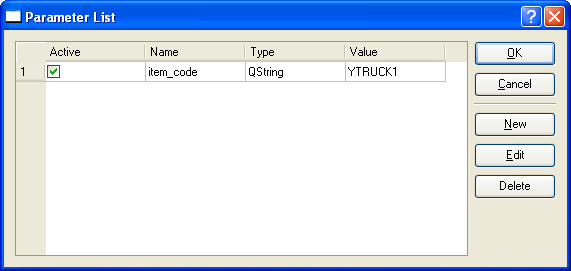
Back on the parameter list, we can verify the information has been entered correctly, as shown in the following screen:
Now that we have our sample query and corresponding parameter, we are ready to begin our testing.
Before we execute our query, we must first parse it using the MetaSQL parser. As we have discussed previously, the MetaSQL parser interprets MetaSQL statements embedded in a query, evaluates the available parameters, and then produces standard SQL. The resulting standard SQL is then sent to the database for processing.
To parse select the “Parse Query” option from the “Tools” menu. The following screen will appear:
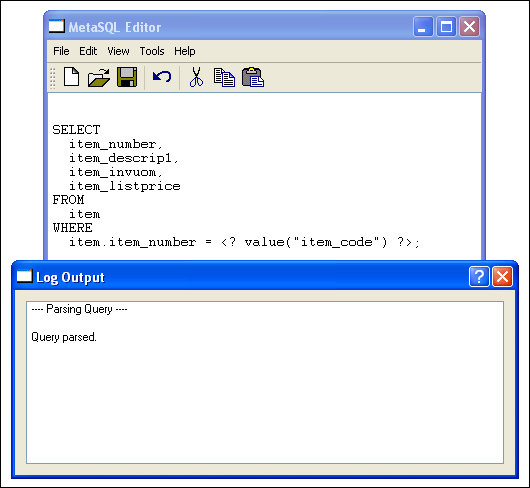
Notice that the MetaSQL parser creates a Log Output screen, where messages related to the parsing process will be written. In our case, we get a “Query parsed” message, which means our MetaSQL was parsed successfully.
Once a query has been parsed, we are ready to execute it. Executing a query means the standard SQL produced by the MetaSQL parser is sent to the database for processing. To execute a query, select the “Execute Query” option from the “Tools” menu. The following screen will appear:

When a query is executed successfully, the results will be displayed in a Results Output screen. As you can see in the example, the value returned in the item_number column equals the value assigned to the parameter item_code.
One of the most powerful features of the MetaSQL Editor is the ability to view the standard SQL generated by the MetaSQL parser. This is the same standard SQL the parser sends to the database for processing. This visibility is especially helpful when attempting to troubleshoot lengthy queries having complex MetaSQL statements and numerous parameters. To view the standard SQL output, select the “Executed SQL” option from the “View” menu. The following screen will appear:
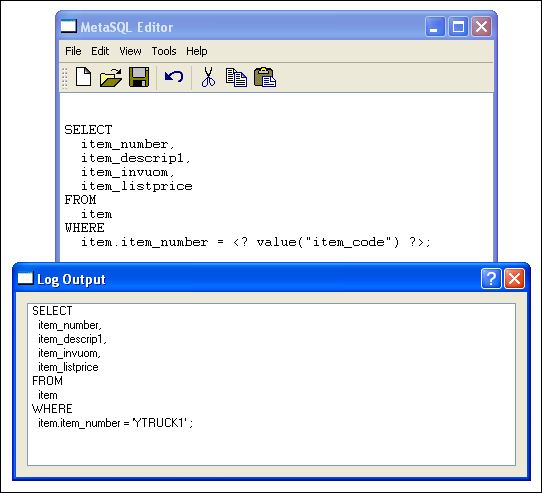
As you can see, the MetaSQL parser has stripped the MetaSQL elements from the original query to produce standard SQL which can be processed by the database.
Tip
If you save your MetaSQL queries to a local file, you can load them into the MetaSQL Editor at a later time. Parameter lists may not be saved, however.
This concludes the section on using the MetaSQL Editor. Again, we used a very simple query to illustrate the basic mechanics of the MetaSQL Editor. We encourage you to test more complex queries and parameter lists on your own.