The best way to illustrate report writer functionality is to work with an existing report definition—rather than create a new one from scratch. So, for this first exercise we will be modifying a report definition called “UsersMasterList.” The “UsersMasterList” report definition is a stock xTuple report designed to provide information about xTuple users.
Note
The data used in this exercise is pulled from a sample xTuple Database.
To begin, we must first log in to xTuple. By logging in, we automatically connect to an xTuple Database. The user information we will be working with is stored in the xTuple Database.
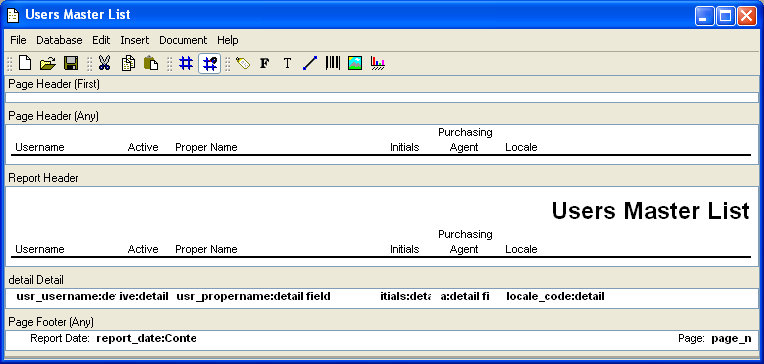
We can access the “UsersMasterList” report by selecting the “Reports” option from the “Master Information” section of the System Module. Scroll down the master list of report definitions until you reach the “UsersMasterList” report. Highlight the report, then select the EDIT button. The following screen will appear:
In the Report Writer Basics chapter, we discussed the importance of grades—and how multiple versions of the same report may be stored on a database using different grades. By default, xTuple uses the report definition having the highest grade.
To differentiate our working version of the “UsersMasterList” report definition from the standard version, we will save it with a different grade. To save a report definition with a different grade, select the “Save to DB” option from the “Database” menu. The following screen will appear:
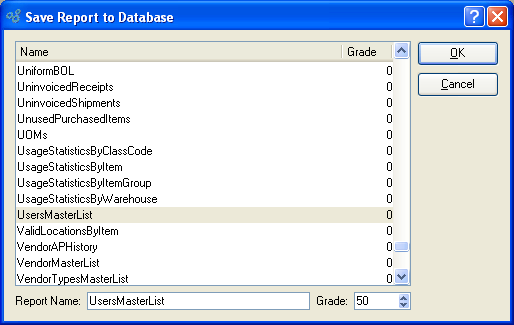
We will keep the same name, but change the grade to 50. When we select the OK button, the report definition is saved to the database.
Tip
If you want to save your changes to the database, be sure to select the “Save to DB” option. Report definitions stored on a local or network drive may also be saved to a database in this way.
We have now made a copy of the report definition—and assigned it a high grade (“50”). When xTuple runs the report, it will use our version of the report definition because ours has been assigned the highest grade in the sample database.
The report writer uses Structured Query Language (SQL) to retrieve information from a database. In this section, we will look at how report definitions use SQL queries to collect the information which is displayed in a report.
To view the SQL query associated with the “UsersMasterList” report definition, select the “Query Sources” option from the “Document” menu. The following screen will appear:

The query master list shows all the queries defined for a report definition. In this case, only one query has been defined. To view the query, double-click on it—or highlight it and then select EDIT. The following screen will appear:
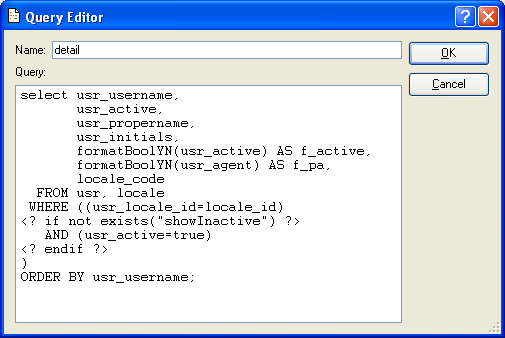
The basic SQL query structure used by many report definitions reads as follows:
SELECT (column) FROM (table) WHERE (condition) and, optionally, ORDER BY (column).
The query shown above follows this basic format.
Readers familiar with SQL may have noticed portions of the statement surrounded by <?...?> tags. These tags signal the use of MetaSQL. MetaSQL is an embedded query language designed to make SQL queries dynamic. The MetaSQL language was developed by xTuple for use by the report writer.
Note
For more information on MetaSQL, the embedded query language designed by xTuple to make SQL queries dynamic, please see the Advanced Topics chapter.
We could edit the query using the query editor. But at this point, we simply want to familiarize ourselves with the query. We will be making cosmetic changes to the report in the next sections.
Label objects contain static text displayed in a report. Text is considered static if it resides in a report definition and is not pulled dynamically from a database. A report title is an example of static text contained within a Label object. In our next exercise, we will show how to modify a report title.
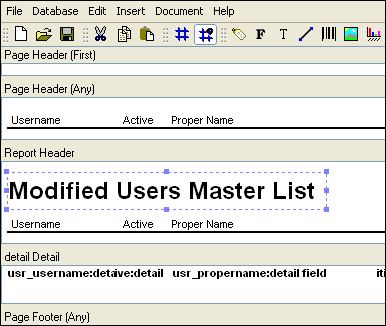
To change the title appearing on the “UsersMasterList” report definition, locate the Label object containing the title in the Report Header section. The title of the report is “Users Master List.” Double-clicking on the object will open the Label properties screen. We will change the text of the Label and align the text on the left margin, as shown in the following screen:
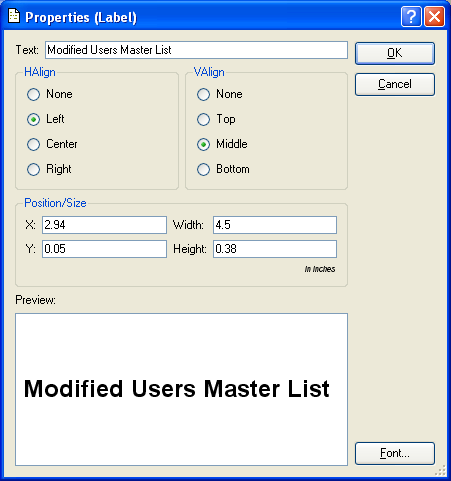
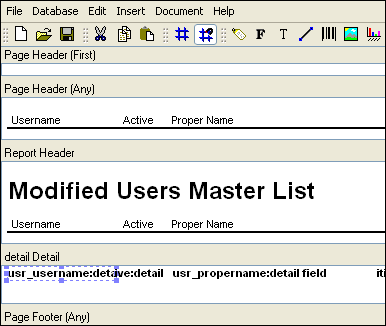
After we have made the changes, we select the OK button. The changes are now applied to the Label object. Finally, we click on the Label object and drag it to the left-hand margin of the report definition—then save the report definition to the database. All these changes appear in the following screenshot:
Tip
Using your mouse, you can click on a Label object and drag it to a new position. Or you can resize a Label object, using the handles on the perimeter of the object.
Field objects contain dynamic information retrieved from a database. The dynamic information is pulled into the Field using query sources. For this exercise, we will be making a cosmetic change to the user name Field. The user name Field is the Field used to print user names on the “UsersMasterList” report. Later, we will add a new Field object.
Our goal in this exercise is to increase the font size used to print user names on the “UsersMasterList” report. By default, these names are printed in 8-pt font. We will be increasing the font size to 14-pt.
To begin, we must first locate the Field object which contains the user name Field. We find it partially obscured on the left-hand margin of the Detail section. It is the Field having the name “usr_username:detail”, as shown in the following screen:
Note
Don’t be concerned if Field objects overlap, causing the names which identify them to become partially obscured. This is common when Field objects are located adjacent to each other.
To edit the properties of the user name Field, we double-click on the Field object. The following Field properties screen will appear.
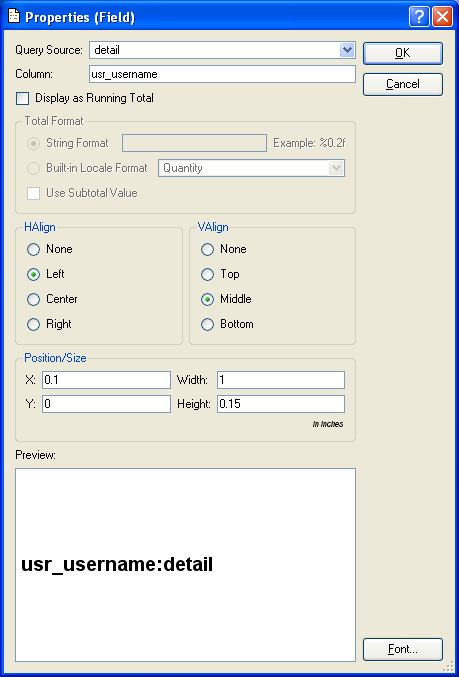
As you can see, the query source being used to populate the Field is the “detail” query source. This is the same query source we looked at previously. The “detail” query uses SQL to retrieve user information from the database the report writer is connected to. The column usr_username is one of the columns mentioned in the “detail” query’s SELECT statement. Only this column will be used when retrieving data into the Field. All other columns referenced in the SELECT statement will be ignored.
Note
This explains how Field names are determined: They begin with the name of a column referenced in a query source, and are followed by the name of the very same query source. And so, in our current example, we get “usr_username:detail.”
For now, we are concerned only with changing the font size used to print user names on the “UsersMasterList” report. We select the FONT button at the bottom of the screen and specify a 14-pt font size. After we select the OK button, we see the change reflected in the report definition, as shown below:
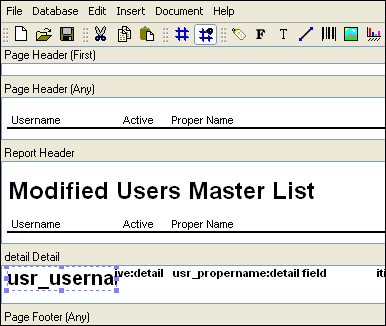
For now, we won’t worry about the length of the Field. We will, however, adjust the height of the Field object to accommodate the larger font. Once we have saved our changes to the database, we can run the report and see how our updates have affected the printed results.
To run the report from within xTuple, open the “Maintain Users” option from the System Module menu. After selecting the PRINT button, the report will print out as follows:
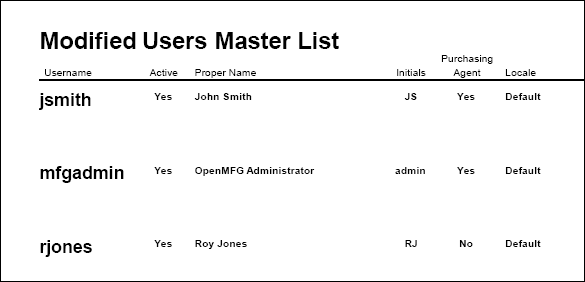
As you can see, the user names have in fact been printed in 14-pt font, as expected. The information contained in other Fields—active status, proper name, initials, etc.—still appears in the default 8-pt font. Notice that the printed title of the report has also been modified, per our report definition changes.
Now that we have a made a few cosmetic changes to a report definition, we are now ready to make a more significant change. In this next exercise, we will add a bar code object to print user names in bar code format.
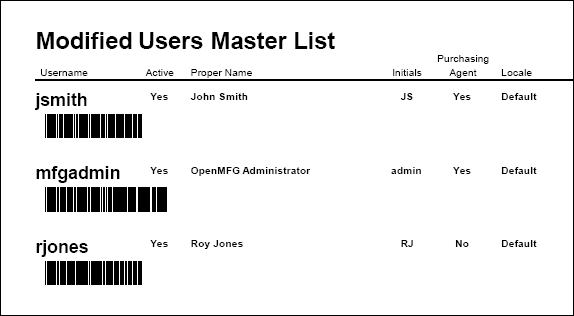
The mechanics of adding a bar code object are the same as adding a human-readable Field object. When we are done, we will have a report that looks like the following:
We will be adding the bar code object just below the Field object containing the human-readable user name. To do so, we first need to expand the lower boundary of the “UsersMasterList” Detail section.
Tip
To expand the height of a section, simply hold your mouse over the lower boundary of the section. When the double arrows of the resize cursor appear, use your mouse to expand the section.
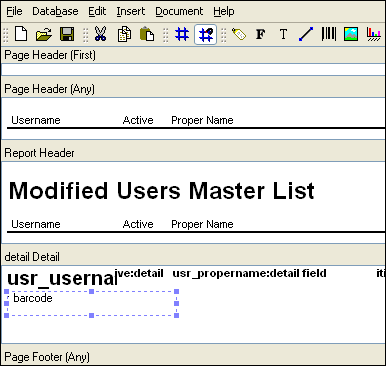
Once the Detail section has been expanded, we select the bar code option from the toolbar and then click in the section just below the user name Field. We have now inserted the bar code object into the report definition, as shown in the following screen.
We must now specify the properties of the bar code object. To do so, we double-click on the bar code object. The following screen will appear:
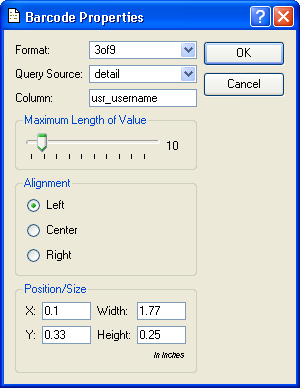
Like Field objects, bar code objects contain dynamic information retrieved from a database. As you can see, the bar code properties screen requires a query source and column name. The dynamic information we need for this exercise is the same as we needed previously—namely, user names retrieved from the usr table. The only difference here is that we will be representing user names in bar code format. We enter the following parameters:
- Format
3of9 (The report writer supports the following bar code formats: 3of9, 3of9+, 128, ean13, ean8, upc-a, and upc-e.)
- Query Source
detail
- Column
usr_username
- Maximum Length of Value
10 (Specifies the maximum number of characters the bar code is expected to contain.)
After we select the OK button, we see the bar code object has been updated in the report definition, as shown below:
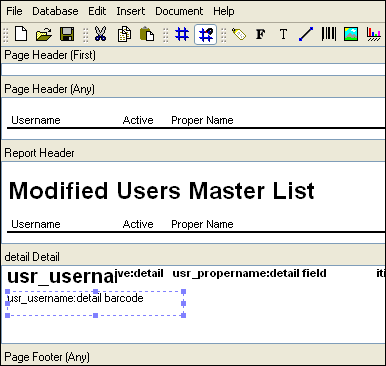
As you can see, the bar code object is now identified with the name usr_username:detail barcode. This name refers to the column and query source which will be used to generate user name data in bar code format. Before we save our changes to the database, we click on the right side of the bar code object and drag it to make it longer.
We have now successfully created a bar code object that will print in “3of9” format—one of several widely-used bar code formats supported by the report writer. Now let’s print the report and see the results.
To print the Users Master List, select the “Maintain Users” option from the System Module menu. When the master list of users appears, select the PRINT button. The following screen shows a portion of the printed report:
As you can see, the final result matches the result we expected to see when we began this section. The user names on the Users Master List are now both human-readable and machine-readable.