
|
xTuple ERP Reference Guide |
|
|
xTuple ERP Reference Guide |
| 11.8.1. Pricing Schedule Assignment | ||
|---|---|---|
 | 11.8. Pricing Schedule Assignments |  |
To create a pricing schedule assignment, select the button. The following screen will appear:
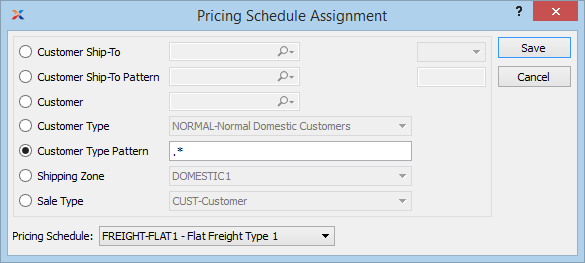
When creating a new pricing schedule assignment, you are presented with the following options:
Specify the customer ship-to address you want to assign a pricing schedule to. This is an optional setting which may be used in conjunction with the Selected Customer setting. The Ship-To option gives you the added flexibility of being able to assign multiple pricing schedules to a single customer based on separate ship-to addresses.
When entering credit memos, make sure the ship-to address on the credit memo matches the ship-to address on the customer's pricing schedule. If they don't match, you won't be able to issue credit for exclusively sold items.
Enter a ship-to address pattern to select a range of ship-to addresses for the selected customer.
Select to assign a pricing schedule to an individual customer.
Specify the customer number of the customer you want to assign a pricing schedule to. The lookup feature located to the right of the field leads to a searchable customers list. You may also access this list using the keyboard shortcut . Once a customer number is entered, the customer name and billing address will display. Select the or symbol next to the lookup feature to view customer information for the specified customer. If a customer's credit is good, the button will feature a black question mark () icon. If the customer is on credit warning, the icon will turn into an orange dollar sign (). A red dollar sign () indicates the customer is on credit hold.
Specify the customer type you want to assign a pricing schedule to.
Enter a customer type pattern to select a range of customer types. Refine your search using regular expressions.
Specify the shipping zone you want to assign a pricing schedule to.
Specify the sale type you want to assign a pricing schedule to.
Specify the pricing schedule to be used when entering sales orders for the specified customers.
| |  | |
| 11.8. Pricing Schedule Assignments |  | 11.9. Sales |