
|
xTuple ERP Reference Guide |
|
|
xTuple ERP Reference Guide |
| 2.1. New Planned Order | ||
|---|---|---|
 | 2. Scheduling |  |
To create a planned order, select the option. The following screen will appear:
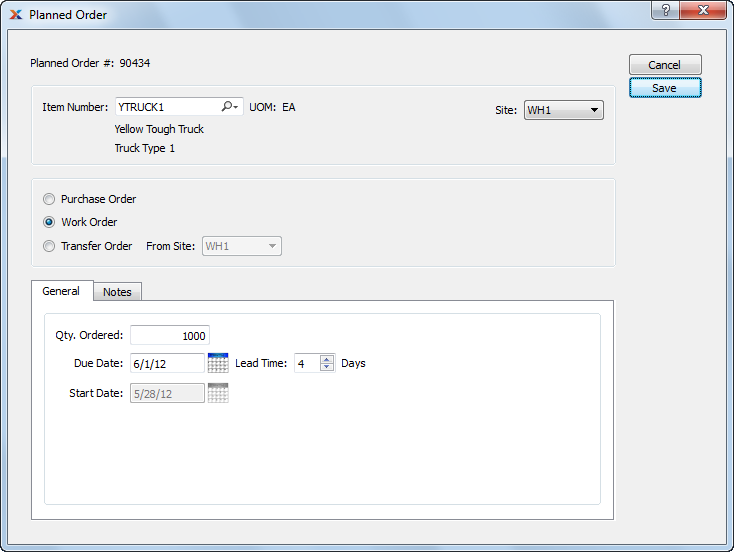
When creating a planned order, you are presented with the following options:
Displays system-defined planned order number.
Enter the item number of the item you want to create a planned order for.
Inventory unit of measure (UOM).
Specify site for planned order.
Specify the supply type of the planned order: purchase order, work order, or transfer order. If you specify transfer order then you must specify the From Site.
Enter the quantity of the specified item required for the planned order.
Enter the date the planned order must be completed by.
This date will be equal to the due date less the lead time. The start date may be changed by altering the Lead Time field.
Select a number using the arrows, or manually enter a value up to a maximum of 999. Value entered specifies the lead time required between the Due Date and the Start Date.
To enter notes related to the planned order, select the tab. The following screen will appear:

When adding notes to a planned order, you are presented with the following options:
This is a scrolling text field with word-wrapping for entering general notes related to the planned order.
The following buttons are unique to this screen:
Creates the planned order.
| |  | |
| 2. Scheduling |  | 2.2. Run MPS by Planner Code |