
|
xTuple ERP Reference Guide |
|
|
xTuple ERP Reference Guide |
| 9.1. Enter New Item Source | ||
|---|---|---|
 | 9. Item Source |  |
To enter a new item source, go to . The following screen will appear:
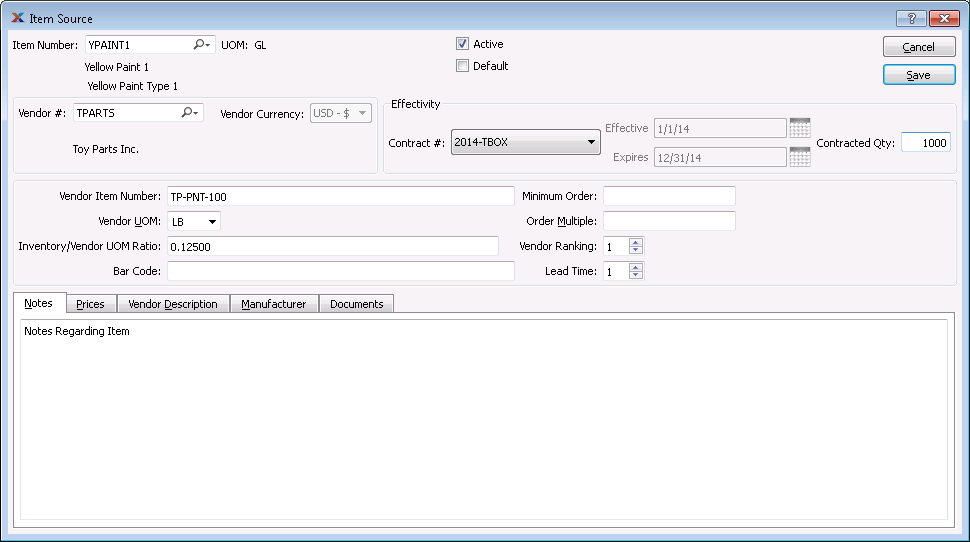
When entering a new item source, you are presented with the following options:
Enter the item number of the manufactured item you want to create a work order for.
Inventory unit of measure (UOM).
Identifies whether the item is currently active.
Select this option to distinguish an item source from other item sources for the same item number. If selected, the default item source will be selected automatically when releasing purchase requests or creating drop shipments. If no default item source is specified, users will be asked to select item sources from a list of available item sources when releasing purchase requests or creating drop shipments. When this option is selected and saved, any other item sources for the item flagged as the default will be unchecked.
Enter the vendor number of the vendor who is the source for the specified item.
Enter the item number the vendor uses to identify the item.
Select the UOM the vendor uses for the specified item.
Specify the ratio between inventory and vendor UOM. For example, if you store an item in single units, but a vendor sells you the item in cases of 12, then you would enter "12" here to represent the 12:1 inv./vend. ratio. If the ratio is 1:1, then enter "1" here. When an inv./vend. ratio is specified, the system allows you to purchase items using the vendor's UOM; however, when the items are received, the system will automatically convert the inventory to your inventory UOM. This same conversion logic flows throughout the system—whether you are viewing inventory availability or running material requirements planning (MRP). Your inventory will always be represented in your inventory UOM, regardless of the vendor UOMs specified on any open purchase orders.
Enter the bar code for the item.
Standard bar code formats supported by the system include the following: Code 3of9, Code 3of9 Extended, Code 128, UPC-A, UPC-E, EAN-8, EAN-13.
Currency used by the vendor.
Select the contract number if a contract exists for this item source.
Specify the date when the relevant contract takes effect.
Specify the date when the relevant contract expires.
Enter the blanket order quantity that will be used to track released and received purchase order quantities for the item under the contract.
Indicate the minimum order allowed for the specified item. A warning message will be shown if a purchase order line item falls below the minimum order value entered here.
Value entered indicates the quantity multiple that orders for this item must use. A warning message will be shown if a purchase order line item does not conform to the order multiple entered here.
Specify the vendor's rank using the arrows, or manually enter a value up to a maximum of 9. The ranking of a vendor is used to identify the relative merits of item sources when releasing purchase requests. If a purchased item has multiple item sources, you may select from a list of available item sources when releasing a purchase request. The item sources will be listed in descending order by vendor ranking.
Specify the lead time for the vendor item using the arrow buttons, or manually enter a value up to a maximum of 99. Specifies the lead time the vendor requires to supply the specified item, measured in days.
This is a scrolling text field with word-wrapping for entering notes related to the item source.
Note that if you enter in information that is a duplicate of an item source that's already in the system, you will receive an error as duplicate records are not allowed to be saved.
To add or modify item source prices, select the tab at the bottom of the Item Source screen. The following screen will appear:
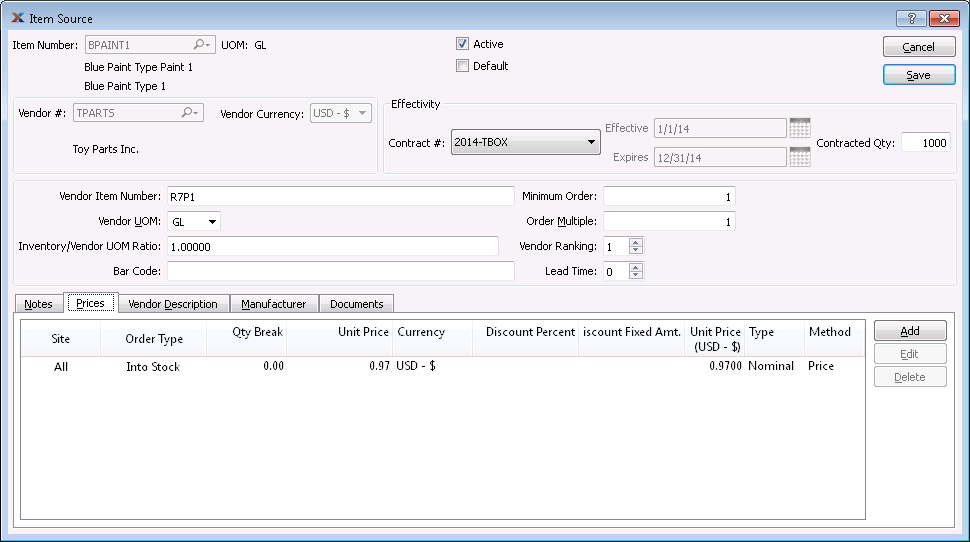
When adding or modifying item source prices, you are presented with the following options:
Display lists item source prices for the specified item source.
The following buttons are unique to this screen:
Opens screen for creating a new item source price, as shown below.
To add or modify a description of the vendor, select the tab at the bottom of the Item Source screen. The following screen will appear:

When adding or modifying a vendor description, you are presented with the following options:
This is a scrolling text field with word-wrapping for entering comments related to the vendor.
To add or modify a manufacturer's information, select the tab at the bottom of the Item Source screen. The following screen will appear:
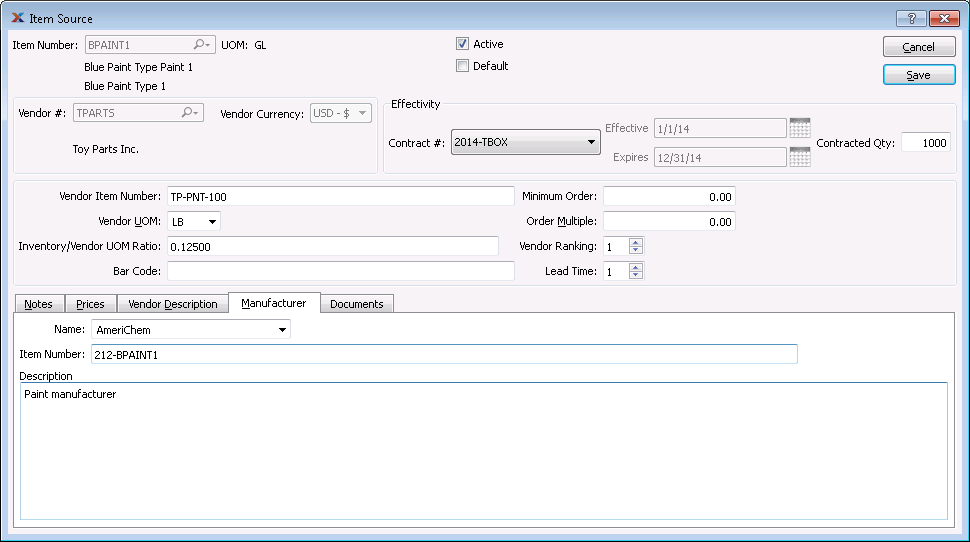
When adding or modifying manufacturing information, you are presented with the following options:
Name of the manufacturer who creates the item.
Item number used by manufacturer who creates the item.
Description used by the manufacturer who creates the item.
To associate documents with an item source, select the tab.
When associating documents, you are presented with the following options:
Select to create a new document and associate it with the current record. You may create the following document types:
Select to create a new image association.
Select to create a new fixed asset association.
Select to create a new maintenance order association.
Select to create a new incident and associate it.
Select to create a new project and associate it.
Select to create a new opportunity and associate it.
Select to create a new task and associate it.
Enables you to edit associated documents. The Edit screen is the same as that for creating a new document—except that when editing, the fields will contain document information. Double-clicking on a document will also bring you to the editing screen.
Highlight a document and then select this button to reach a read-only view of the Edit screen.
Select to associate already-existing documents. The following document types may be attached: contact, account, customer, employee, file, image, incident, item, opportunity, project, purchase order, sales order, vendor, web site, work order.
Highlight a document and then select this button to remove the association.
To associate already-existing documents, select the button. The following screen will appear:
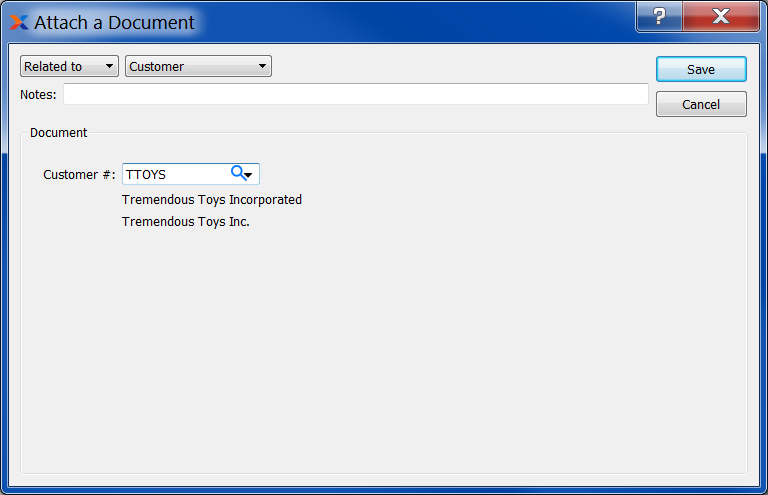
When associating already-existing documents, you are presented with the following options:
Indicate how the document is related to the current record. The following relationship options are available: related to, parent of, child of, duplicate of.
Specify the kind of document you want to associate. The following document types may be attached: contact, account, customer, employee, file, image, incident, item, opportunity, project, purchase order, sales order, vendor, web site, work order. When associating files, you will also be given the option to save the file to the database.
There is no file size restriction when saving files to the database. However, excessively large files could cause storage and performance issues.
Leave any notes on the document file as needed.
Use the lookup tool to identify the specific document you want to attach. The data entry options will vary depending on the document type you select.
| |  | |
| 9. Item Source |  | 9.1.1. Item Source Price |