
|
xTuple Connect Guide |
|
|
xTuple Connect Guide |
| Scheduling Jobs | ||
|---|---|---|
 | Running Batch Jobs |  |
To reach the cost update screen we will be using for this example, follow these steps:
Follow this path:
Select "All Class Codes"
Select the SELECT ALL COSTS button
Select the "Roll Up Actual Costs" option
Select the SCHEDULE button
The job is now ready for the xTuple Connect Batch Manager, as shown in the following screen:
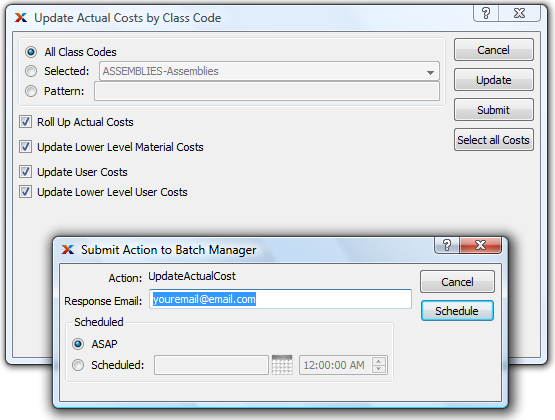
On the "Submit Action to xTuple Connect Batch Manager" screen you can see that the "Response Email" field is pre-filled with an email address. By default, this email address belongs to the user who submits the job. User email addresses are maintained on the user record.
In this example, the "ASAP" option is selected. This means the job should be processed immediately or as soon as possible. Remember, since the xTuple Connect Batch Manager is single-threaded, it can only process one job at a time. If there are already other jobs in front of this one, then this job will have to wait its turn. To send the job to the xTuple Connect Batch Manager for processing, select the SCHEDULE button.
We could have selected the "Scheduled" option and selected a date and time to run the job instead.
| |  | |
| Running Batch Jobs |  | Monitoring Job Progress |