
|
xTuple Connect Guide |
|
|
xTuple Connect Guide |
| Enable xTuple Connect | ||
|---|---|---|
 | Basic xtConnect Package Configuration |  |
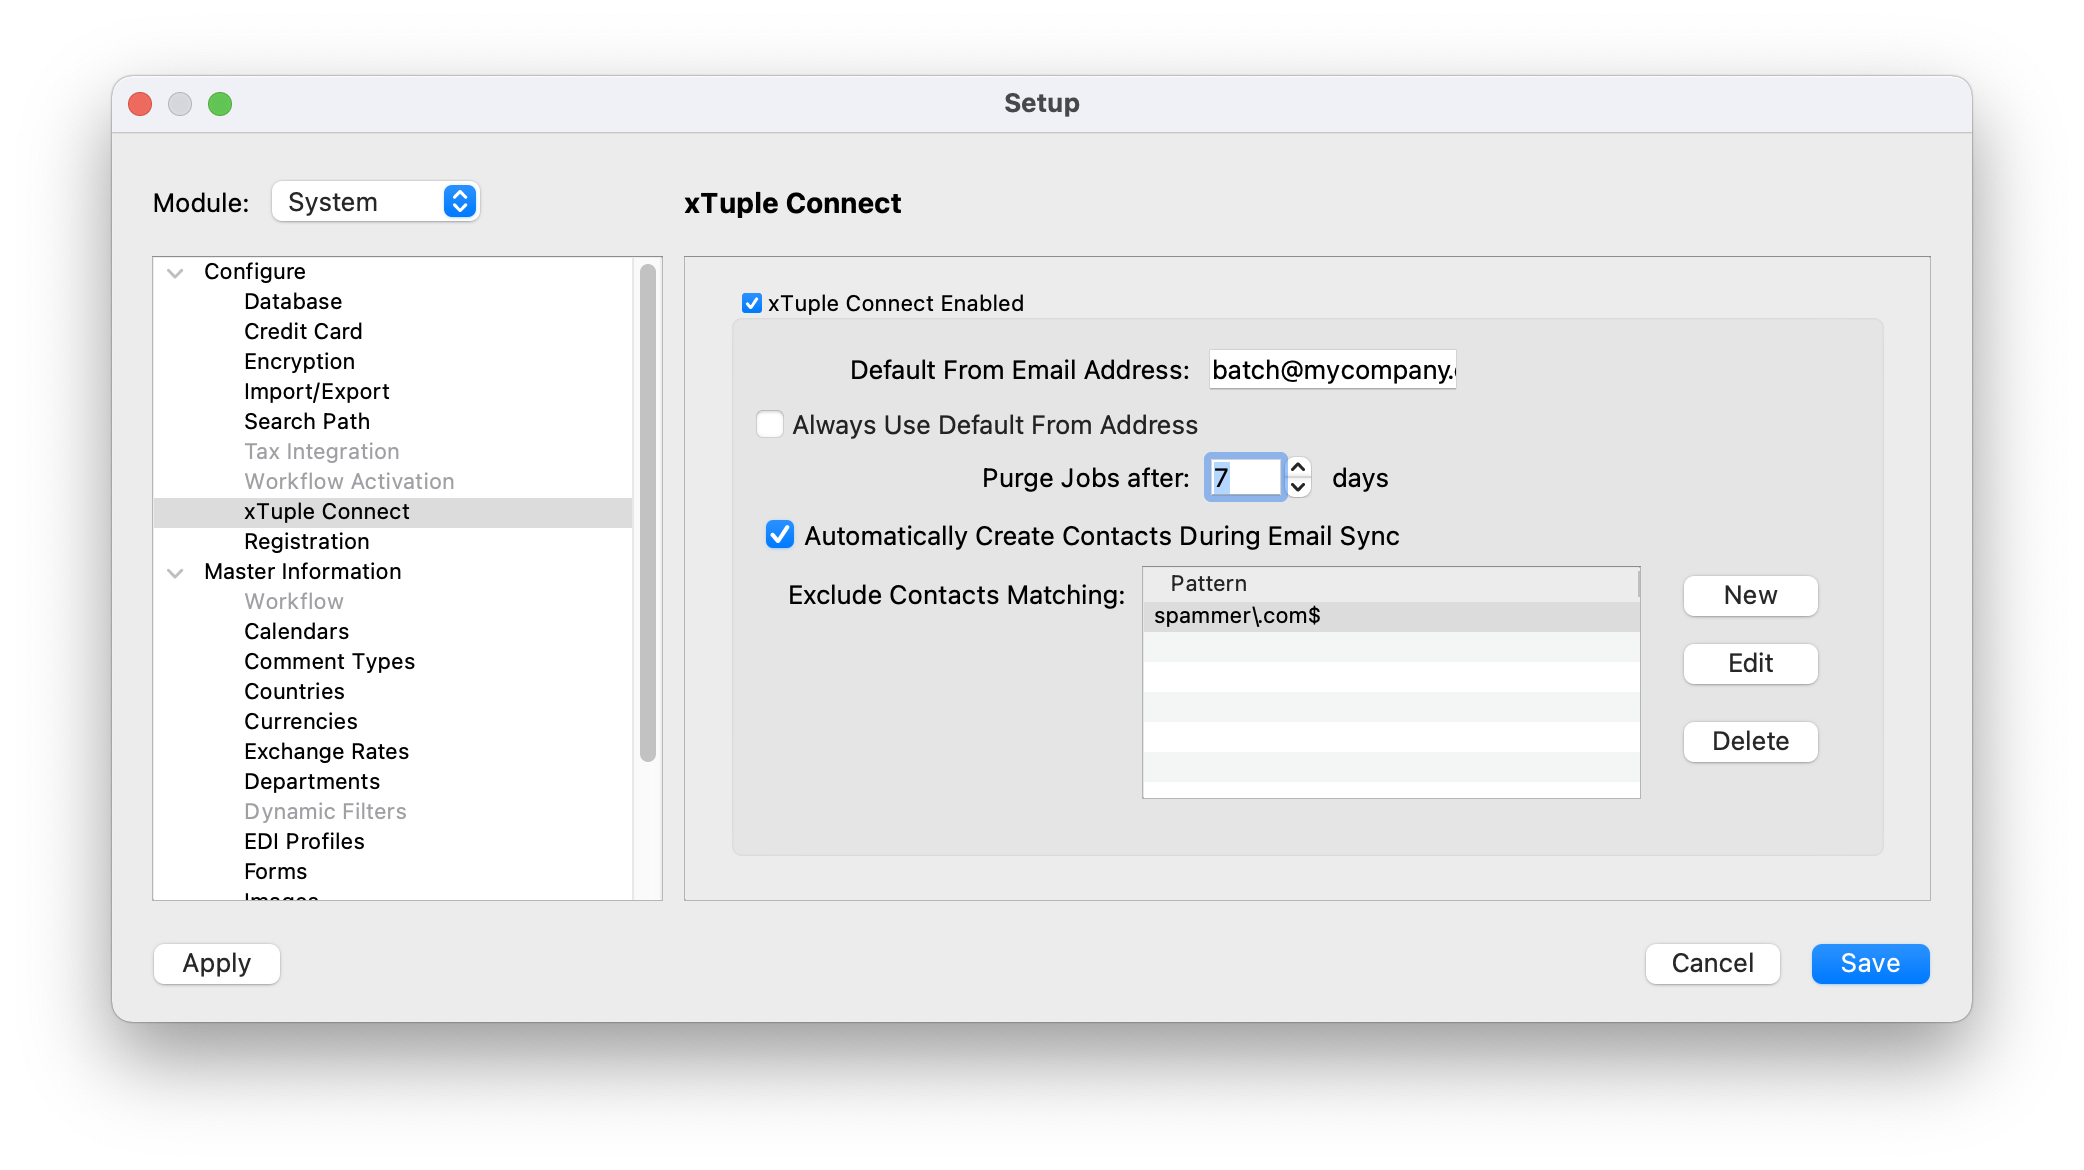
To get started using the xTuple Connect Batch Manager to process xTuple ERP jobs, you will first have to complete some configuration steps within the xTuple ERP client. Using your xTuple ERP client, log in to the database you just applied the xtConnect extension package to. Then follow this path to reach our first configuration screen: and click on "xTuple Connect" in the list on the left side of the window. Once you get there, follow these steps:
Enable the package by selecting the "xTuple Connect Enabled" check box
If the "xTuple Connect Enabled" option is not selected, you will not be able to submit jobs to the xTuple Connect Batch Manager. In fact, none of the xTuple Connect features will be enabled in xTuple ERP until this option is selected.
Assign a default "From Email Address" to an appropriate email address. The xTuple Connect Batch Manager will use this address if a job is submitted by a user with no email address defined in their xTuple ERP user record or a job is submitted without a from email address.
Some scheduled jobs allow setting a "From Email Address" as part of the job. Selecting the "Always Use Default From Address" overrides this per-job setting.
Specify the number of days you want to save completed xTuple Connect Batch Manager jobs before they are automatically deleted
Click the SAVE button
Quit xTuple ERP and restart it. If the Batch Manager is running, quit the Batch Manager and restart it, too.
All the xTuple Connect features—including —will now be visible throughout the xTuple ERP client
The following screen shows the Database Information window with the xTuple Connect information already added:
| |  | |
| Basic xtConnect Package Configuration |  | User Privileges |