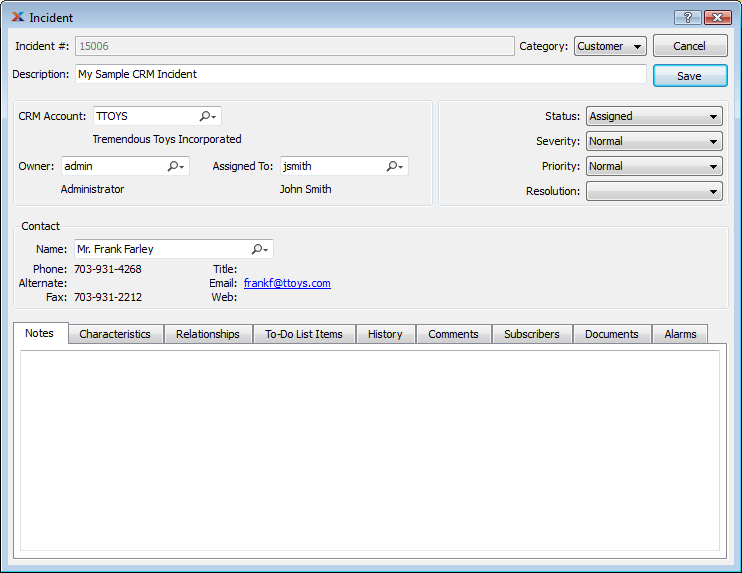
At this point, the configuration steps are all done. Now we can create a simple CRM Incident—and follow it through to email delivery. The Incident screen contains a multitude of fields. For this exercise, we are only going to fill in the minimum necessary—so we can save our example and submit it to the xTuple Connect Batch Manager. To begin, follow these steps:
Follow this path:
Set the "Category" field to "Customer"
Enter some text in the "Description" field
Select a CRM Account in the "CRM Account" field
Caution
Be careful, as you are about to send an email to a Contact related to the CRM Account. For testing purposes, you may want to enter your email address instead of the selected Contact's email address.
In the "Owner" field, enter your user
In the "Assigned To" field, enter another user
Select a Contact using the browse button
Enter some notes in the "Notes" field
Set the "Status" to "New"
Set the "Severity" to "Normal"
Set the "Priority" to "Normal"
Leave "Resolution" blank
The results will look like the following screen:
After you select the SAVE button, you will be presented with the email delivery screen, as shown in the following screenshot:
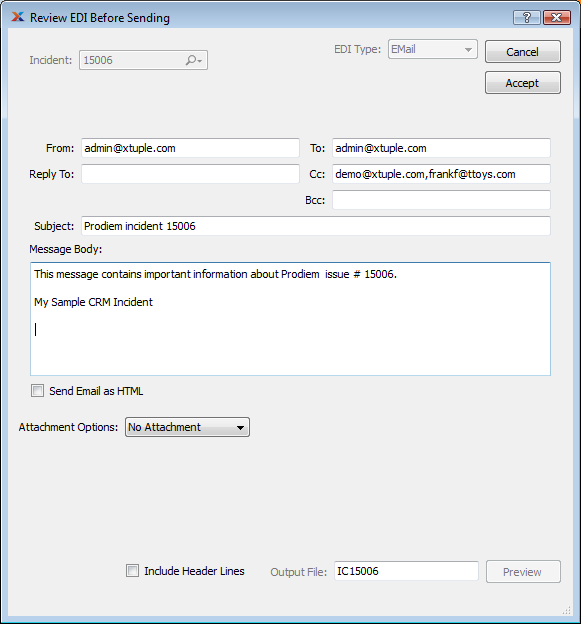
As we saw when we emailed other business documents, the tokens we included have been replaced with their actual values. To send the job to the xTuple Connect Batch Manager, select the ACCEPT button.