
|
OpenRPT Product Guide |
|
|
OpenRPT Product Guide |
| 1.2. Connecting to an xTuple Database | ||
|---|---|---|
 | 1. pgAdmin III |  |
Once you have completed the installation of pgAdmin III, it is time to configure a connection to your xTuple database. To begin, select the option from the pgAdmin III menu. You will be presented with the following screen:
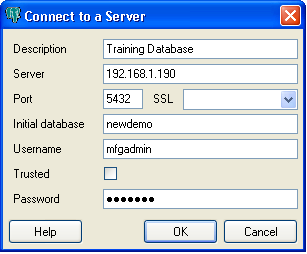
You will need to provide the URL or IP address of your server along with the port on which PostgreSQL is listening. Then, you will identify the name of your xTuple database—as well as the username and password for the user who will be establishing the connection.
Once the server has been added and you have established a connection, the pgAdmin will screen will look as follows:
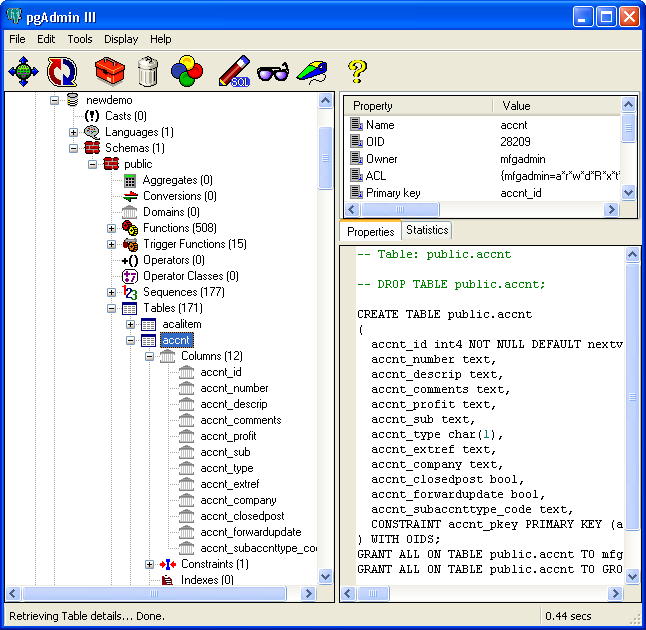
pgAdmin III will add your new connection to its list of servers. In the future, you can simply double-click on the name of a server to initiate a connection.
Using pgAdmin III is helpful when creating OpenRPT reports because it enables you to see all of a database's tables and their corresponding columns. It is also possible to see data—and even maintain data—by drilling down to a specific table, right clicking on it, and selecting the from the resulting menu. The following screenshot illustrates the data view:
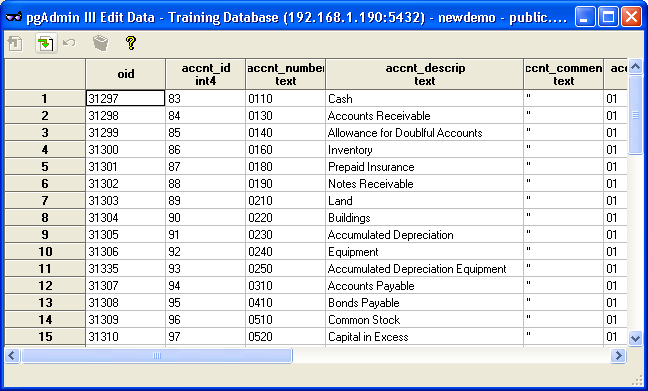
The pgAdmin III utility is a very powerful tool. Be sure to take care when using the option, as it enables you to manually update data in the database.
Also worth noting is pgAdmin's option located under the menu. These help filed provide very detailed descriptions and examples of SQL commands, syntax, and statements.
| |  | |
| 1.1. Where Can I Find pgAdmin III? |  | 2. What is ODBC? |