
|
OpenRPT Product Guide |
|
|
OpenRPT Product Guide |
| 2.3. Defining Parameters and Values | ||
|---|---|---|
 | 2. MetaSQL Editor |  |
Earlier in this chapter we discussed parameters and how they enable reports to respond to dynamic conditions presented by application users. The MetaSQL Editor enables you to simulate these dynamic conditions, by defining parameters and assigning values to them.
Let’s assign a value to the parameter we entered in our MetaSQL example—namely, the parameter item_code. In our example, we are simulating a situation in which an xTuple user inputs an item_code. The item_code, in turn, corresponds to an item_number in the item table.
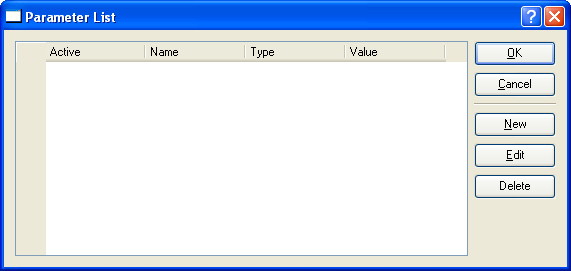
Before we can test our MetaSQL, we must first create the parameter item_code. To create a parameter, we open the option from the menu. The following screen will appear:
Parameters will be saved only for the duration of the current MetaSQL Editor session. Once the MetaSQL Editor is closed, any saved parameters will be erased.
The Parameter List screen displays information on all parameters which have been created for testing purposes, including active status, parameter name, data type, and value.
To create a new parameter, select the button. The following screen will appear:
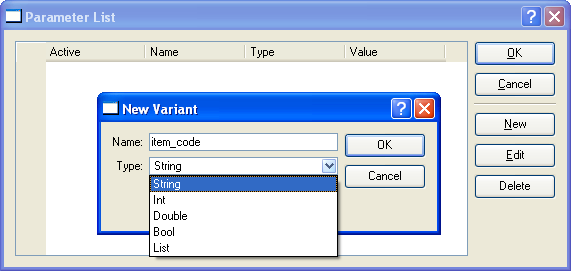
When entering a new parameter, you are presented with the following options:
Enter a name to identify the parameter. The names of parameters should correspond to parameter names referenced in your test queries.
Select the appropriate data type from the list of available data types. Data types are defined on the database—and may vary from column to column. To be successful, your selection must match the data type for the target column in the database. In our example, the target column is item_number. The data type for this column is text in the MetaSQL Editor. The text data type corresponds to the string type.
To the far right of the screen, the following buttons are available:
Select to save the entered values.
Select to cancel the transaction and return to the parameter list.
After we have entered the appropriate values and selected the OK button, the following screen appears:
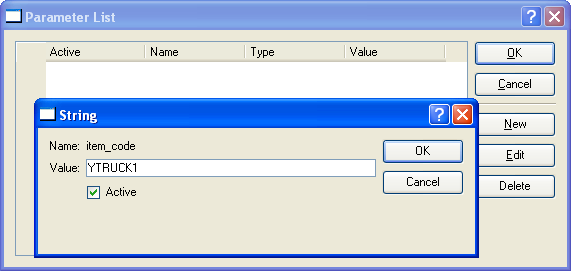
As you can see, we are asked to enter a value for the parameter. In this case, we enter YTRUCK1. This is an item_number from our sample database. By entering that value here, we are linking the parameter item_code to item_number YTRUCK1. Selecting the button saves our information.
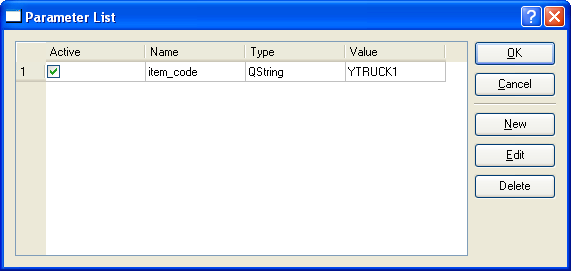
Back on the Parameter List window, we can verify the information has been entered correctly, as shown in the following screen:
Now that we have our sample query and corresponding parameter, we are ready to begin our testing.
| |  | |
| 2.2. Entering a Query |  | 2.4. Parsing and Executing a Query |