
|
xTuple for Service Businesses Demo Guide |
|
|
xTuple for Service Businesses Demo Guide |
| 4. Clocking Time on Work Orders | ||
|---|---|---|
 | Chapter 2. Labor and Overhead Tracking |  |
In our previous examples, we have used default settings when posting operations. However, it is always possible to override the defaults. In fact, if you clock into and out of work orders using the Shop Floor workbench, you can capture the exact time spent on operations.
We will cover how to use the Shop Floor workbench in this section. However, before we begin, you'll need to meet the following two conditions:
Create a new work order for 100 units of YTRUCK1.
Release the work order, changing the status from "E" to "R".
The Shop Floor workbench requires work orders to be released.
There are several ways to release work orders. From the Work Order Schedule screen you can right-click on the order to release it. You can also follow this path: .
Once you have met the above requirements, you are ready to start using the Shop Floor workbench. To begin using the Shop Floor workbench, follow these steps:
Pull down the module menu.
Select the submenu.
Choose the option.
The following screen will appear:
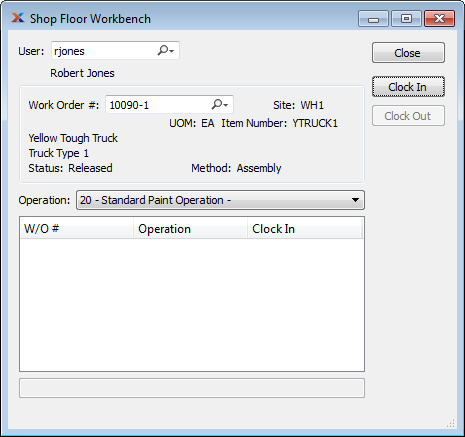
From this screen, users can clock-in to specific work order operations. As soon as users clock-in, their time spent on the operation is being recorded. The elapsed time stops once they clock-out. To clock-in to a work order operation, follow these steps:
Enter your username.
Select the work order you created.
If you do not see the work order, make sure it has been released.
Pick the operation you want to clock-in to.
In our example, we have chosen the paint operation.
Select the button.
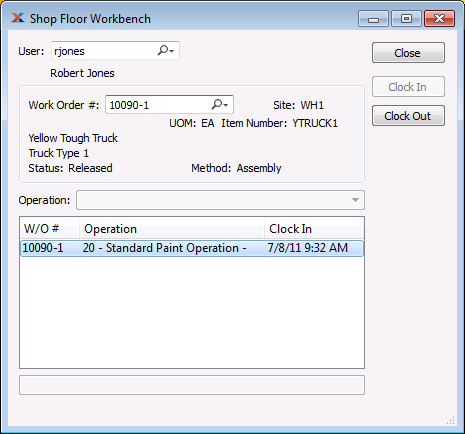
You are now clocked-in to an operation on your work order. To clock-out of the work order, follow the same steps as when clocking-in. Since you may be clocked-in to more than one operation at a time, be sure to highlight the operation you want to clock out of.
When you are ready to clock-out, select the button. The act of clocking out will cause the Post Operations screen to appear. This is the same screen we saw earlier. However, the main difference now is that the exact time spent on the operation is pre-filled into the specified run time field:
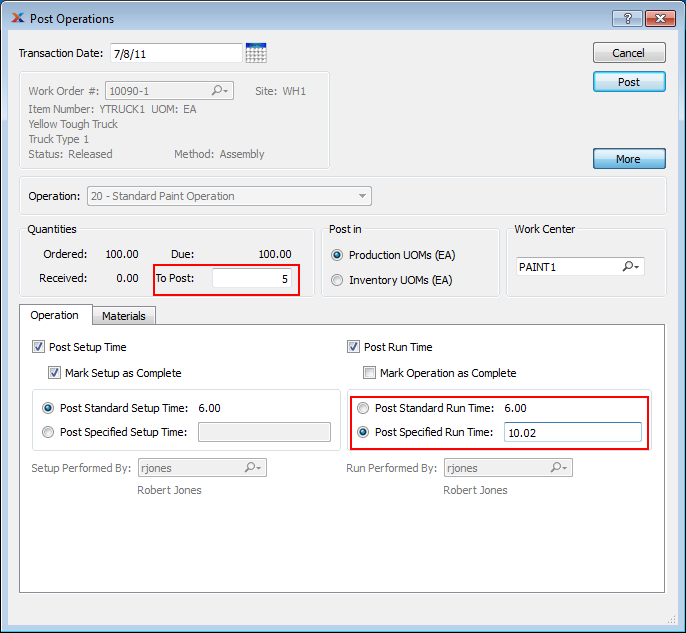
Since we did not spend long clocked-in to this work order operation, let's adjust the quantity we are posting. As you can see in the screenshot, we have entered a quantity to post of 5. The run time showed in the example equates to the amount of time between when we clocked in and when we clocked out. When you are done, select the button and handle any inventory distributions as before.
Remember to use the button on the Post Operations screen to show or hide details.
Reporting is available to show you who is clocked-in to a work order—and for how long. To see the time clock reporting, follow these steps:
Pull down the module menu.
Select the submenu.
Select the submenu.
Choose the option.
Locate the work order you clocked in to.
Hit the button.
The following screen will appear:

The same type of reporting is also available by user, if you ever need to track the work of individual employees.
| |  | |
| 3.4. General Ledger |  | Chapter 3. Master Scheduling |